


 How to edit photos and videos
Here, we introduce how to edit photos and videos taken with DJI drone.
Show
Enjoy photos and videos taken with DJI drone / How to use DJI Mimo function
page for more information on Enjoy photos and videos taken with DJI drone.
このページを日本語で見る
Table of contents
About output video quality and size
- The output video edited with the DJI Fly app will be in 1080p or 720p, Level 4.0 high profile “.MOV” format regardless of the source.
- If you edit the file “downloaded” to your smartphone, the output video bitrate will be approximately 17Mbps. And edit a file that has not been “downloaded”, bitrate will be approximately 11Mbps. Files that have not been “downloaded” will have reduced image quality and skipped frames.
- The file size of the output video edited with the DJI Fly app is reduced to about 80% to half of the original video due to the reduced resolution and bit rate.
Simple editing using templates
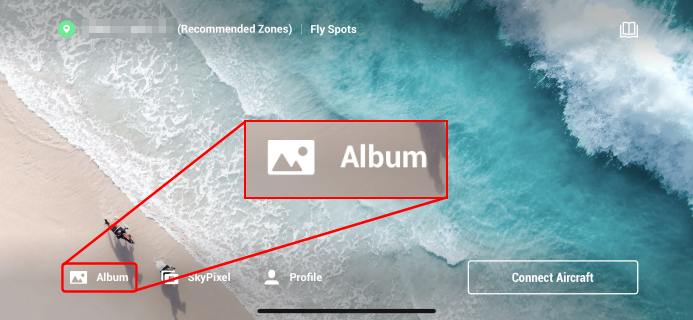 Open "Album" menu from home screen of DJI Fly app.
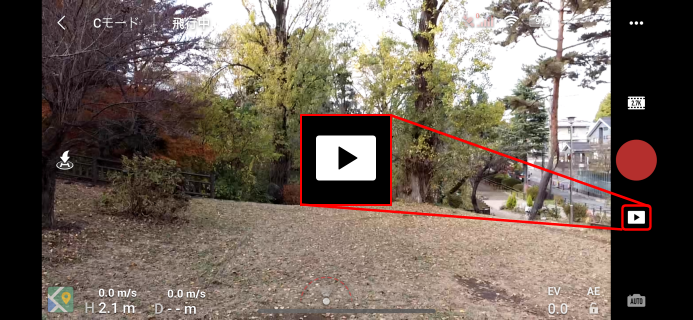 Or open playback screen from camera view screen while operating DJI drone.
This cannot be used unless DJI drone and controller are running and connected to a smartphone.
Or open playback screen from camera view screen while operating DJI drone.
This cannot be used unless DJI drone and controller are running and connected to a smartphone.
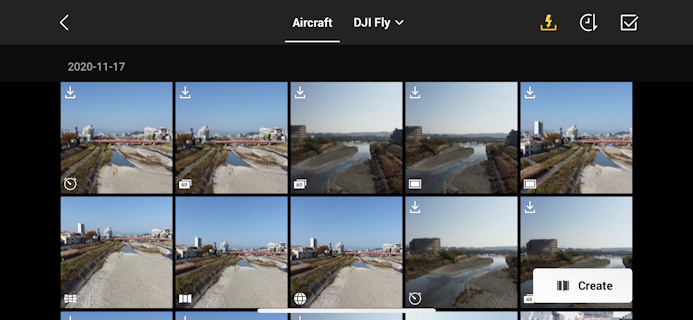 Then a list of media will be displayed.
 Tap
Tap
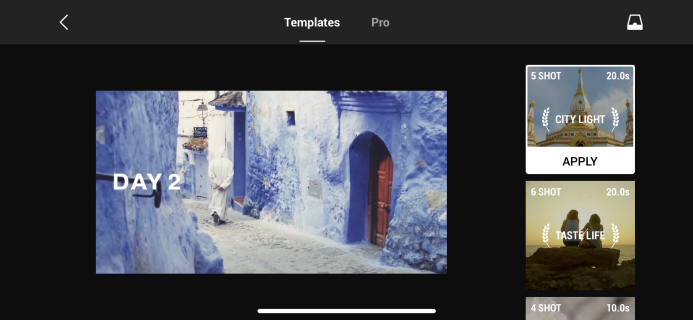
If you select "Template" from the menu above, you can easily edit using a template prepared in advance. If you choose "Pro", you can freely select videos and music for more elaborate editing. See Edit photos and videos for “Pro” edit method.
On the right side of the screen, more than 20 templates are arranged vertically. Tap to display an example on the left side of the screen.
Each template shows the number of videos require (SHOT) and the maximum total time.
 When you select a template and tap “Apply”, a screen like this will appear.
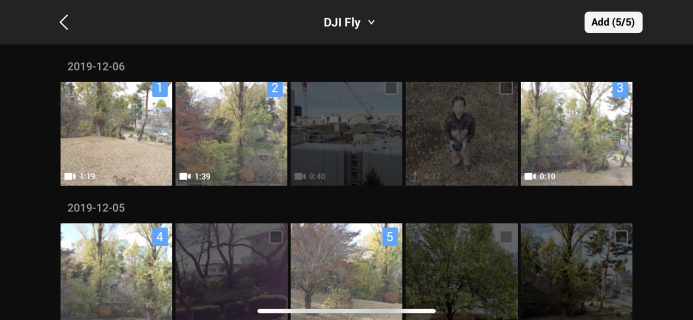
Select the video you want to use and tap “Add” in the upper right.
Videos are used in the order you tap them.
When you select a template and tap “Apply”, a screen like this will appear.
Select the video you want to use and tap “Add” in the upper right.
Videos are used in the order you tap them.
 Then, a short movie with BGM and subtitles is automatically created like this.
Tap
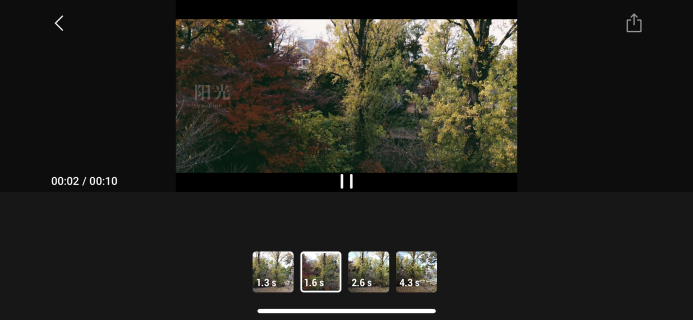
 On the screen above, tap the video icon below to get a screen like this.
Drag the video left or right to change the range to use.
Tap “Retake” to select a video from the list again.
On the screen above, tap the video icon below to get a screen like this.
Drag the video left or right to change the range to use.
Tap “Retake” to select a video from the list again.
 An “Import” album is created in the
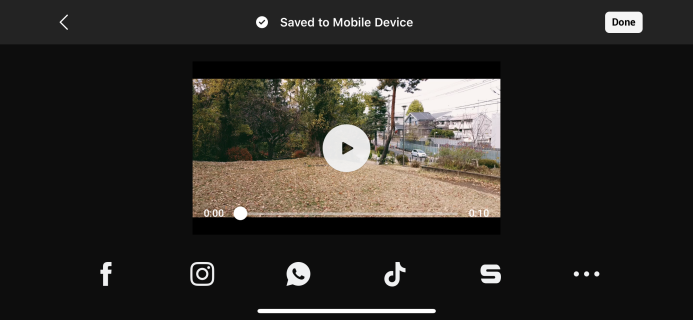
And the screen looks like this. Post photos and videos to SNS, or send them to family or friends via email or messages.
Tap
Tap
Tap
SkyPixel
 When you tap
 Edit photos and videos
 When you tap “Pro” menu or
Tap
Tap
Tap
Tap
When editing is complete, tap
An “Import” album is created in the
And the screen looks like this. Post photos and videos to SNS, or send them to family or friends via email or messages.
Tap
Tap
Tap
SkyPixel
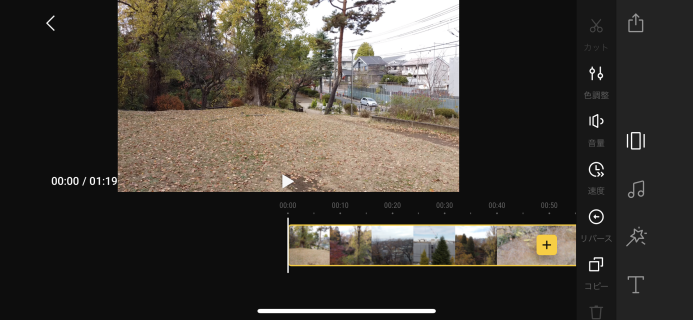
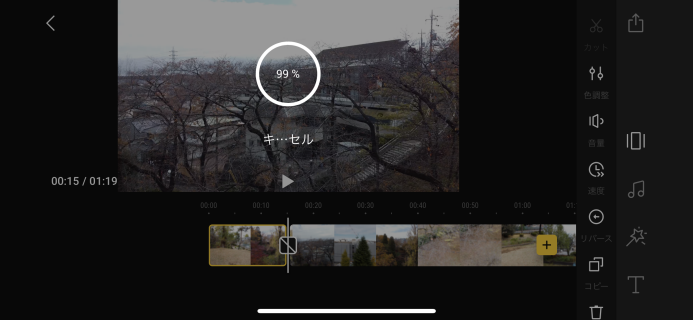
 Edit video track
 When you tap
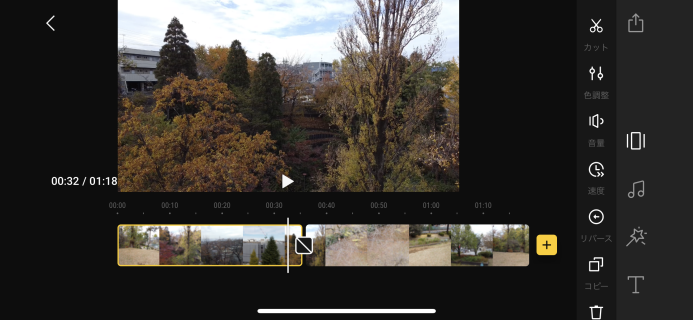
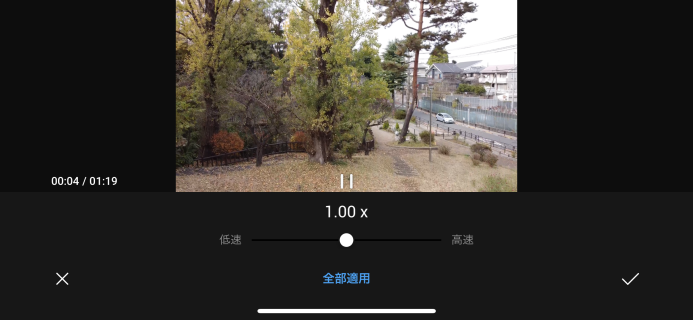
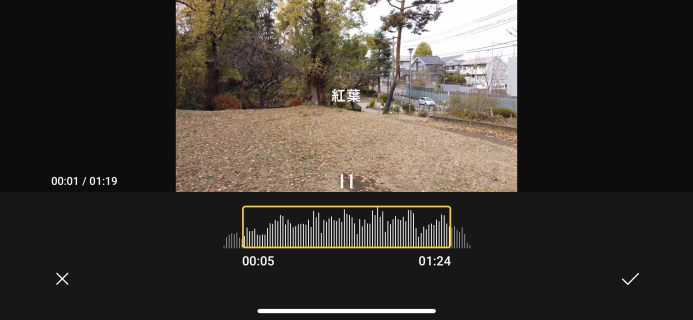
Drag the video timeline at the bottom of the screen left and right and tap
After tapping the cut video timeline, you can change the length of the timeline by dragging both ends of the timeline left or right.
Tap the cut video timeline and tap
Tap
Tap
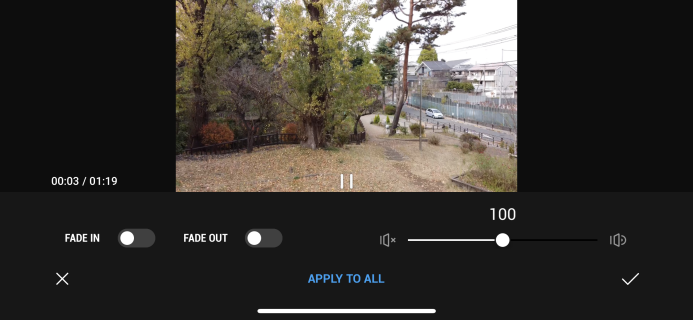
 When you tap
After selecting an effect, tap the check mark in the lower right to apply it.
 When you tap
 When you tap
 Tap
Tap
 Tap
Tap
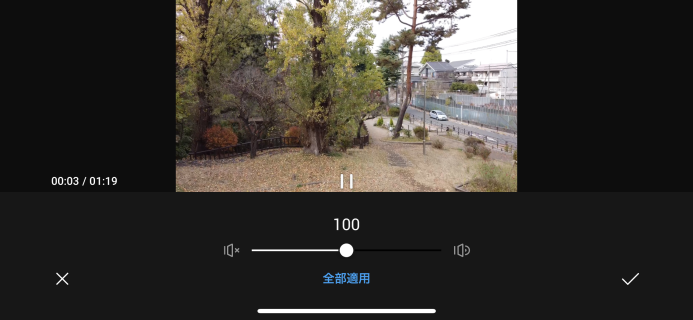
 Edit audio track
 When you tap
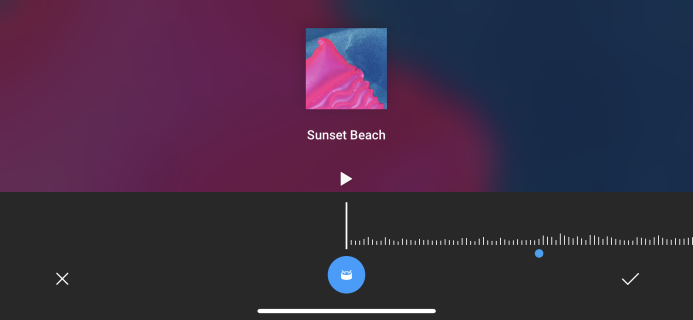
Tap
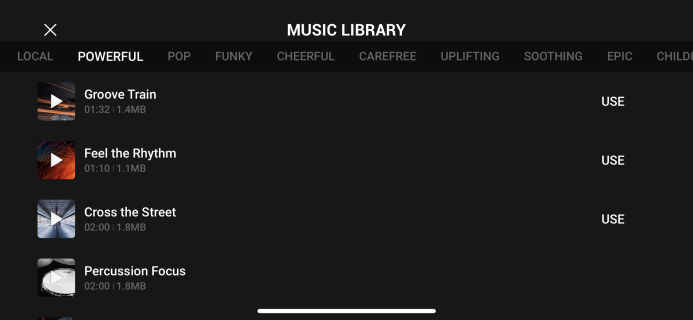 The music library opens. You can select music from the BGM collection built into the DJI Fly app.
Tap the category menu at the top of the screen to choose from a number of categorized music.
The music library opens. You can select music from the BGM collection built into the DJI Fly app.
Tap the category menu at the top of the screen to choose from a number of categorized music.
If you tap the “Local” menu, you can use the downloaded music in
Please note that publishing videos on YouTube e.t.c. using copyright-protected music such as commercial music will violate copyright law.
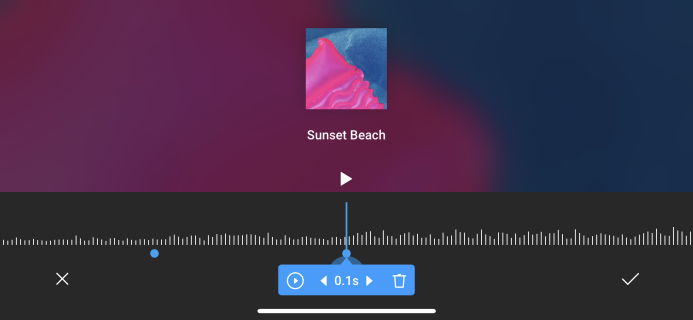
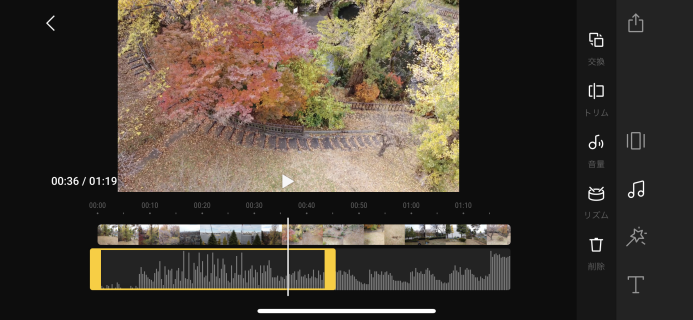 When music is added, the screen looks like this.
You can edit the added audio track.
When music is added, the screen looks like this.
You can edit the added audio track.
After tapping an audio track, you can change the length of the music by dragging both ends left or right.
You can add additional music by tapping on an empty area of the audio track.
Tap
Tap
 When you tap
 When you tap
 When you tap
Rhythm point is a mark to remember the change point of music when you want to edit video according to music.
Note: Rhythm points are set for each music. If you use the music for another video, the previously set rhythm point is applied.
 When you tap a preset rhythm point, the screen looks like this.
Tap
Tap
Tap
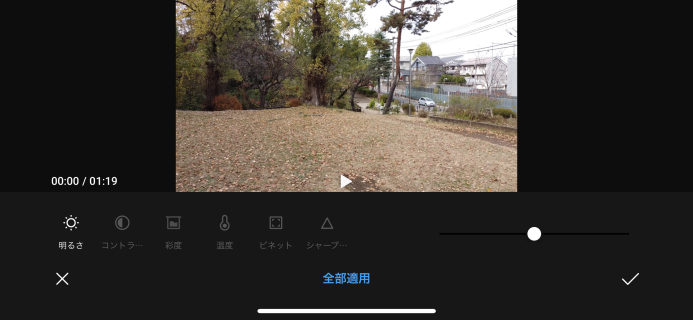
 Apply a filter
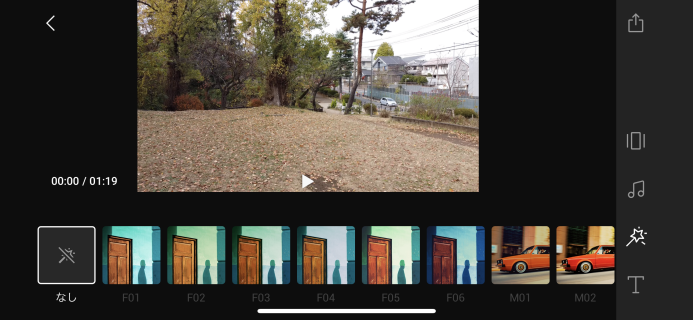 When you tap
 Add title or sticker
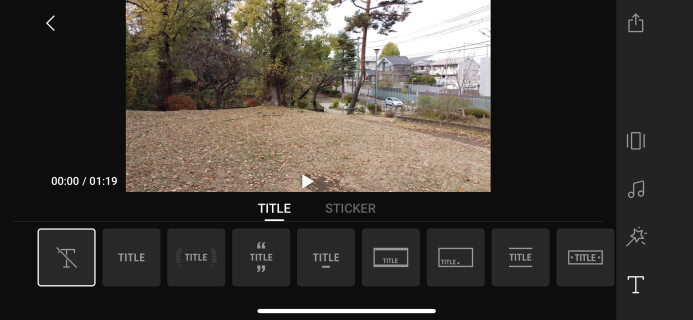 When you tap
Select “Title” menu and select the title design from the list below.
If you want to delete the title, tap the leftmost icon.
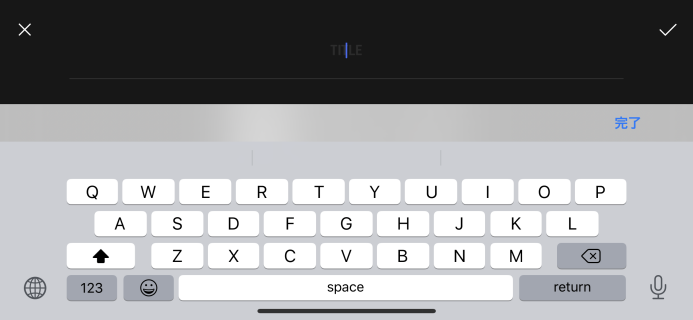 The icon for the selected title changes to
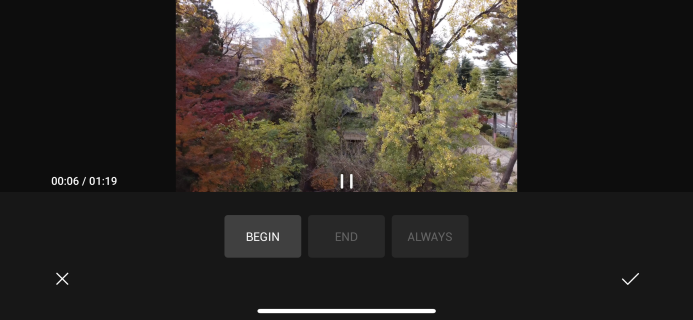
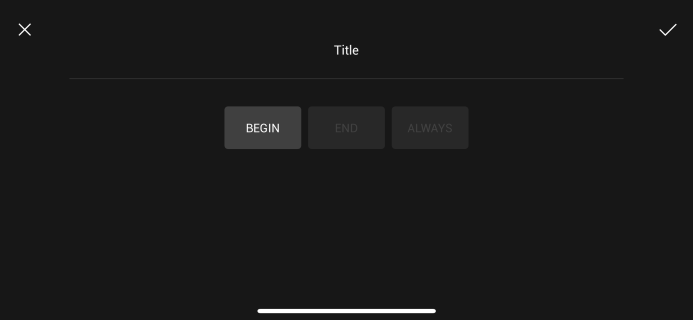 Then this screen will appear.
Select the position to insert the title from “Begin (start of video)”, “End (end of video)” or “Always (always display)” and tap the check mark to apply.
Then this screen will appear.
Select the position to insert the title from “Begin (start of video)”, “End (end of video)” or “Always (always display)” and tap the check mark to apply.
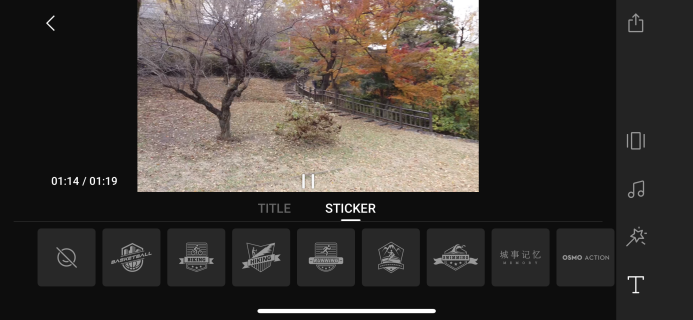 When “Sticker” menu is selected, the screen looks like this.
Select the sticker you want to add from the list below.
When “Sticker” menu is selected, the screen looks like this.
Select the sticker you want to add from the list below.
If you want to delete the sticker, tap the leftmost icon.
 The icon of the selected sticker changes to