


 How to set or change Splash Screen / Background Image / Model Image
This section describes how to set or change Splash Screen / Background Image / Model Image of OpenTX / EdgeTX radio.
このページを日本語で見る
Table of contents
Radio screen resolution and configurable images
There are following types of screen resolutions for OpenTX / EdgeTX radio, and the images that can be set are determined for each resolution.| Radio screen resolution | Splash Screen | Background Image | Model Image | Compatible models (example) |
|---|---|---|---|---|
| 480x272 Color | ○ | ○ | ○ | TX16s, T16, Horus x10s,Horus x12s, Most color screen radios... |
| 480x320 Color | ○ | ○ | ○ | Flysky PL18 |
| 320x480 Color | ○ | ○ | ○ | Flysky NV14, EL18 |
| 128x64 BW | ○ | × | × | Zorro, T-Pro, T12, T-Lite, QX7, X9 Lite, X-Lite, X-Lite Pro, など |
| 212x64 BW | ○ | × | ○ | X9D, X9D Plus, X9D Plus 2019, e.t.c. |
- Splash Screen is the screen that is displayed when the radio turned on. Display time of this screen can be specified in "Splash Screen" field of RADIO SETUP screen .
- Background Image is displayed in the background of main screen of color display model.
- Model Image is displayed as an image of the selected aircraft on main screen and MODELSEL screen .
Pay attention to the copyright of the images used
When using images created or taken by others, such as those obtained from the Internet, for the Splash Screen, Background Image, and Model Image, please be careful about the copyright. It is a crime of violating the copyright law if you divert an image owned by another person and publish or distribute it. In particular, many images from movies, manga, anime, and television, and Landscape photography, posters, portraits are copyrighted. Please be careful when publishing or distributing.
When using images created or taken by others, such as those obtained from the Internet, for the Splash Screen, Background Image, and Model Image, please be careful about the copyright. It is a crime of violating the copyright law if you divert an image owned by another person and publish or distribute it. In particular, many images from movies, manga, anime, and television, and Landscape photography, posters, portraits are copyrighted. Please be careful when publishing or distributing.
How to change Splash Screen
Prepare image file you want to use for Splash Screen according to the specifications in the table below.| Radio screen resolution | Image size | Number of colors | Format | Storage folder |
|---|---|---|---|---|
| 480x272 | 480x272 | Color(24bit) | PNG | /IMAGES/splash.png |
| 480x320 | 480x320 | Color(24bit) | PNG | /IMAGES/splash.png |
| 320x480 | 320x480 | Color(24bit) | PNG | /IMAGES/splash.png |
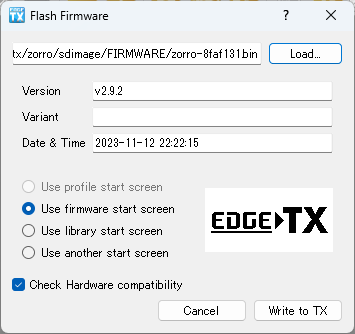
| 128x64 | 128x64 | BW 2 gradation(1bit) | BMP | Set when updating firmware |
| 212x64 | 212x64 | BW 16 gradation(4bit) | BMP | Set when updating firmware |
For color models
The Splash Screen changes just by saving the image as "splash.png" in "Storage folder" written in the table above on microSD card. Before writing a new image file to a microSD card, it is recommended to rename it to something like "splash_backup.png" to save the original image.
How to access radio microSD card directly from your PC
For monochrome model
How to update radio firmware
How to change Background Image
Prepare image file you want to use for Background Image according to the specifications in the table below.| Radio screen resolution | Image size | Number of colors | Format | Storage folder |
|---|---|---|---|---|
| 480x272 | 480x272 | Color(24bit) | PNG |
/THEMES/DEFAULT/background.png (OpenTX)
/THEMES/EdgeTX/background.png (EdgeTX) |
| 480x320 | 480x320 | Color(24bit) | PNG |
/THEMES/DEFAULT/background.png (OpenTX)
/THEMES/EdgeTX/background.png (EdgeTX) |
| 320x480 | 320x480 | Color(24bit) | PNG |
/THEMES/DEFAULT/background.png (OpenTX)
/THEMES/EdgeTX/background.png (EdgeTX) |
In addition, you can set one background image for each theme . The background image used will change according to the theme assigned to the model. So you need to change "/DEFAULT" or "/EdgeTX" parts of the storage folder according to theme you are currently selecting.
How to access radio microSD card directly from your PC
How to change radio screen design / How to use Screens Settings menu
How to change Model Image
Prepare image file you want to use for Model Image according to the specifications in the table below.| Radio screen resolution | Image size | Number of colors | Format | Storage folder |
|---|---|---|---|---|
| 480x272 | 192x114 | Color(24bit) | PNG | /IMAGES/xxxxxxxxx.png |
| 480x320 | 192x114 | Color(24bit) | PNG | /IMAGES/xxxxxxxxx.png |
| 320x480 | 192x114 | Color(24bit) | PNG | /IMAGES/xxxxxxxxx.png |
| 212x64 | 64x32 | BW 16 gradation(4bit) | BMP | /BMP/xxxxxx.bmp |
How to access radio microSD card directly from your PC
 To set the model image, select the MODEL you want to assign on
MODELSEL screen
, open
MODEL SETUP screen
, and press and hold the [ENTER] key in the "Model image" field.
To set the model image, select the MODEL you want to assign on
MODELSEL screen
, open
MODEL SETUP screen
, and press and hold the [ENTER] key in the "Model image" field.
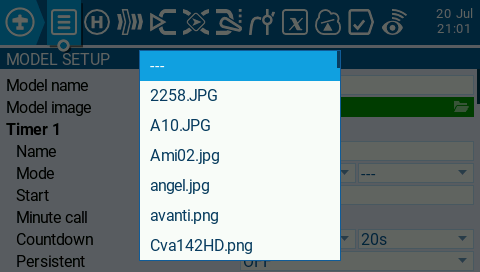 Then, a list of files stored in "/IMAGES" folder of the microSD card will be displayed.
Select file name you want to assign to the MODEL.
Then, a list of files stored in "/IMAGES" folder of the microSD card will be displayed.
Select file name you want to assign to the MODEL.
How to access radio microSD card directly from your PC
There are two ways to save data to the radio's microSD card: remove the microSD card from the radio and access it with a computer, or connect computer and radio with a USB cable to access it.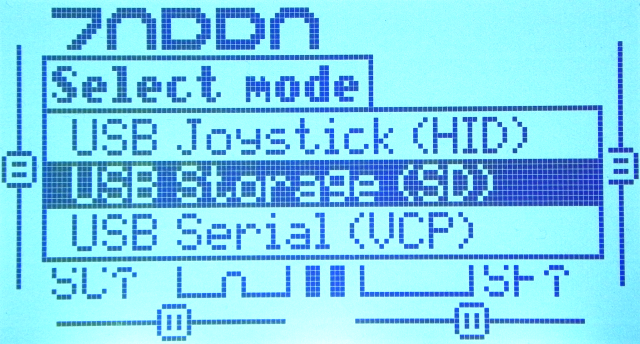 When you turn on the radio and connect it to your PC with USB cable, a menu like this will be displayed.
Select "USB Storage(SD)" to access the microSD card installed in the radio.
When you turn on the radio and connect it to your PC with USB cable, a menu like this will be displayed.
Select "USB Storage(SD)" to access the microSD card installed in the radio.
There are two types of USB cables: "For data communication" where all terminals are connected, and "For charging" where only power supply terminals are connected. You need to use "For data communication" to communicate with PC. Please note that some cables attached to bonus of mobile phone or charger, battery are "For charging".
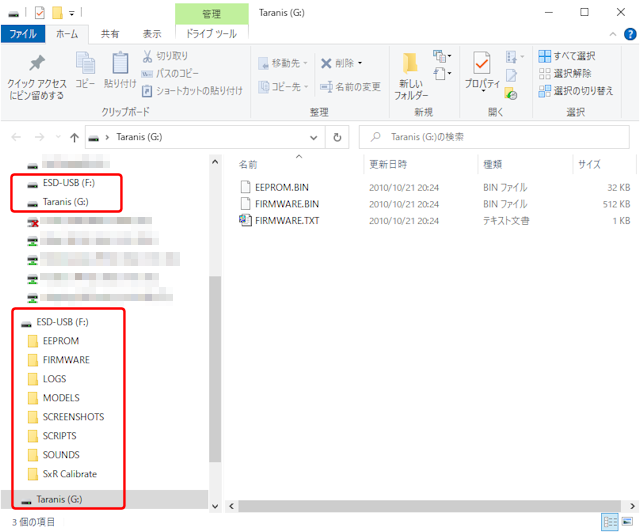 Then, after waiting for a while (about 20-30 seconds), two drives, "ESD-USB" or "USB drive", and "Taranis" or "(your radio name)" will be mounted in Explorer on your computer.
(For EdgeTX, only "USB drive")
The drive called "ESD-USB" or "USB drive" is microSD card installed in radio. From here you can save, delete, rename the file and more.
 When radio is connected to PC in DFU/Bootloader Mode, memory of the radio is visible as a USB memory.
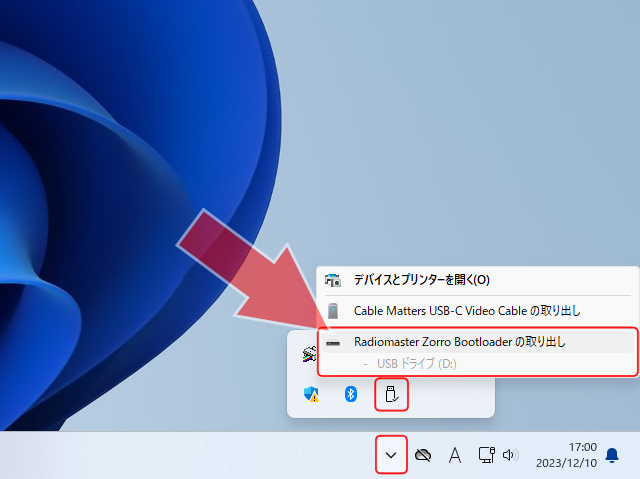
When removing radio from PC, perform "Eject" operation of two drives, "ESD-USB" or "USB drive", and "Taranis" or "(your radio name)", and then remove it, in the same way as when removing USB memory.
When radio is connected to PC in DFU/Bootloader Mode, memory of the radio is visible as a USB memory.
When removing radio from PC, perform "Eject" operation of two drives, "ESD-USB" or "USB drive", and "Taranis" or "(your radio name)", and then remove it, in the same way as when removing USB memory.
Related web sites
Guide: Splash screen, background and model images in OpenTX radio (multirotorguide)
Custom Splash Screen, Background and Model Images for T16 / TX16S / T18 (oscarliang)
Power On Splash Screen Image Change (rcdiy)
Creating A Model Image (OpenTX University)