


 How to install EdgeTX on the radio
Here, we will show you how to install EdgeTX on a radio running OpenTX.
このページを日本語で見る
Table of contents
Confirmation of compatible radio

Check Supported Radios (EdgeTX)
Check the installation procedure
There are several ways to install EdgeTX on your radio. The following pages are available on GitHub's EdgeTX official site. (The same procedure is explained on the second and fourth pages.)- 5 ways to flash EdgeTX for the hardcore
- EdgeTX Installation Guide
- EdgeTX Installation with OpenTX Companion
- EdgeTX Installation with the Bootloader
- EdgeTX Installation with the EdgeTX Flasher
You can also write OpenTX back to a radio running EdgeTX using the same procedure.
Other installation methods
EdgeTX buddy , which allows you to install EdgeTX on the radio with just a web browser, or EdgeTX flasher , a tool specialized for installation, has also been developed, but it is currently at the prototype level.
Back up OpenTX firmware and various setting information
In case of installation failure, first back up OpenTX firmware and various setting information currently stored in the radio. For the backup procedure, see "Back up MODELs and various settings (EEPROM) in radio" chapter on " OpenTX/EdgeTX radio initial setup procedure " page and "Access to radio: backup Flash memory and EEPROM" chapter on " How to install OpenTX Companion " page. Then, copy the contents of the SD card to your PC, etc., or take it out from the radio and storage it.
OpenTX/EdgeTX radio initial setup procedure
How to install OpenTX Companion
Preparation of microSD card
OpenTX/EdgeTX radio uses a microSD card as a data storage area (compatible with SDHC standard). Image / audio data, Lua scripts, backups of radio and drone settings (MODEL information) are saved. See below for how to prepare the microSD card.Download EdgeTX firmware
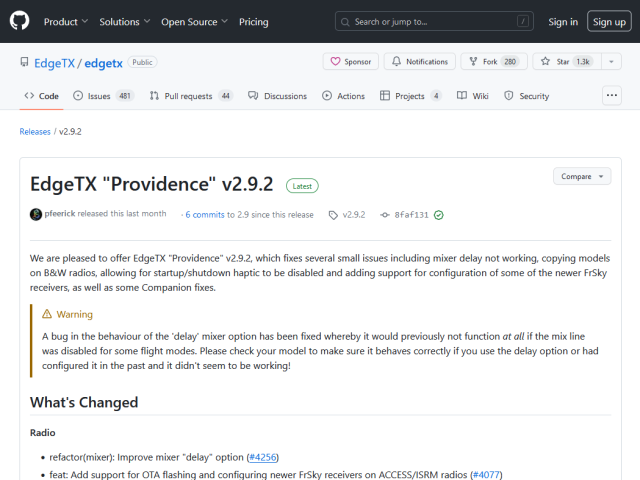 Open
EdgeTX Firmware Release page
on GitHub or
EdgeTX Latest Firmware Release page
and select the version you want to install.
Open
EdgeTX Firmware Release page
on GitHub or
EdgeTX Latest Firmware Release page
and select the version you want to install.
There is also a version called Nightly, but since this is a Nightly build, a so-called beta version, it may be unstable or contain bugs. This version is for developers, so please do not use it for general users.
There is also a version with "-RC1" or "-RC2" .e.t.c. added to the end of the version name, which is the Release Candidate version. As with Nightly, it may contain bugs, so general users should avoid using it as much as possible.
EdgeTX Firmware Release page (GitHub)
EdgeTX Latest Firmware Release page (GitHub)
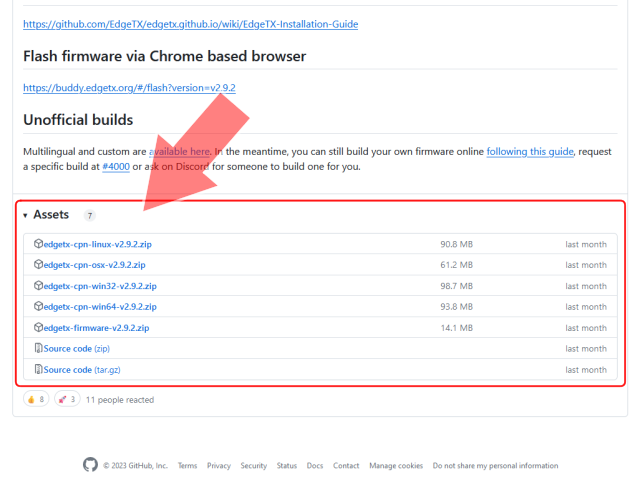 If you scroll the release page screen and click the part written as "Assets", you will see a list of links to companion software for each OS of your computer and firmware binary files.
When installing using radio, use binary files.
Download the Zip file named "edgetx-firmware-v [version number] .zip".
If you scroll the release page screen and click the part written as "Assets", you will see a list of links to companion software for each OS of your computer and firmware binary files.
When installing using radio, use binary files.
Download the Zip file named "edgetx-firmware-v [version number] .zip".
Right-click on the link and download it to your computer. Unzip this in any folder.
Also, download the companion software here. Download the Zip file named "edgetx-cpn- [OS name] -v [version number] .zip".
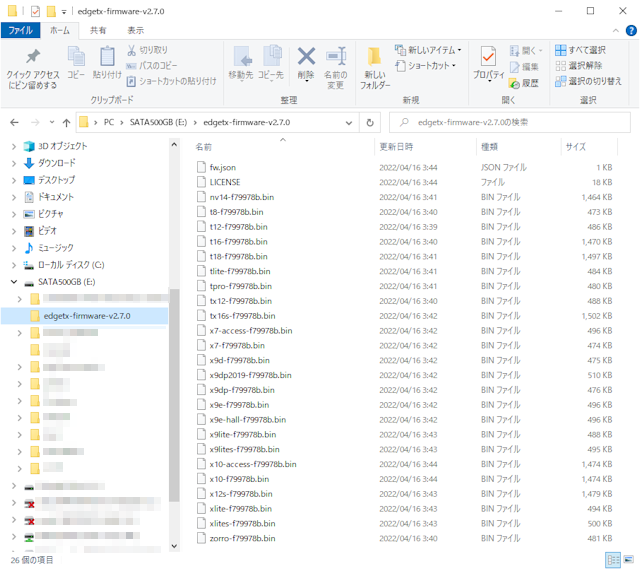 If you unzip the binary file Zip file, you will get files shown in this figure.
These are files for each radio model.
Select the file that fits your radio.
If you unzip the binary file Zip file, you will get files shown in this figure.
These are files for each radio model.
Select the file that fits your radio.
If you don't know which file to select, open "fw.json" stored in the same folder with a text editor. You can see a list of model name and file name prefixes.
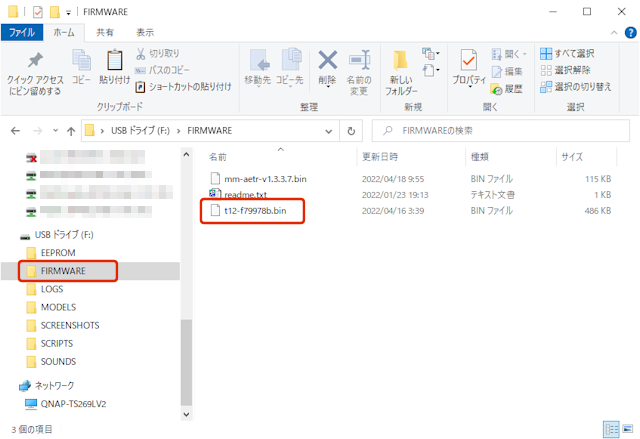 Store selected binary file in "FIRMWARE" folder of microSD card used for radio.
If the file name is too long, radio will not be recognized, so change it to a shorter name (up to 28 characters + ".bin") if necessary.
Then insert this microSD card into radio.
Store selected binary file in "FIRMWARE" folder of microSD card used for radio.
If the file name is too long, radio will not be recognized, so change it to a shorter name (up to 28 characters + ".bin") if necessary.
Then insert this microSD card into radio.
It may be good to take this opportunity to upgrade built-in multi-protocol module at the same time. In that case, the firmware for multi-protocol module is also stored in "FIRMWARE" folder. For how to upgrade the built-in multi-protocol module, see How to update radio firmware .
How to update radio firmware
Turn on the radio
 Make sure the radio battery is fully charged.
If power is lost during a firmware update, it may never boot again.
Make sure the radio battery is fully charged.
If power is lost during a firmware update, it may never boot again.
Insert microSD card containing EdgeTX firmware into radio and turn on as usual. Audio file has changed to that of EdgeTX, so radio says "Welcome to EdgeTX".
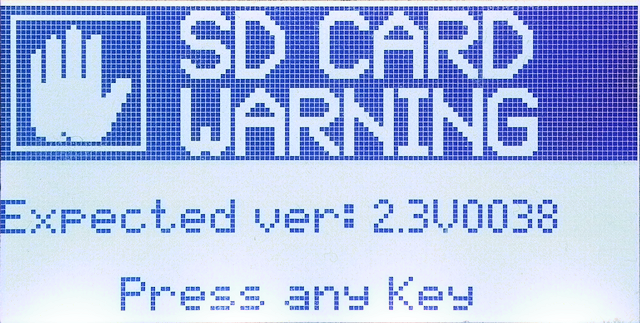 Also, since version file stored in SD card has been changed to that of EdgeTX, "SD CARD WARNING" as shown in this figure is displayed.
Clicking any button will ignore this warning and switch to the usual OpenTX startup screen.
Also, since version file stored in SD card has been changed to that of EdgeTX, "SD CARD WARNING" as shown in this figure is displayed.
Clicking any button will ignore this warning and switch to the usual OpenTX startup screen.
Installation of EdgeTX boot loader
First of all, install the boot loader.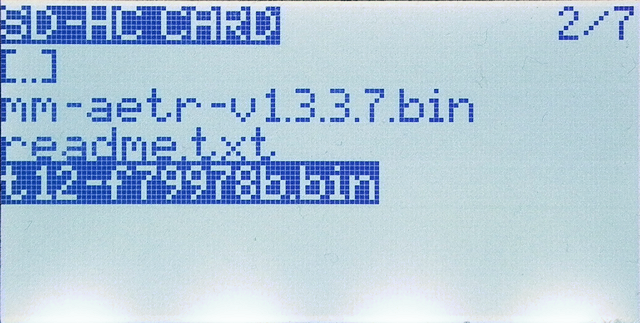 Open "SD-HC CARD" or "SD CARD" screen of "RADIO (SYSTEM) menu" in OpenTX and move to "FIRMWARE" folder.
Then select EdgeTX firmware binary file and press and hold [ENTER] key.
Open "SD-HC CARD" or "SD CARD" screen of "RADIO (SYSTEM) menu" in OpenTX and move to "FIRMWARE" folder.
Then select EdgeTX firmware binary file and press and hold [ENTER] key.
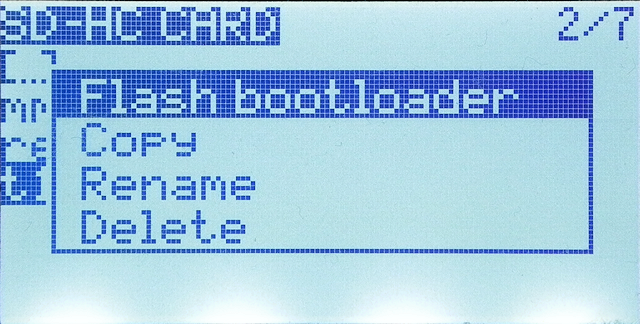 Then a menu like this will be displayed.
Select "Flash boot loader".
Update will be completed in an instant.
Then a menu like this will be displayed.
Select "Flash boot loader".
Update will be completed in an instant.
 You can check the bootloader version on DFU / Bootloader Mode screen (described later).
Installation of EdgeTX firmware
Then install EdgeTX firmware.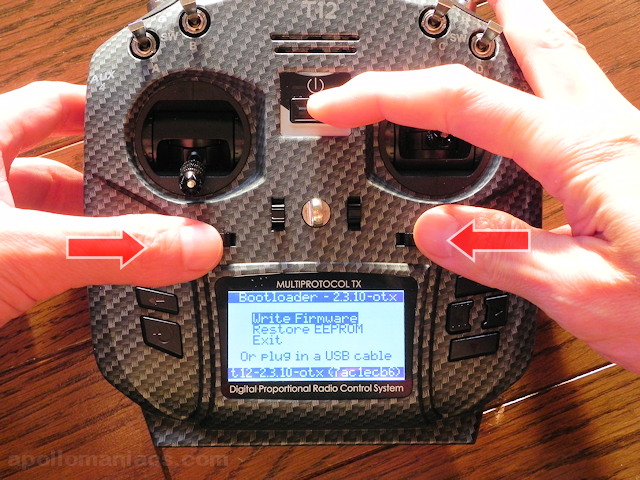 Boot the radio in DFU/Bootloader Mode.
Hold down left and right horizontal trim buttons inward and press power button.
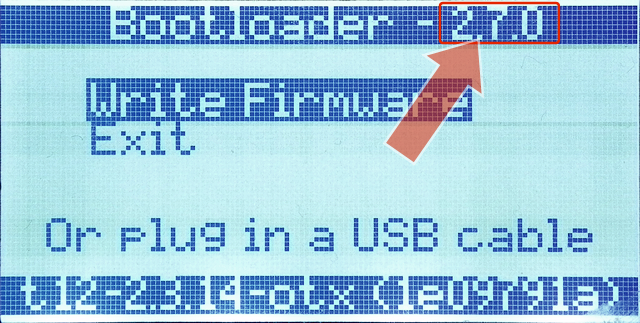
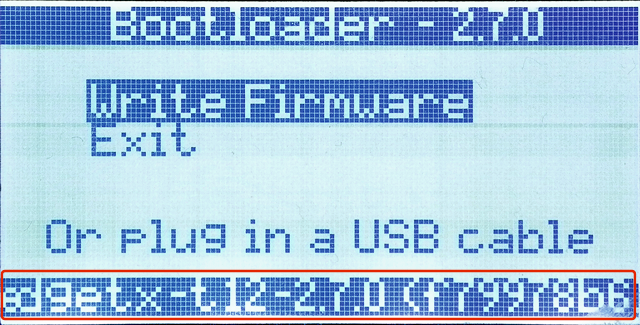
When screen becomes bright, release trim buttons and you will see a screen like this.
Select "Write Firmware".
Boot the radio in DFU/Bootloader Mode.
Hold down left and right horizontal trim buttons inward and press power button.
When screen becomes bright, release trim buttons and you will see a screen like this.
Select "Write Firmware".
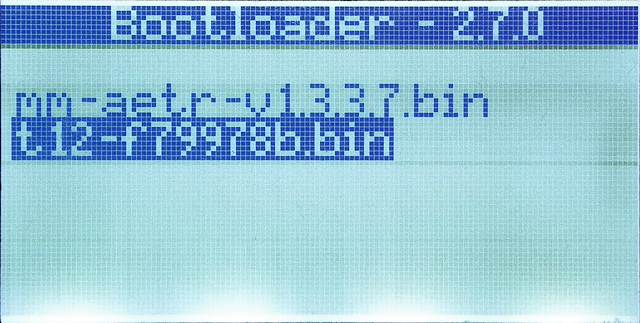 Then, a list of files stored in the "FIRMWARE" folder of the microSD card set in the radio is displayed.
Select EdgeTX firmware file, then press [ENTER] key.
Then, a list of files stored in the "FIRMWARE" folder of the microSD card set in the radio is displayed.
Select EdgeTX firmware file, then press [ENTER] key.
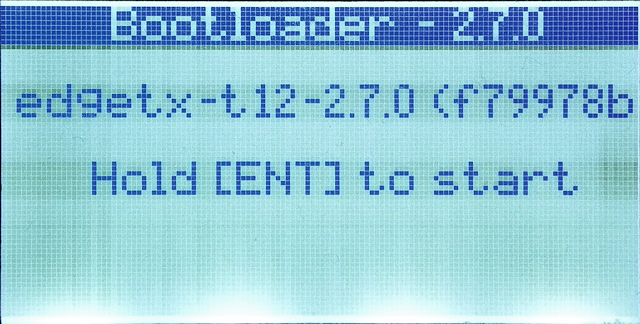 Version of the selected firmware file is displayed.
If there is no problem, long press [ENTER] key.
Version of the selected firmware file is displayed.
If there is no problem, long press [ENTER] key.
 Then the firmware writing will start.
It takes about several tens of seconds to write.
Then the firmware writing will start.
It takes about several tens of seconds to write.
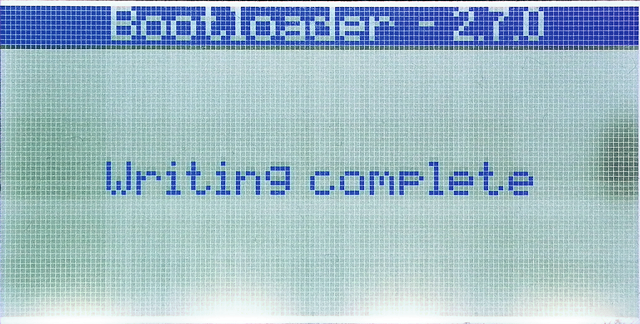 When the screen looks like this, the update is complete.
 Press [EXIT] key to return to boot loader top screen and look at the bottom of the screen to see updated firmware version.
If you select [Exit] from menu here, DFU/Bootloader Mode will be exited and the radio will boot normally.
Press [EXIT] key to return to boot loader top screen and look at the bottom of the screen to see updated firmware version.
If you select [Exit] from menu here, DFU/Bootloader Mode will be exited and the radio will boot normally.
First start after installing EdgeTX
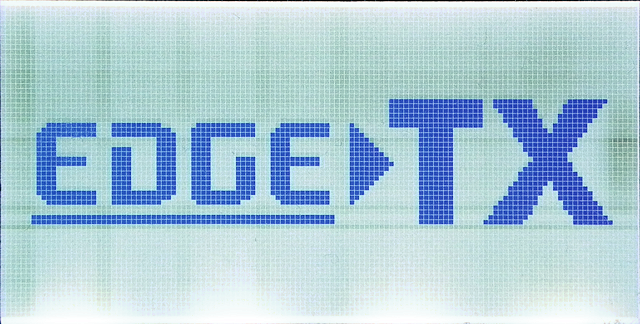 EdgeTX logo is displayed.
Radio says "Welcome to Edge TX".
EdgeTX logo is displayed.
Radio says "Welcome to Edge TX".
 If you turn on the radio just after installing EdgeTX, "STORAGE WARNING" shown in this figure will be displayed because EEPROM (setting data inside radio) is that of OpenTX.
Clicking any button then ...
If you turn on the radio just after installing EdgeTX, "STORAGE WARNING" shown in this figure will be displayed because EEPROM (setting data inside radio) is that of OpenTX.
Clicking any button then ...
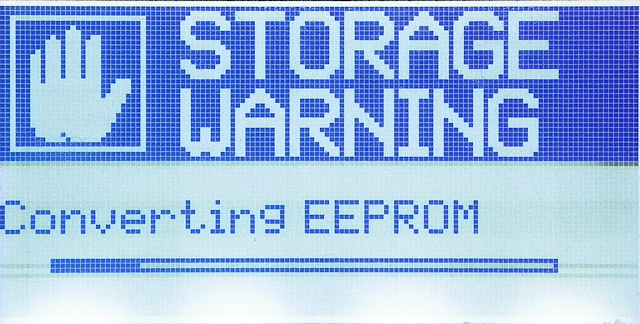 Conversion of setting data starts.
Conversion takes about a dozen seconds.
All settings used in OpenTX, such as MODELs, are also set in EdgeTX.
Conversion of setting data starts.
Conversion takes about a dozen seconds.
All settings used in OpenTX, such as MODELs, are also set in EdgeTX.
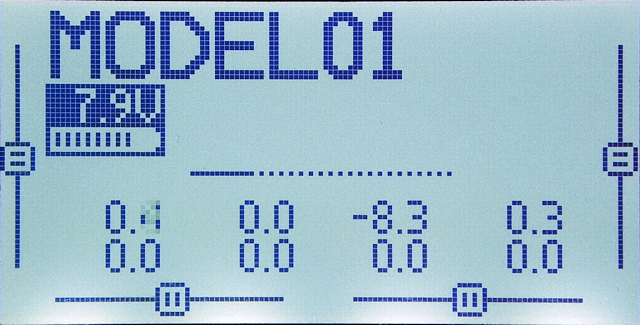 If you see a screen like this, the first startup is successful.
You can use it as usual.
Aircraft bound with OpenTX can be flown as they are without re-bind.
If you see a screen like this, the first startup is successful.
You can use it as usual.
Aircraft bound with OpenTX can be flown as they are without re-bind.
Use EdgeTX Companion instead of OpenTX Companion to manage radios on your computer.
How to install EdgeTX Companion