


 Prepare DJI Mini 2 for flight
Here, we introduce Prepare DJI Mini 2 for flight.
Click
here
for more information on DJI Mini 2.
DJI Mini 2 instructions. 4K aerial video mini drone weighing 249g
このページを日本語で見る
Table of contents
Check drone flight rules
Because the DJI Mini 2 weighs less than 250g/200g, drone flight rules are greatly relaxed, but you can't fly anywhere. Make sure to check the drone flight rules in advance to avoid violating the law.
DJI Mini 2 Drone Unboxing to first flight
Watch on YouTube
DJI Fly app installation and initial settings
First, let's install theCharging the battery and controller
 The battery is in hibernate mode when shipped.
After removing the DJI Mini 2 from the box, first charge the battery and controller.
A full charge restores the battery from hibernation mode.
The battery is in hibernate mode when shipped.
After removing the DJI Mini 2 from the box, first charge the battery and controller.
A full charge restores the battery from hibernation mode.
With the battery in the DJI Mini 2 body, connect it to the USB charger with a cable. Or if you have a Two Way Charging Hub, set the battery and connect it to the USB charger with a cable.
In DJI Mini 2, the connector shape on drone side has been changed to USB Type-C.
See the DJI Mini 2 specifications page for the four LED lighting patterns and their meanings.
DJI Mini 2 specifications
DJI Mini 2 cannot be turned on while charging. Also, charging is not possible when DJI Mini 2 is ON.
Do not remove the battery when drone is ON.
In addition, the battery cannot be charged when the temperature of the battery is 5 degrees Celsius or less or 40 degrees Celsius or more (41 degrees Fahrenheit or more or 104 degrees Fahrenheit or more). Warm the battery in cold places. If the battery is hot, such as immediately after flight, cool it.
 When charging with the DJI Mini 2, set it as shown on the right.
Make sure that you hear a click and that the battery is fully inserted.
When charging with the DJI Mini 2, set it as shown on the right.
Make sure that you hear a click and that the battery is fully inserted.
 When charging with a Two Way Charging Hub, set as shown in the illustration.
Connect to a USB charger using the USB Type-C connector.
Make sure that you hear a click and that the battery is fully inserted.
When charging with a Two Way Charging Hub, set as shown in the illustration.
Connect to a USB charger using the USB Type-C connector.
Make sure that you hear a click and that the battery is fully inserted.
Three batteries can be set at the same time on the Two Way Charging Hub, but charging is done one by one. It takes about 250 minutes to fully charge all three batteries ( 2250 mAh batteries).
In DJI Mini 2, the connector shape of 2WAY charging hub has also been changed to USB Type-C.
You can use the charged battery attached to the Two Way Charging Hub to charge other devices. You can charge the controller using the USB Type-A connector of the Two Way Charging Hub.
 The controller is also charged by connecting it to a USB charger with a cable.
When all four LEDs on DJI Mini 2 body or Two Way Charging Hub are lit, charging is complete.
Controller is fully charged when all four LEDs stop blinking and all go out.
The controller is also charged by connecting it to a USB charger with a cable.
When all four LEDs on DJI Mini 2 body or Two Way Charging Hub are lit, charging is complete.
Controller is fully charged when all four LEDs stop blinking and all go out.
| Charging time | Usable time | |
|---|---|---|
| Controller (DJI RC-N1) | 240 min. | Max 6 hours (There is a device charging function) |
| Battery (2250 mAh) | 82 min. | 31 min. (When flying at 17 km / h in no wind) |
| Battery (1065 mAh) | 50 min. | 18 min. (When flying at 17 km / h in no wind) |
The battery is equipped with an automatic discharge function. If not used for a day, it will be automatically discharged to about 96%. If not used for 5 days, it will be automatically discharged to about 72%. However, the battery may heat up during automatic discharge.
If the battery will not be used for more than 10 days, it is recommended to discharge the battery manually (let it fly) until the battery level between 39% to 75%. Also, when transporting the battery, it is recommended to manually discharge it so that the battery level is less than 30%. It is also recommended to charge the battery once every three months even if it will not be used for a long period of time.
When the voltage of each cell is less than 3.0V or the remaining capacity is less than 10%, the battery goes into hibernation mode to prevent over-discharging. After charging, it will return from hibernation mode.
Gimbal movement check
 Check the gimbal movement before turning on the power.
Turn the DJI Mini 2 over and pull the gimbal protector forward to remove it.
Then hold the camera with your finger and move it up, down, left and right.
Depending on the product, it may get caught and not move in a specific direction.
In this case, try pulling the camera lightly forward.
If it moves freely up and down, left and right, it is OK.
Check the gimbal movement before turning on the power.
Turn the DJI Mini 2 over and pull the gimbal protector forward to remove it.
Then hold the camera with your finger and move it up, down, left and right.
Depending on the product, it may get caught and not move in a specific direction.
In this case, try pulling the camera lightly forward.
If it moves freely up and down, left and right, it is OK.
Note: Do not move the gimbal by hand when the power is on.
Arm deployment and SD card setting
 Insert a microSD card into the microSD card slot on the back of the body for saving photos and videos.
UHS Class 3 (U3), Video Class 30 (V30), UHS-I or higher performance is required to record 4K video. Prepare a microSD card with the
You can record photos (single shots) or 720p video even if you do not have a microSD card inserted in the drone. The photos and videos taken are stored directly in the DJI Fly app.
Note: Do not insert or remove the microSD card when the DJI Mini 2 is turned on.
Buy 128GB U3-compatible microSD card(Amazon.com)
Buy 128GB U3-compatible microSD card(Amazon.co.uk)
 First remove the propeller holder.
Please note that only the Fly More Combo includes a propeller holder. Other than that, it is sold separately.
 Then unfold the front arm.
Pull out the front arm to rotate horizontally from the back to the front.
Then unfold the front arm.
Pull out the front arm to rotate horizontally from the back to the front.
 Unfold rear arm after unfolding front arm.
The rear arm will unfold when rotated downward.
Unfold rear arm after unfolding front arm.
The rear arm will unfold when rotated downward.
When folding, conversely, first fold rear arm, then fold front arm.
Prepar the controller
 Take out the control stick stored at the bottom of the controller and screw it into the controller.
Then pull out the mobile device holder from the top of the controller.
Take out the control stick stored at the bottom of the controller and screw it into the controller.
Then pull out the mobile device holder from the top of the controller.
The tip of the mobile device holder is an antenna. If you do not pull out the mobile device holder, the radio range will be reduced.
 Connect the controller and smartphone / tablet using the USB cable included in the box.
There are three types of USB cables: Lightinig (for iPhone), Type-C, and micro Type-B (standard).
Use a cable that matches your smartphone.
Connect the end with controller icon to the controller and the other end to the smartphone.
Then put your smartphone in mobile device holder.
When using a tablet, hold it using the optional tablet holder.
Connect the controller and smartphone / tablet using the USB cable included in the box.
There are three types of USB cables: Lightinig (for iPhone), Type-C, and micro Type-B (standard).
Use a cable that matches your smartphone.
Connect the end with controller icon to the controller and the other end to the smartphone.
Then put your smartphone in mobile device holder.
When using a tablet, hold it using the optional tablet holder.
Accessories for DJI mini 2 / Mavic Mini
Power on and connect
 Launch the
Next, turn on controller. You can check battery level by clicking power button.
 Click power button once, release your finger, and immediately press and hold it for about 2 seconds to start with a lively beep.
When controller and app are connected, an icon like this will appear at the bottom right of the screen.
Click power button once, release your finger, and immediately press and hold it for about 2 seconds to start with a lively beep.
When controller and app are connected, an icon like this will appear at the bottom right of the screen.
Similarly, to turn off the power, click the power button once, release your finger, and press and hold it immediately.
 Then turn on drone.
You can check battery level by clicking power button.
Then turn on drone.
You can check battery level by clicking power button.
 The drone also starts with a lively beep when you click power button once, release your finger, and immediately press and hold it for about 2 seconds.
When drone, controller, and app are connected, an icon like this will be displayed at the bottom right of the screen.
The drone also starts with a lively beep when you click power button once, release your finger, and immediately press and hold it for about 2 seconds.
When drone, controller, and app are connected, an icon like this will be displayed at the bottom right of the screen.
Similarly, when turning off the power of drone, click power button once, release it, and press and hold it immediately.
 The controller has the ability to charge the connected mobile device.
Charging starts automatically when an Android device is connected.
Every time you want to charge your iOS device, you need to enable charging in the DJI Fly app.
However, iOS devices consume less power, so you may need it less often.
The controller has the ability to charge the connected mobile device.
Charging starts automatically when an Android device is connected.
Every time you want to charge your iOS device, you need to enable charging in the DJI Fly app.
However, iOS devices consume less power, so you may need it less often.
Activation
The first time you launch an unused product, a process called "activation" takes place. This is done only once at the beginning. Once activated, it will not be activated even if you use DJI Fly app logged in with another DJI account (another user).Once you fly, the drone will be linked to another DJI account. You can share one drone with multiple DJI accounts.
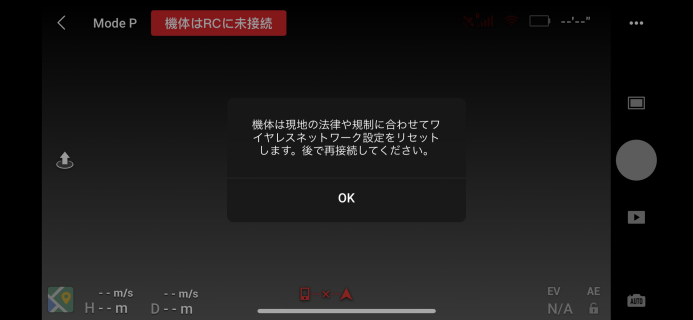 When the controller starts up, a display like this appears on the smartphone screen.
Tap “OK”.
When the controller starts up, a display like this appears on the smartphone screen.
Tap “OK”.
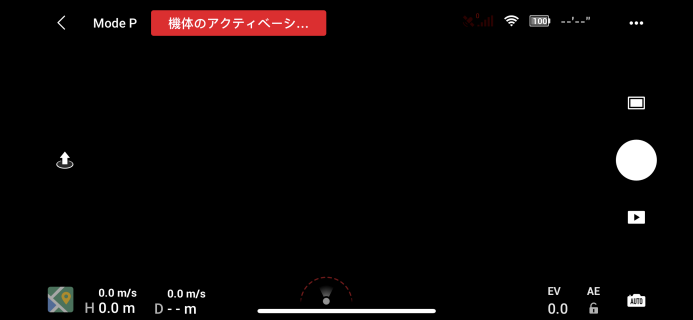 At the first startup, the activation process is performed.
At this time, the smartphone must be connected to the Internet.
At the first startup, the activation process is performed.
At this time, the smartphone must be connected to the Internet.
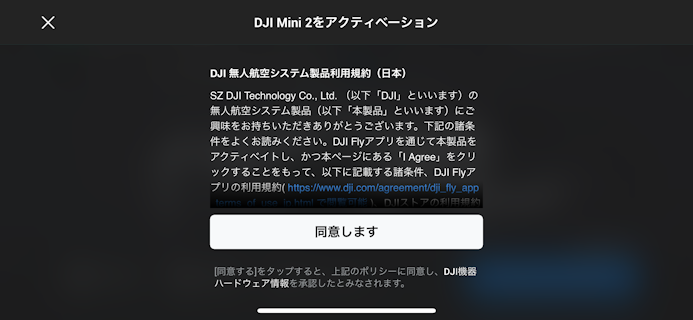 The product terms and conditions will be displayed.
After confirming the contents, tap “I Agree”.
The product terms and conditions will be displayed.
After confirming the contents, tap “I Agree”.
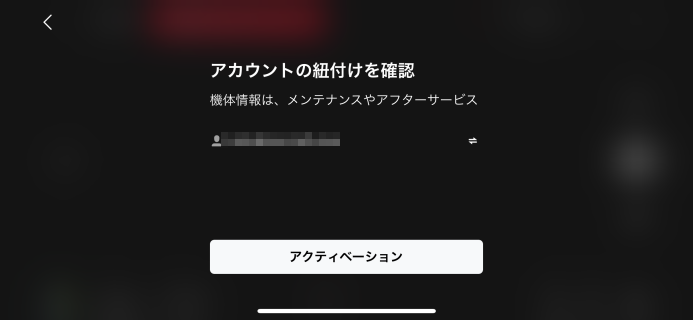 If you have registered as a user during
Initial settings for DJI Fly app
, the account (email address) used at that time will be displayed.
Here, DJI Mini 2 is linked to your user account.
Tap “Activation”.
If you have registered as a user during
Initial settings for DJI Fly app
, the account (email address) used at that time will be displayed.
Here, DJI Mini 2 is linked to your user account.
Tap “Activation”.
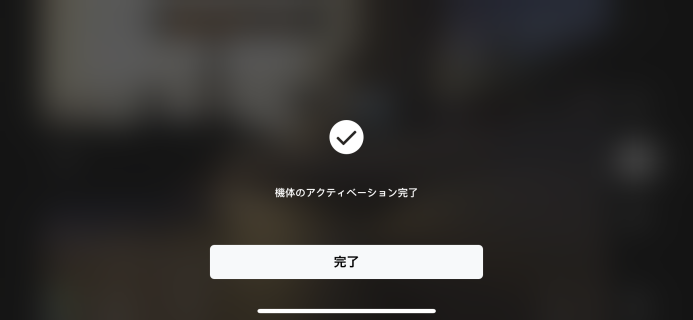 When activation is complete, this screen appears.
Tap “Done”.
When activation is complete, this screen appears.
Tap “Done”.
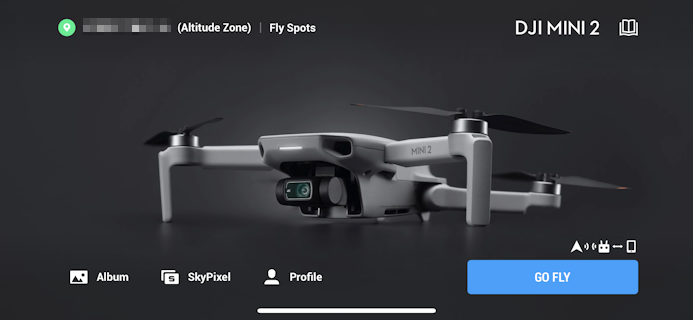 Then it looks like this.
Tap “GO FLY” to start flying.
Then it looks like this.
Tap “GO FLY” to start flying.
Firmware update
When you start up for the first time, let's update the built-in firmware to the latest.When you connect the aircraft and remote controller to DJI Fly app, you will be notified if a new firmware update is available. See below for detailed instructions.
DJI Mini 2 knowledge
IMU and compass calibration
If the DJI Fly app tells you to calibrate the IMU (navigation device) or compass, do this. It is better to calibrate the compass, especially when flying outdoors for the first time. See below for detailed instructions.
DJI Mini 2 knowledge