


 How to take videos and photos with DJI Mini 2 Quick Shot/panoramic photo
Here, we introduce How to take videos and photos with DJI Mini 2.
Click
here
for more information on DJI Mini 2.
DJI Mini 2 instructions. 4K aerial video mini drone weighing 249g
このページを日本語で見る
Table of contents
Taking a video / photo
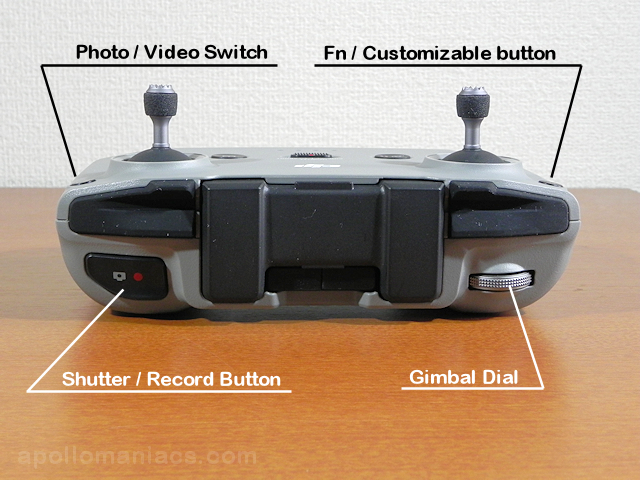
Also, the button on the upper right of the controller is the shutter / record button. In video mode, each time you press the button, video recording starts and ends. In photo mode, each time you press it, a photo is taken.
You can also switch between photo mode and video mode on the DJI Fly app screen (see below).
To protect the camera system, the maximum continuous shooting time for a single video is 30 minutes.
Switch video format
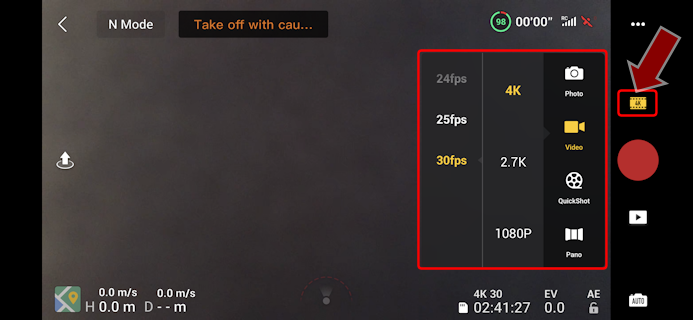
First, select the resolution from "4K", "2.7K", and "1080P", and then select the frame rate on the left. You can choose up to 30fps for 4K, and up to 60fps for 2.7K and 1080P.
* For 48/50/60fps shooting at 2.7k, necessary to upgrade to firmware version 01.02.0100.
Switch photo format
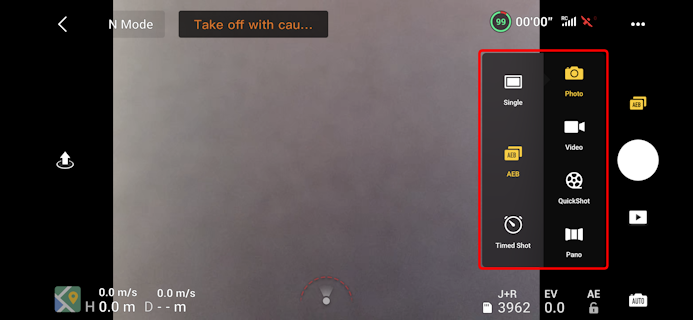
“Single” takes one photo each time you press the shutter.
“AEB (Auto Exposure Bracketing)” takes three pictures in a row with proper exposure, -0.67 under, and +0.67 over each time you press the shutter.
In “Timed Shot”, when you press the shutter once, photo is taken continuously every specified number of seconds. Press the shutter button again to stop shooting. You can shoot in Jpg format at the shortest every 3 seconds, and in Jpg + RAW format at the shortest every 5 seconds.
Change camera direction
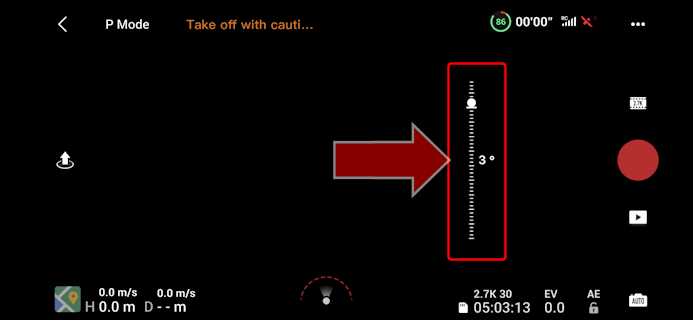
By tapping
Zoom up / down
You can zoom when shooting by holding down the customizable button labeled “Fn” on the top left of the front of the controller and tilting the gimbal dial at the same time. This method results in stepless zoom. Alternatively, you can switch zoom magnification by tapping| Video resolution | Digital zoom |
|---|---|
| 4K | Max. 2x |
| 2.7K | Max. 3x |
| FHD | Max. 4x |
| photos | Max. 2x |
Format of video / photo taken
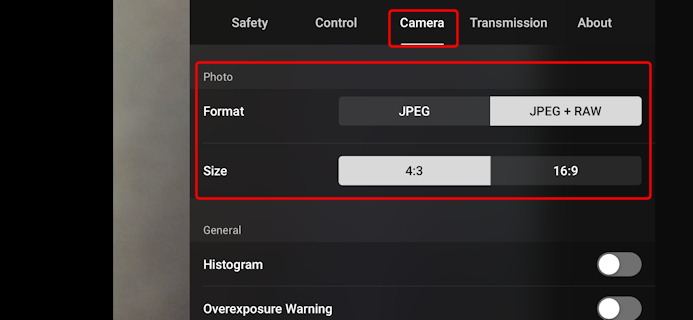
See DJI Mini 2 specifications page to know about format of video / photo taken.
DJI Mini 2 specifications
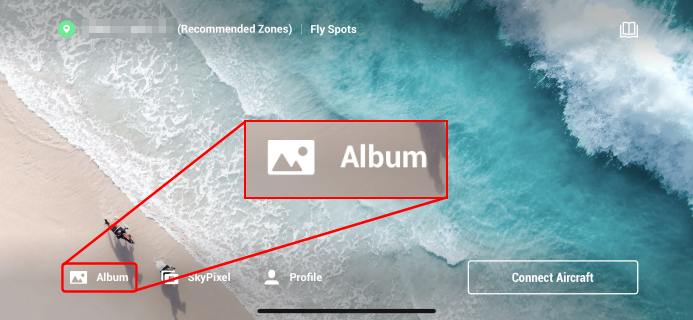
Retrieve videos and photos taken
See Enjoy photos and videos taken with DJI drone / How to use DJI Mimo function page for retrieve videos and photos.
Enjoy photos and videos taken with DJI drone / How to use DJI Mimo function
Drone Aerial View MavicMini Saipan Aqua Resort Club
Watch on YouTube
How to use Quick Shot
With Quick Shot, you can shoot a dramatic video clip of about 15 seconds with one touch. If you find stunning views while traveling, or if your family or friends get together, try quick shots.(Quick shots are taken in FHD / 1080p regardless of video settings.)
If the GPS signal mark displayed on the upper right of the DJI Fly app is not white, Quick Shot cannot be used.
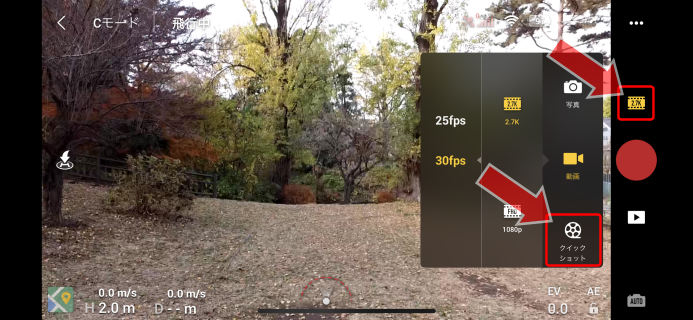 Tap the icon above the shutter button of the DJI Fly app.
Then, a menu like this will be displayed, so select “Quick Shot”.
Tap the icon above the shutter button of the DJI Fly app.
Then, a menu like this will be displayed, so select “Quick Shot”.
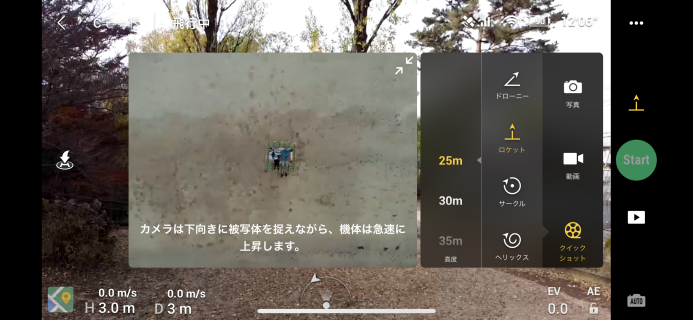 Select the shooting mode from “Dronie”, “Rocket”, “Circle”, “Helix”, “Boomerangand” then select the distance or altitude.
When you start Quick Shot for the first time, an explanation video will be displayed. Tap the
For details on the operation of “Dronie”, “Rocket”, “Circle”, “Helix”, “Boomerangand” mode, see DJI Mini 2 knowledge .
DJI Mini 2 knowledge
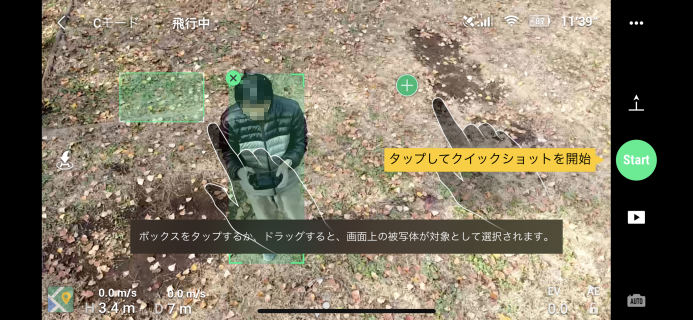 On the screen of the DJI Fly app, tap the
During quick shot shooting, press the pause / RTH button on the controller or tap the
- • Do not use quick shots when the subject is not directly visible.
- • If the subject and the surrounding scenery are similar in color, it may not work properly.
- • Do not specify fast-moving or flying objects as subjects.
- • Do not use quick shots in extremely dark (< 300 lux) or bright (> 10,000 lux) locations.
- • Do not use quick shots in places where GPS signals are weak, such as near buildings.
Enjoy photos and videos taken with DJI drone / How to use DJI Mimo function
How to take panoramic photos
With DJI Mini 2, you can take three types of panoramic photos: "Sphere", "180 °", and "Wide-angle" with a single touch.You cannot take a panoramic photo unless the GPS signal mark displayed on the upper right of the DJI Fly app is white.
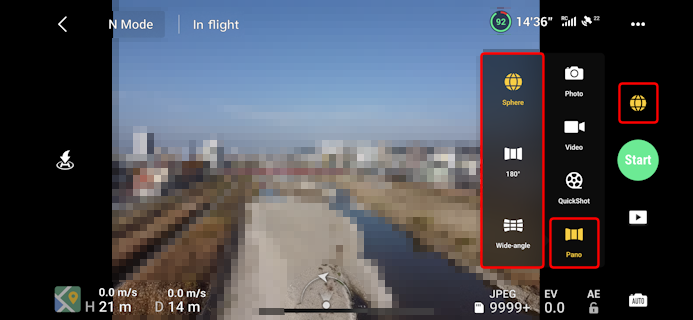 Tap the icon above the shutter button in the DJI Fly app.
Then, a menu like this will be displayed. Select "Pano" and then select "Sphere", "180 °", or "Wide-angle".
Tap the icon above the shutter button in the DJI Fly app.
Then, a menu like this will be displayed. Select "Pano" and then select "Sphere", "180 °", or "Wide-angle".
For more information about Sphere, 180 °, and Wide-angle modes, see DJI Mini 2 Knowledge .
DJI Mini 2 knowledge
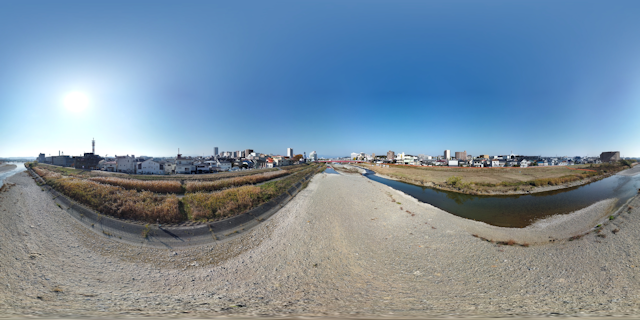 For example, if you select "Sphere", you can get a picture like this.
This photo is also called "Planet".
The scenery around about 360 ° is contained in one photo.
(Gimbal does not point directly above, so zenith area is complemented by surrounding image).
For example, if you select "Sphere", you can get a picture like this.
This photo is also called "Planet".
The scenery around about 360 ° is contained in one photo.
(Gimbal does not point directly above, so zenith area is complemented by surrounding image).
Photos before compositing are stored in the folder named by the number under "PANORAMA" folder of microSD card inserted in the drone.
Composited photos will be stored in an album named "Import" created in
Even if you specify RAW format shooting, the format of the panoramic photo will be jpg.
How to use photo app (Japanese)
 "Sphere" photos look different when opened from the "Albums" in the DJI Fly app.
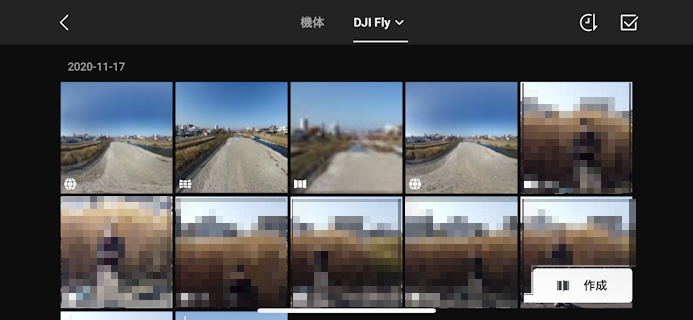 Panorama photos have an icon at the bottom left.
When you tap a photo taken in "Sphere" mode ...
Panorama photos have an icon at the bottom left.
When you tap a photo taken in "Sphere" mode ...
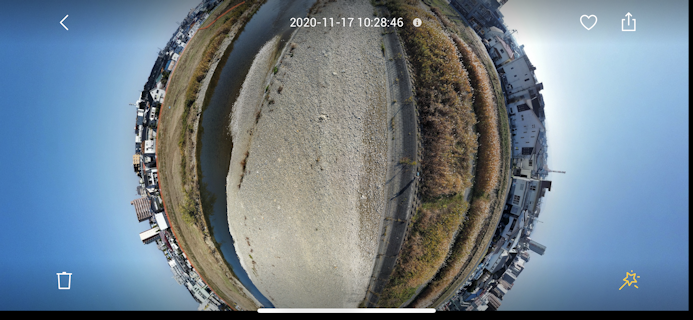 It will be displayed like this.
You can automatically correct the image quality by tapping the "Magic Wand" mark at the bottom right.
It will be displayed like this.
You can automatically correct the image quality by tapping the "Magic Wand" mark at the bottom right.
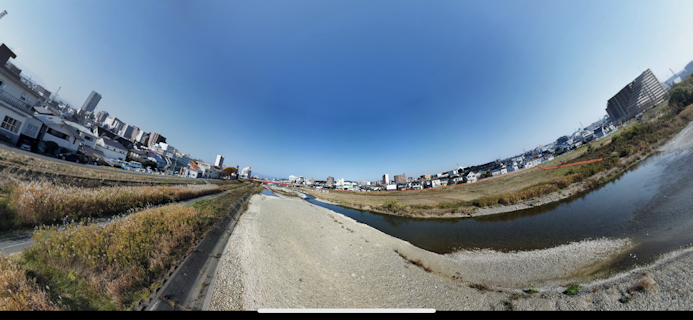 You can move the viewpoint around by tapping the screen once and then dragging it.
You can see any direction in 360 °.
This can only be done with photos taken in "Sphere" mode.
You can move the viewpoint around by tapping the screen once and then dragging it.
You can see any direction in 360 °.
This can only be done with photos taken in "Sphere" mode.