


 How to use Geotag Photos Pro / GPS Logger / Automatically record location info and write it to digital camera photos
There are "GPS logger" apps that automatically records your location information just by installing it.
If you use these apps, you can later check when and where you were on a leisure or business trip, and how long it took you to travel.
You can also use this GPS log to write location information (geotag) to photos taken with digital cameras and action cameras such as GoPro, Insta360, and DJI Osmo Action.
Here, we will explain how to use the GPS logger app: Geotag Photos Pro.
- Installing Geotag Photos Pro 2
- Geotag Photos Pro 2 Initial Settings
- Start GPS log collection
- View GPS log information currently being collected
- Completion of log collection, account registration, and data upload
- Manage Logs/Retrieve GPS Logs (gpx files)
- Operate log collection with AppleWatch
- Write geotags (location information) to photos with a desktop app
- Charge to remove the limit on the number of trip records
- Write geotags (location information) to videos
Installing Geotag Photos Pro 2
-
Geotag Photos Pro 2

TappyTaps s.r.o. Photo/Video Free (with in-app purchase)
This is a GPS logger application that specializes in adding location information (geotag) to digital camera photos later. Can generate GPS log data in ".gpx" format. If you install the Geotag Photos Pro desktop application from official site on your computer, you can write (tag) GPS data to digital camera photos.
view the details (App Store)Geotag Photos Pro Official site (geotagphotos)Geotag Photos Pro user guide (geotagphotos) -
Geotag Photos Tagger (GPX)
TappyTaps s.r.o. Photo/Video Free (with in-app purchase)
Use GPX files to geotag images imported to your iPad with the Camera Connection Kit. Note: Due to iCloud restrictions, location-tagged photos can only be viewed in iCloud Photo Library. Other apps may not reflect the added GPS location information.
view the details (App Store)Geotag Photos Tagger Official site (geotagphotos)
Geotag Photos Pro 2 Initial Settings
 Tap
Tap If you have a smartwatch that connects via Bluetooth, allowing access to Bluetooth will allow you to operate the app from your smartwatch. However, if you're using an Apple Watch, you don't need to allow Bluetooth here.
This setting can be changed later in
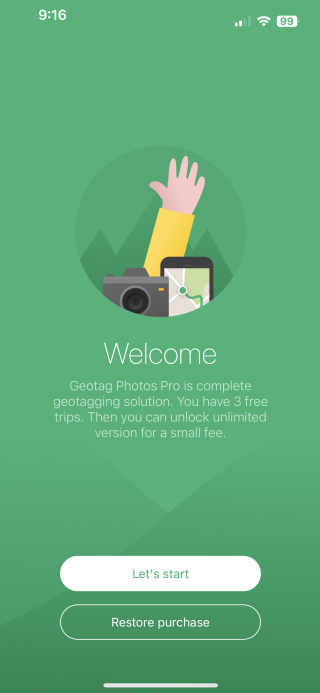
Next, tap "Let's start" button.
 Then the screen will look like this.
Three pages of brief descriptions of the app are displayed.
Tap "Next >" or "Done >" at the bottom right of the screen to advance the page.
Then the screen will look like this.
Three pages of brief descriptions of the app are displayed.
Tap "Next >" or "Done >" at the bottom right of the screen to advance the page.
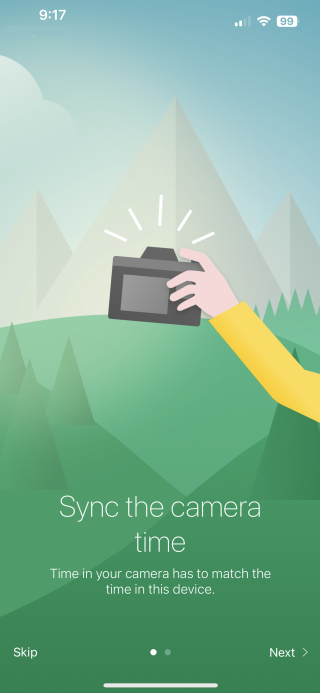
 When you see a screen like this, you're ready to go.
 When you tap
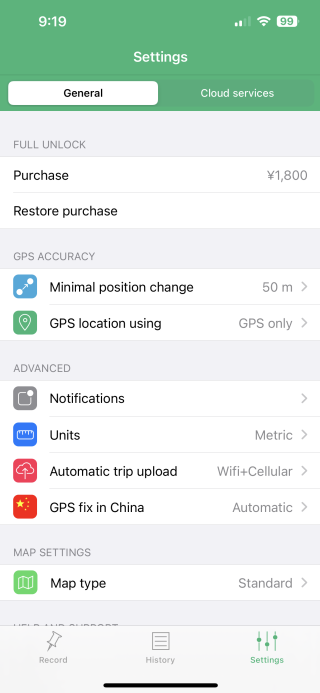
| item | description |
|---|---|
| Minimal position change | Only when the distance specified here is moved, the GPS coordinates are treated as changed. This value is used to avoid GPS coordinates being recorded differently even though you are at the same location due to GPS errors, etc. |
| GPS location using | Specify whether or not to use GSM (location information of connected mobile phone base stations) in addition to GPS as a GPS information source. The position can be determined faster if GSM is also used. |
| Notifications | You can choose what notifications you receive. You can choose when the GPS signal is lost or when the time zone changes. |
| Units | Select either Metric or Imperial units for display. |
| Automatic trip upload | Specifies how to upload GPS logs. You can choose from "Disabled: Do not auto-upload" / "Use Wifi only" / "Use Wifi and cellular network". Specify Disabled or Wifi only when you want to save packets. |
| Map type | You can choose the map type from standard / satellite photo / combination of standard and satellite photo. |
Start GPS log collection
Tap
This app records GPS logs in units called "trips". Also, each "trip" can record multiple "PART(routes)". Each time you press "Start" on the screen shown below, a new PART recording will begin, and each time you press "Stop", the PART recording will end.
To start recording a new "trip", tap the "+" icon at the top right of the screen.
 Then the screen will look like this.
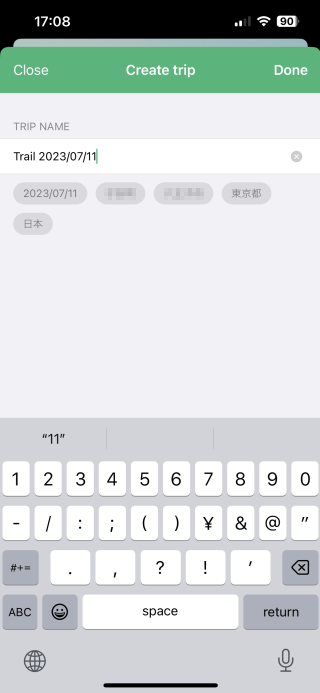
Name the new "trip".
I think it would be a good idea to include the date, place where the photo was taken, the name of the travel destination, etc.
Then the screen will look like this.
Name the new "trip".
I think it would be a good idea to include the date, place where the photo was taken, the name of the travel destination, etc.
Several suggestions are displayed just below the input area. If you tap these in order, it will be entered in the text area.
After naming, tap "Done" at the top right of the screen.
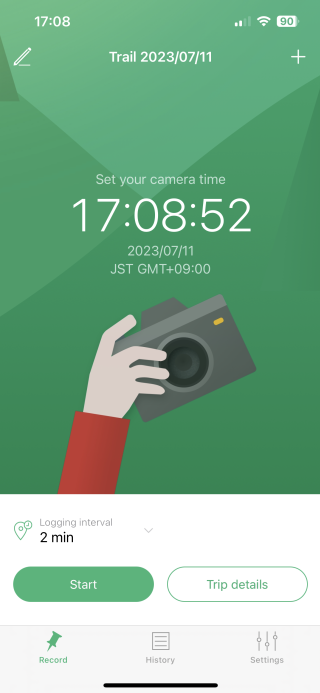 The following screen will appear.
The current time is displayed large in the center of the screen. Set the clock on your digital camera to this time. If the digital camera's clock is out of sync, the location information written in the photos will also be out of sync.
When using an action camera or drone, you can usually set the time by connecting the smartphone and the action camera or drone wirelessly via Wi-Fi.
You can change the name of "trip" by tapping the pen icon on the upper left of the screen.
By tapping
Tap "Start" at the bottom left to start collecting logs.
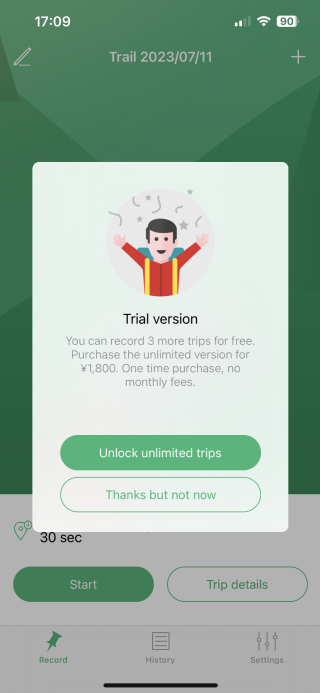 When you tap "Start", a screen like this will be displayed.
It is a choice whether to charge for the application or not.
Tap "Thanks but not now" to continue using it for free.
When you tap "Start", a screen like this will be displayed.
It is a choice whether to charge for the application or not.
Tap "Thanks but not now" to continue using it for free.
Only 2 "trips" can be created for free. Also, when using two "trips", even if you delete the created "trip", you cannot add a new "trip". To keep using it for free, keep using the first two "trips" you created by renaming them or deleting the PARTs.
The limit on the number of "trip" records will be lifted when you make a payment . Billing is a one-time purchase, not a subscription.
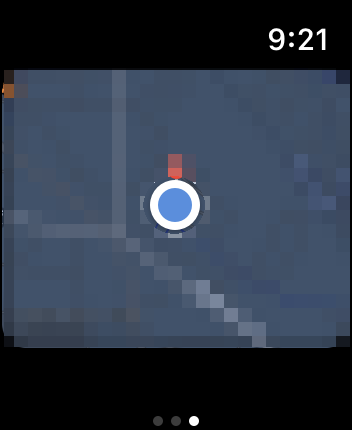
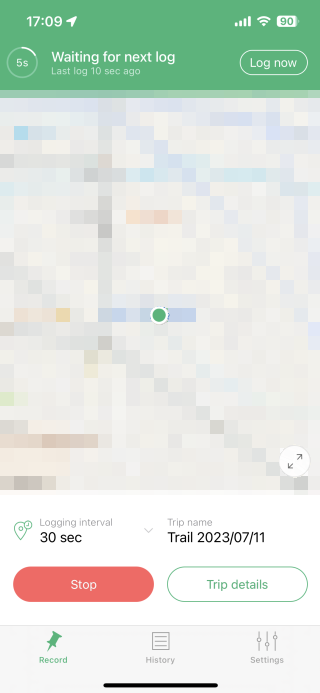 The screen looks like this while the log is being collected.
No further action is required. If you leave it alone, the GPS log will be collected automatically.
The screen looks like this while the log is being collected.
No further action is required. If you leave it alone, the GPS log will be collected automatically.
The time until the next log is collected is displayed on the upper left of the screen.
Tap "Log now" at the top right of the screen to immediately add the location information of the current location to the log.
By tapping "Trip details" at the bottom right of the screen, you can see the GPS log information being collected .
View GPS log information currently being collected
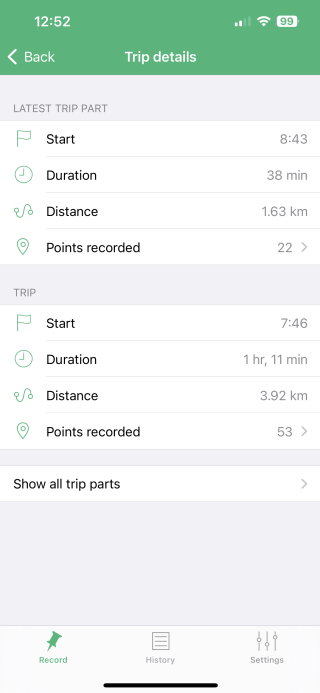 If you tap "Trip details" on the log collection screen, the screen will look like this.
For the latest PART, today's PART, and the entire "trip" included in this "trip", the start time (Start), travel time (Duration), travel distance (Distance), and the number of recorded location information (Points recorded) are displayed.
Tap the Points recorded to check the route on the map.
If you tap "Trip details" on the log collection screen, the screen will look like this.
For the latest PART, today's PART, and the entire "trip" included in this "trip", the start time (Start), travel time (Duration), travel distance (Distance), and the number of recorded location information (Points recorded) are displayed.
Tap the Points recorded to check the route on the map.
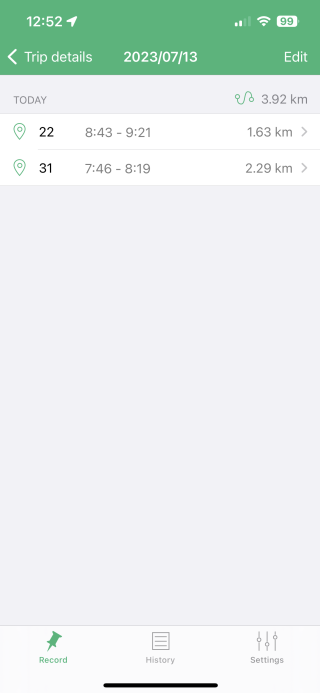 If you tap "Show all trip parts" on the screen above, you will see a screen like this.
All PARTs included in this "trip" are listed.
You can check each PART on the map by tapping it.
If you tap "Show all trip parts" on the screen above, you will see a screen like this.
All PARTs included in this "trip" are listed.
You can check each PART on the map by tapping it.
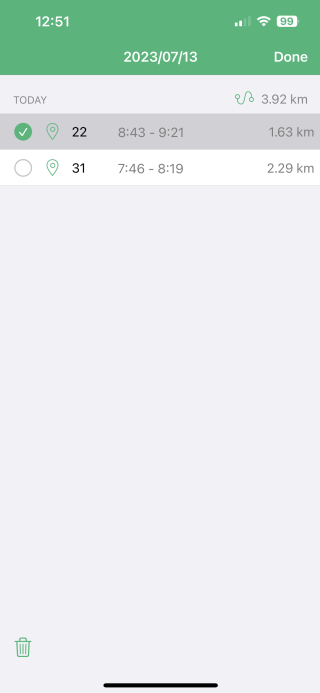 On the above screen, tap "Eidt" in the upper right to display a screen like this.
Select each PART and tap the trash can icon at the bottom left of the screen to delete it.
On the above screen, tap "Eidt" in the upper right to display a screen like this.
Select each PART and tap the trash can icon at the bottom left of the screen to delete it.
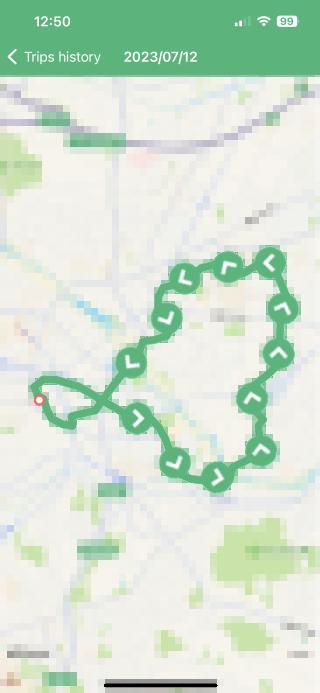 The map display will look like this.
You can zoom in and out on the map by pinch open/close.
By tapping the arrow mark, you can see the position coordinates (latitude and longitude) and passage time of the place, and copy it to the clipboard.
The map display will look like this.
You can zoom in and out on the map by pinch open/close.
By tapping the arrow mark, you can see the position coordinates (latitude and longitude) and passage time of the place, and copy it to the clipboard.
Completion of log collection, account registration, and data upload
To end logging, tap the red "Stop" button at the bottom left of the screen.
Then the recording of the current PART will be finished and the log will be automatically uploaded to the server (GeotagPhotos.net).
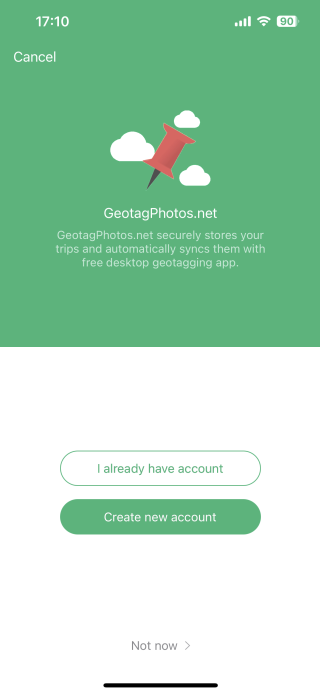 When you use this app for the first time, you will be prompted to register for a GeotagPhotos.net account.
If you want to use GeotagPhotos.net, register an account here.
GeotagPhotos.net is free for up to 2 "trips".
When you use this app for the first time, you will be prompted to register for a GeotagPhotos.net account.
If you want to use GeotagPhotos.net, register an account here.
GeotagPhotos.net is free for up to 2 "trips".
To register a new account, tap "Create new account".
If you already have an account, tap "I already have account" and enter your ID (email address) and password.
You can also retrieve GPS logs (gpx files) directly from the app without registering an account.
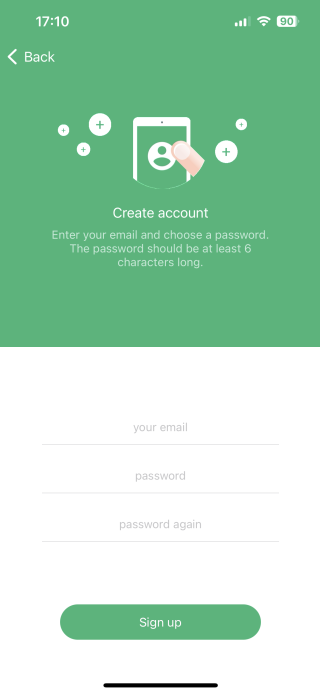 When you tap "Create new account" on the screen above, you will see a screen like this.
In the "your email" field, enter the email address you want to register as your user ID.
When you tap "Create new account" on the screen above, you will see a screen like this.
In the "your email" field, enter the email address you want to register as your user ID.
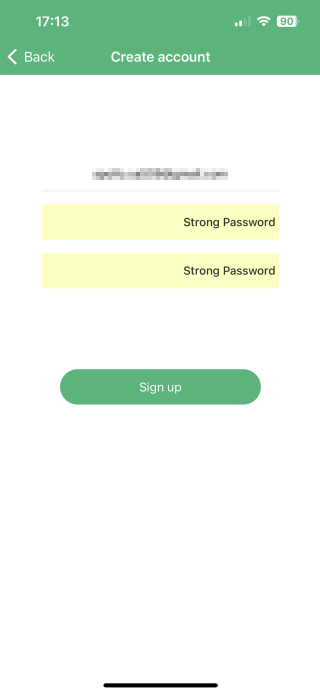 Then think of a password and enter it.
However, if you are using the latest iOS, a Strong Password is automatically generated and stored in iCloud Keychain.
When you see a screen like this, just tap "Sign up" and it's OK.
Then think of a password and enter it.
However, if you are using the latest iOS, a Strong Password is automatically generated and stored in iCloud Keychain.
When you see a screen like this, just tap "Sign up" and it's OK.
I also tried manually entering my own password, but it didn't work. This may be a bug...
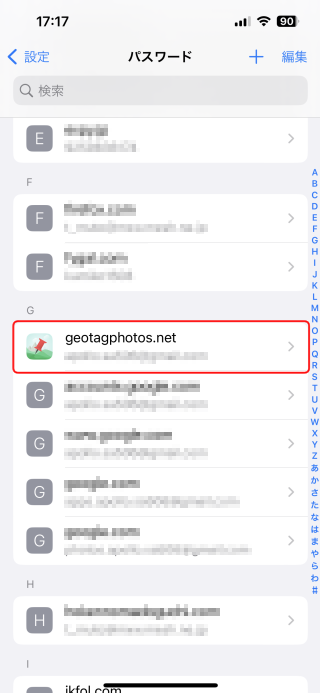 If you want to check the "Strong Password" automatically generated by iOS, open
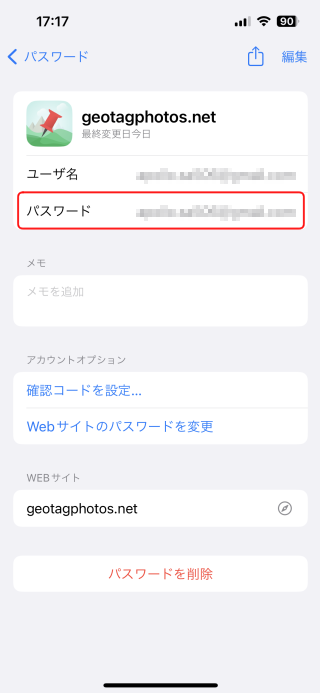 Then the screen will look like this.
You can check it by tapping the "Password" field.
Then the screen will look like this.
You can check it by tapping the "Password" field.
Manage Logs/Retrieve GPS Logs (gpx files)
The collected GPS log can be extracted as a gpx file in addition to being uploaded to the server (GeotagPhotos.net).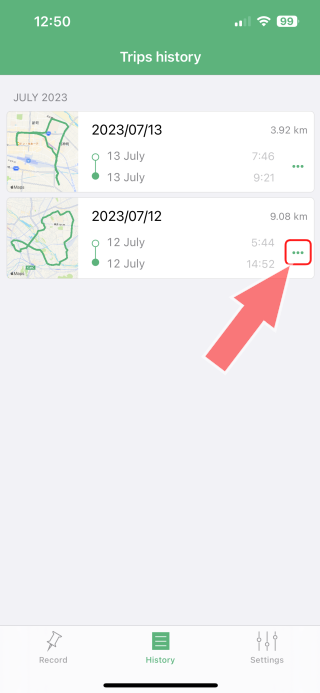 If you tap
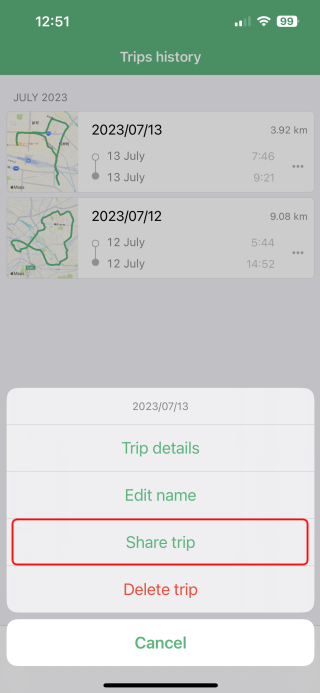 A menu like this will appear.
Tap "Trip details" to display the screen explained in View GPS log information currently being collected .
Tap "Edit name" to change the name of this "trip".
You can delete this "trip" by tapping "Delete trip". However, only two "trip"s can be added when using it for free. Note that deleting "trip" here will reduce the number of "trip"s that can be used.
Tap "Share trip" to retrieve the GPS log (gpx file).
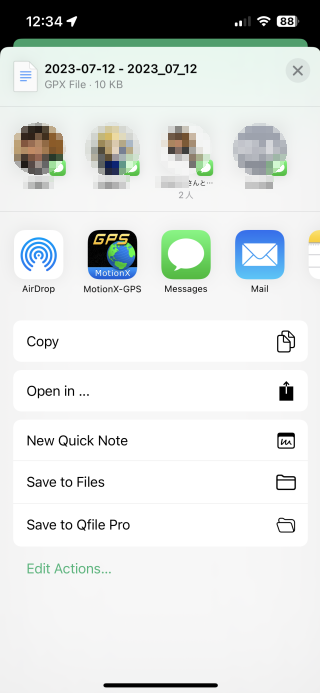 Then the iOS standard share sheet is displayed like this.
You can send the file in ".gpx" format using
Then the iOS standard share sheet is displayed like this.
You can send the file in ".gpx" format using
 Operate log collection with AppleWatch
If you install Geotag Photos Pro 2 on your iPhone, you can start/stop logging with the paired AppleWatch.
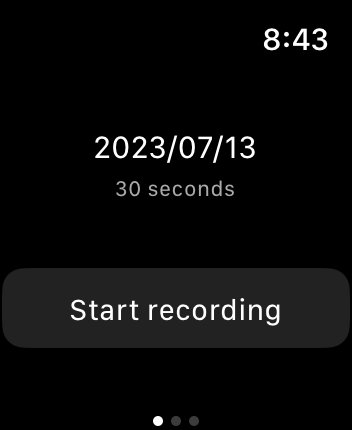 After creating a "trip" on your iPhone, open
When creating multiple "trips", you can open another "trip" by flicking the dial left or right.
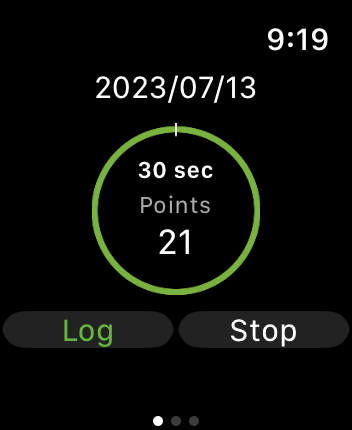 The screen looks like this while the log is being collected.
The name of "trip" is displayed at the top of the screen, the number of location information collected, the collection interval, and the time until the next collection are displayed at the center of the screen.
The screen looks like this while the log is being collected.
The name of "trip" is displayed at the top of the screen, the number of location information collected, the collection interval, and the time until the next collection are displayed at the center of the screen.
Tap "Log" at the bottom left of the screen to immediately add the location information of the current location to the log.
Tap "Stop" at the bottom right of the screen to end the current PART recording and automatically upload the log to the server (GeotagPhotos.net).
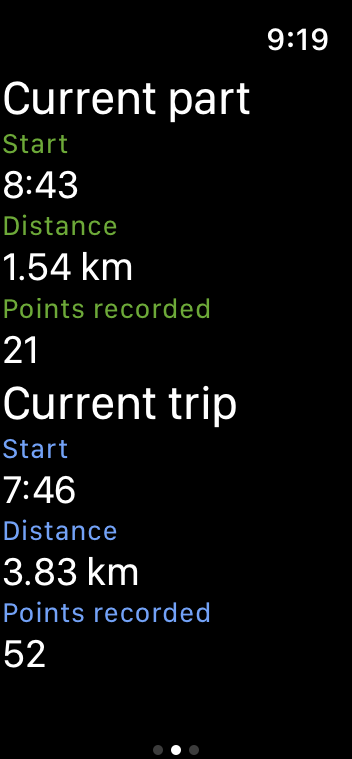 If you flick the screen from right to left, it will look like this.
For the current "trip" and PART, the start time (Start), distance traveled (Distance), and the number of recorded location information (Points recorded) are displayed.
If you flick the screen from right to left, it will look like this.
For the current "trip" and PART, the start time (Start), distance traveled (Distance), and the number of recorded location information (Points recorded) are displayed.
 If you flick the screen again from right to left, it will look like this.
You can check the current position on the map.
If you flick the screen again from right to left, it will look like this.
You can check the current position on the map.
Write geotags (location information) to photos with a desktop app
Geotag Photos provides free PC software "desktop application" that can write geotags (location information) to digital camera photos using collected GPS logs (.gpx files). Available for Windows, Mac and Linux.In addition to GPS logs collected with the Geotag Photos Pro app, you can also use GPS logs collected with commercially available GPS loggers .
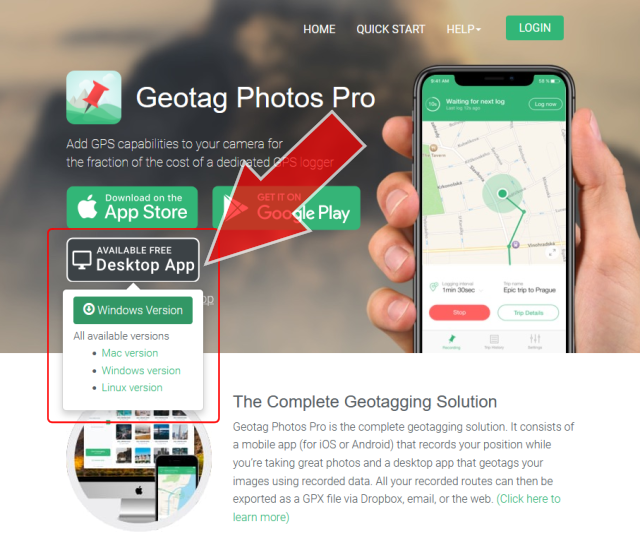 Download the Geotag Photos desktop app from
Geotag Photos Pro official site
.
When you click the icon labeled "Desktop App" on the official site, the screen shown in the figure will appear.
Click here to download the desktop app.
Download the Geotag Photos desktop app from
Geotag Photos Pro official site
.
When you click the icon labeled "Desktop App" on the official site, the screen shown in the figure will appear.
Click here to download the desktop app.
You can download a file with a file name such as "Geotag-Photos-Pro-2-Setup-1.9.5.exe". Depending on the network environment, the download will take from several tens of seconds to several minutes.
Double-click the downloaded file to install it on your computer.
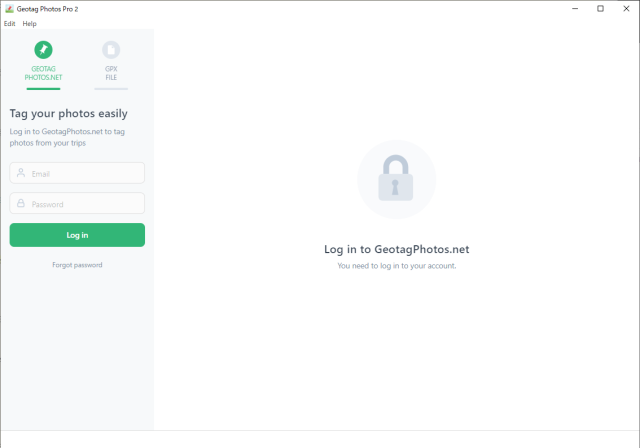 After installation is complete, double-click
 The following screen will appear.
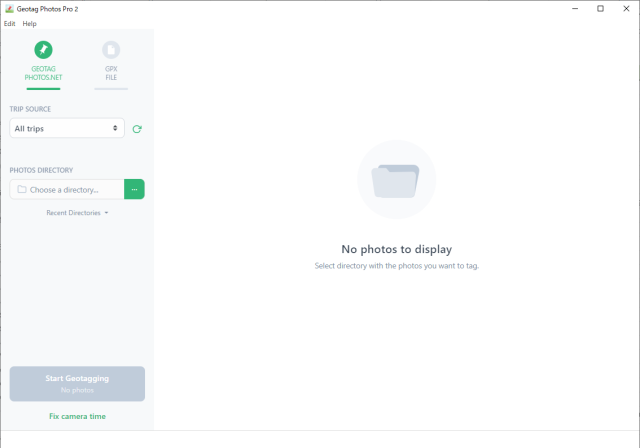
In the "TRIP SOURCE" field on the upper left of the screen, select the "trip" that contains the GPS log you want to use this time.
And in the "PHOTOS DIRECTORY" column below that, specify the folder where the digital camera photos are saved.
The following screen will appear.
In the "TRIP SOURCE" field on the upper left of the screen, select the "trip" that contains the GPS log you want to use this time.
And in the "PHOTOS DIRECTORY" column below that, specify the folder where the digital camera photos are saved.
Note: Please make a backup of the photos in advance to avoid the photos being destroyed due to the malfunction of the app.
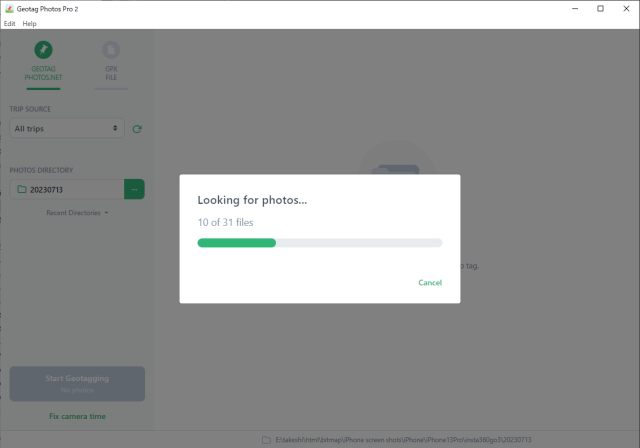 Then the loading of digital camera photos will start.
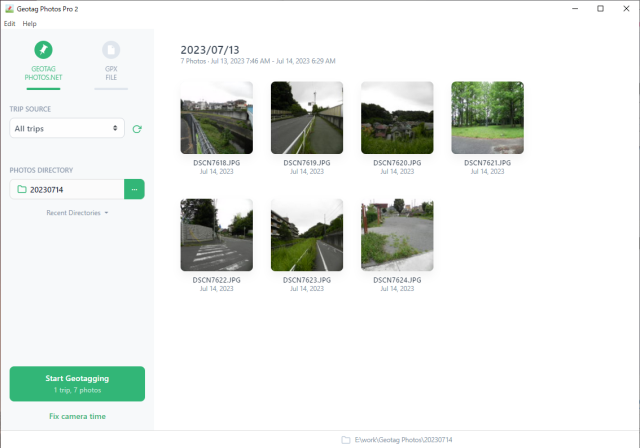 If the shooting date of the photo and the date of the GPS log match, those photos will be displayed in a list.
Click the green "Start Geotagging" button at the bottom left of the screen to start writing geotags (location information).
If the shooting date of the photo and the date of the GPS log match, those photos will be displayed in a list.
Click the green "Start Geotagging" button at the bottom left of the screen to start writing geotags (location information).
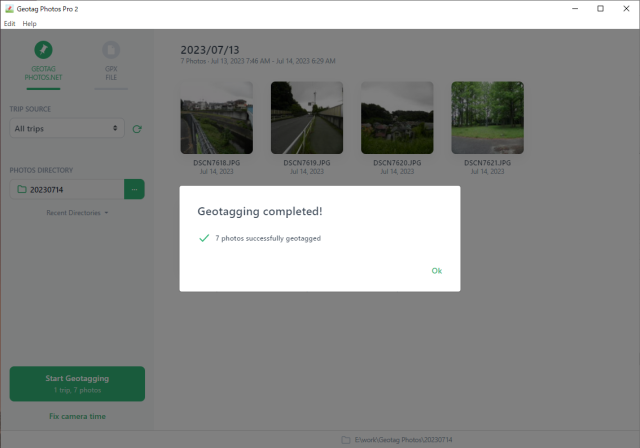 Writing is successful when the screen looks like this.
Click OK to return to the screen above.
Writing is successful when the screen looks like this.
Click OK to return to the screen above.
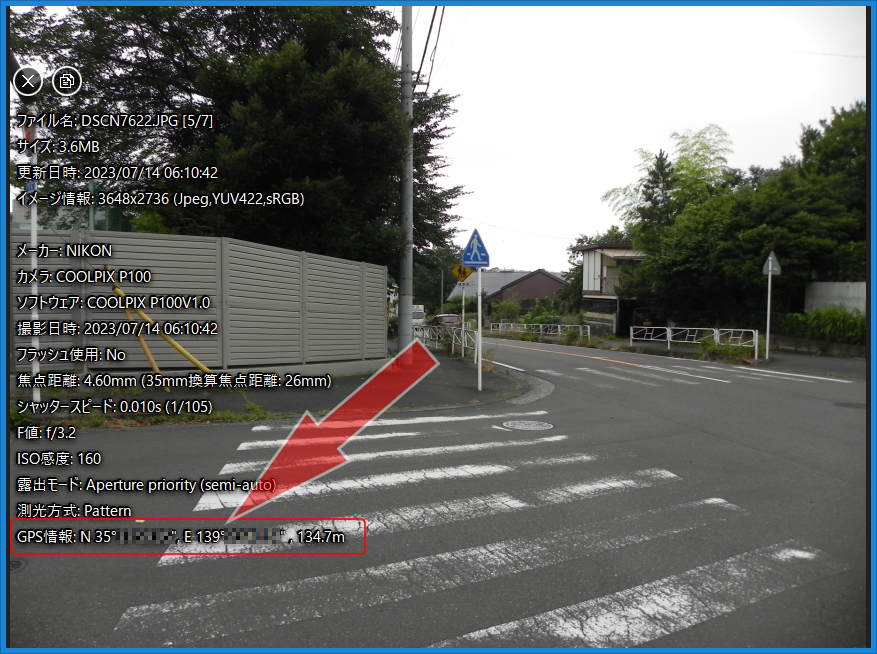 When you click the thumbnail of the photo on the screen above, the photo viewing software set by default in the OS will start.
You can see that "GPS information" has been added as shown in this figure.
When you click the thumbnail of the photo on the screen above, the photo viewing software set by default in the OS will start.
You can see that "GPS information" has been added as shown in this figure.
The photo viewing software used on this screen is HoneyView .
 You can also use a GPS log (.gpx file) collected by commercially available
GPS loggers
.
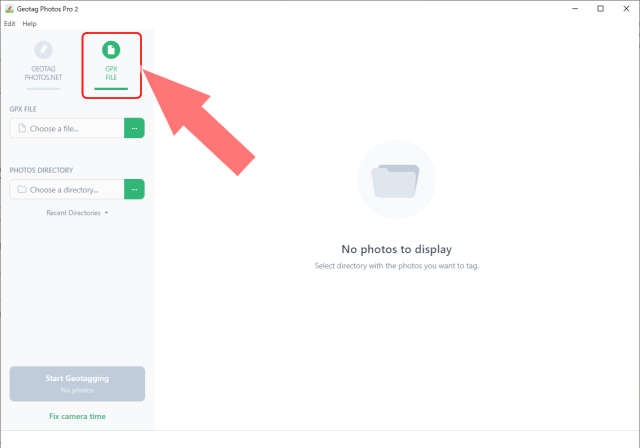
When you click "GPX FILE" on the upper left of the screen, you will see a screen like this.
In the "GPX FILE" field, specify the GPS log (.gpx file) you want to use.
You can also use a GPS log (.gpx file) collected by commercially available
GPS loggers
.
When you click "GPX FILE" on the upper left of the screen, you will see a screen like this.
In the "GPX FILE" field, specify the GPS log (.gpx file) you want to use.
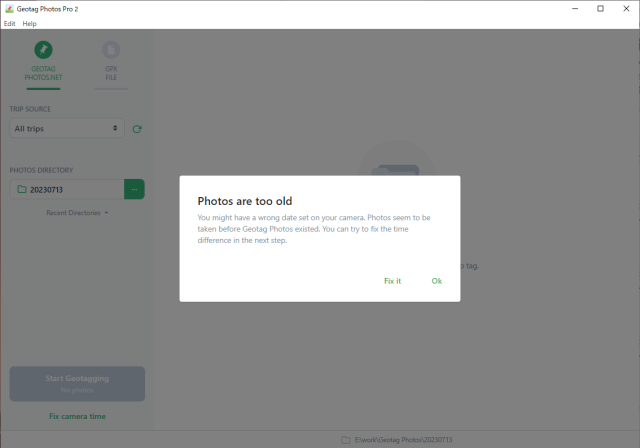 If there are no photos in the specified folder that match the date and time of the specified GPS log, such an error screen will be displayed.
Check whether the folder specification or GPS log specification is correct.
If there are no photos in the specified folder that match the date and time of the specified GPS log, such an error screen will be displayed.
Check whether the folder specification or GPS log specification is correct.
If the digital camera's time is not correct, you can correct it. Click "Fix it" on this error screen or "Fix camera time" at the bottom left of the screen.
When you take a photo with an Insta360 action camera such as Insta360 GO 3 and specify the shooting format "insp+Raw" or "PureShot", the camera stores two files in insp format and Raw (DNG) format. And both files will be converted to JPEG files when you export them with the Insta360 STUDIO app on your computer. However, JPEG files generated by exporting Raw (DNG) format do not have the correct shooting date and time.
After shooting, before writing the location information with the desktop application, you need to correct the Exif information using a tool like ExifTool .
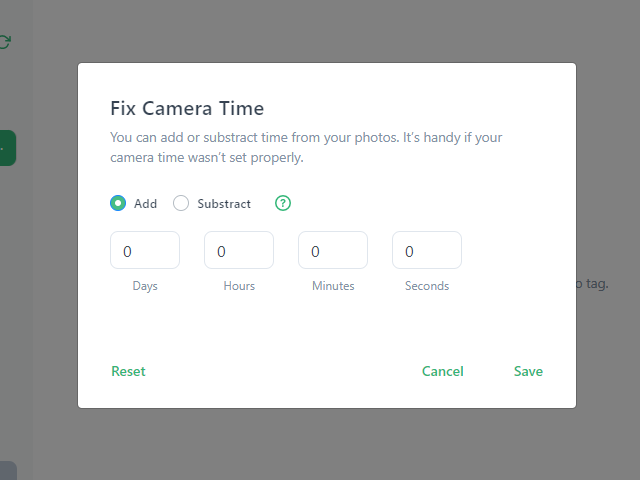 Click "Fix it" or "Fix camera time" and you will see a screen like this.
On this screen, you can specify an offset value to be added or subtracted from the shooting time of digital camera photos.
Specify whether to add or subtract with the "Add / Subtract" radio button.
In the fields below it, specify the number of days and hours to be added or subtracted.
Click "Fix it" or "Fix camera time" and you will see a screen like this.
On this screen, you can specify an offset value to be added or subtracted from the shooting time of digital camera photos.
Specify whether to add or subtract with the "Add / Subtract" radio button.
In the fields below it, specify the number of days and hours to be added or subtracted.
Then click "Save" at the bottom right of the screen to calculate the shooting time of the digital camera photo. Redo matching with the GPS log.
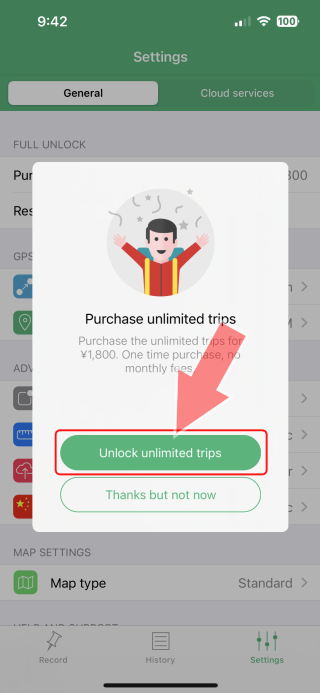
Charge to remove the limit on the number of trip records
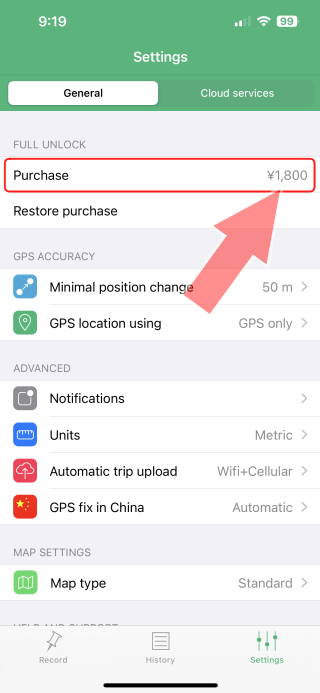 If you like Geotag Photos and want to remove the "trip" record limit, please make an in-app purchase.
The amount is USD11.99.
Billing is an initial one-time purchase, not a subscription.
If you like Geotag Photos and want to remove the "trip" record limit, please make an in-app purchase.
The amount is USD11.99.
Billing is an initial one-time purchase, not a subscription.
When you tap
 Then the screen will look like this.
Tap "Unlock unlimited trips".
Then the screen will look like this.
Tap "Unlock unlimited trips".
This screen is also displayed when creating a "trip". You can charge by tapping "Unlock unlimited trips" from anywhere.
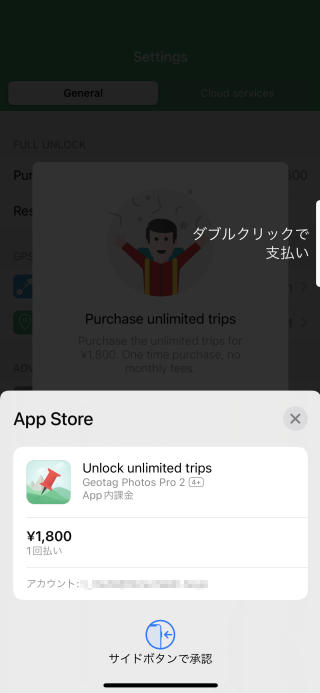 The screen will look like this.
Check the amount, number of payments, and billing account, and double-click the side button if there is no problem.
The screen will look like this.
Check the amount, number of payments, and billing account, and double-click the side button if there is no problem.
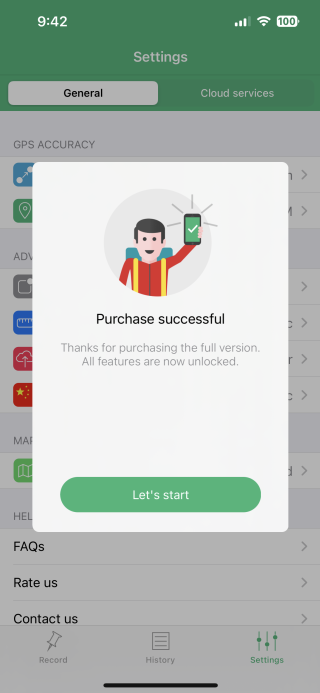 When the screen looks like this, the payment is complete.
The limit on the number of "trip" records has been unlocked.
When the screen looks like this, the payment is complete.
The limit on the number of "trip" records has been unlocked.
Write geotags (location information) to videos
There is no uniform way to write location information to video. Also, depending on the application that browses the video, where the location information written in the video is referenced varies.On this site, I explain how to write the recording date and time and location information to MPEG4 (.mp4) videos so that they can be recognized by Google Photos.