
Install free add-ons to MSFS, add airplanes, airports, and scenery How to use flightsim.to
The site flightsim.to allows you to download various user-developed content for Microsoft Flight Simulator for free or for a fee.
このページを日本語で見る
Contents
Add-on installation procedure
The steps to install additional content to Microsoft Flight Simulator are roughly as follows.- Download additional content, either for a fee or for free, from websites where the content is distributed.
- Downloaded content is usually compressed in ZIP, RAR, 7z format, etc. Unzip this in any folder.
- Move the unzipped files, including their entire folder, to the "Community" folder in the folder that stores MSFS data.
Uninstall
If you want to uninstall content, just delete the folder from the "Community" folder. If you want to check the influence/effect of the content, try moving the folder in and out of the "Community" folder.
Installation tips
The more additional content you install, the longer it takes to launch the game. You can speed up startup by loading and unloading content you don't usually use or wide-area scenery from the "Community" folder depending on the flight situation and location. Also, if you install multiple scenery with the same region, all content will be displayed overlapping regardless of the order. Please note that this will increase the display load.
What is flightsim.to?
This is one of the websites where user-developed mods, colorings, and add-ons for Microsoft Flight Simulator 2020 are collected. If you sign in, you can use all the basic functions for free, but if you become a paid Premium member, your download speed will be faster and ads will not be displayed.Sign in to flightsim.to
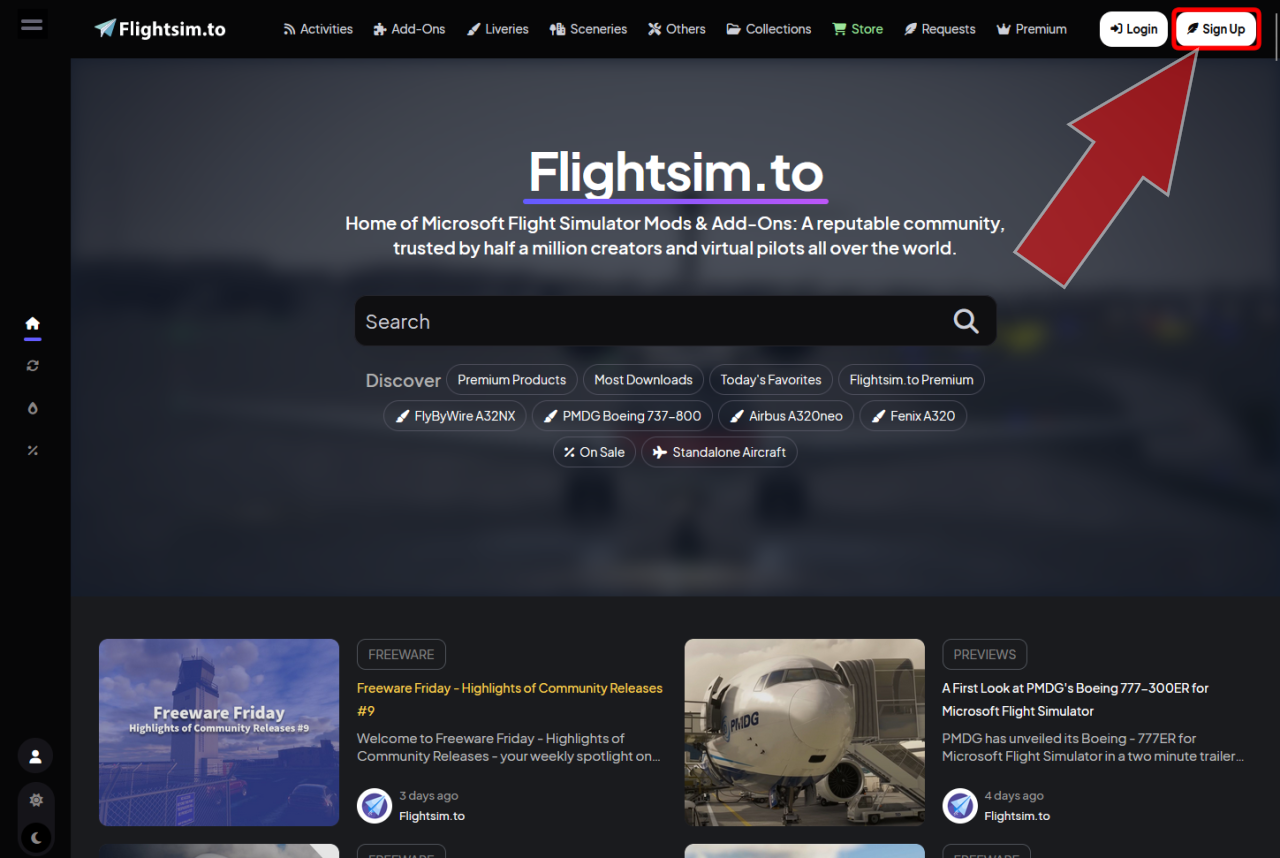 Open the
flightsim.to
website and click the "Sign Up" button at the top right of the screen.
Open the
flightsim.to
website and click the "Sign Up" button at the top right of the screen.
MSFS Mods, Add-Ons & Liveries - Flightsim.to
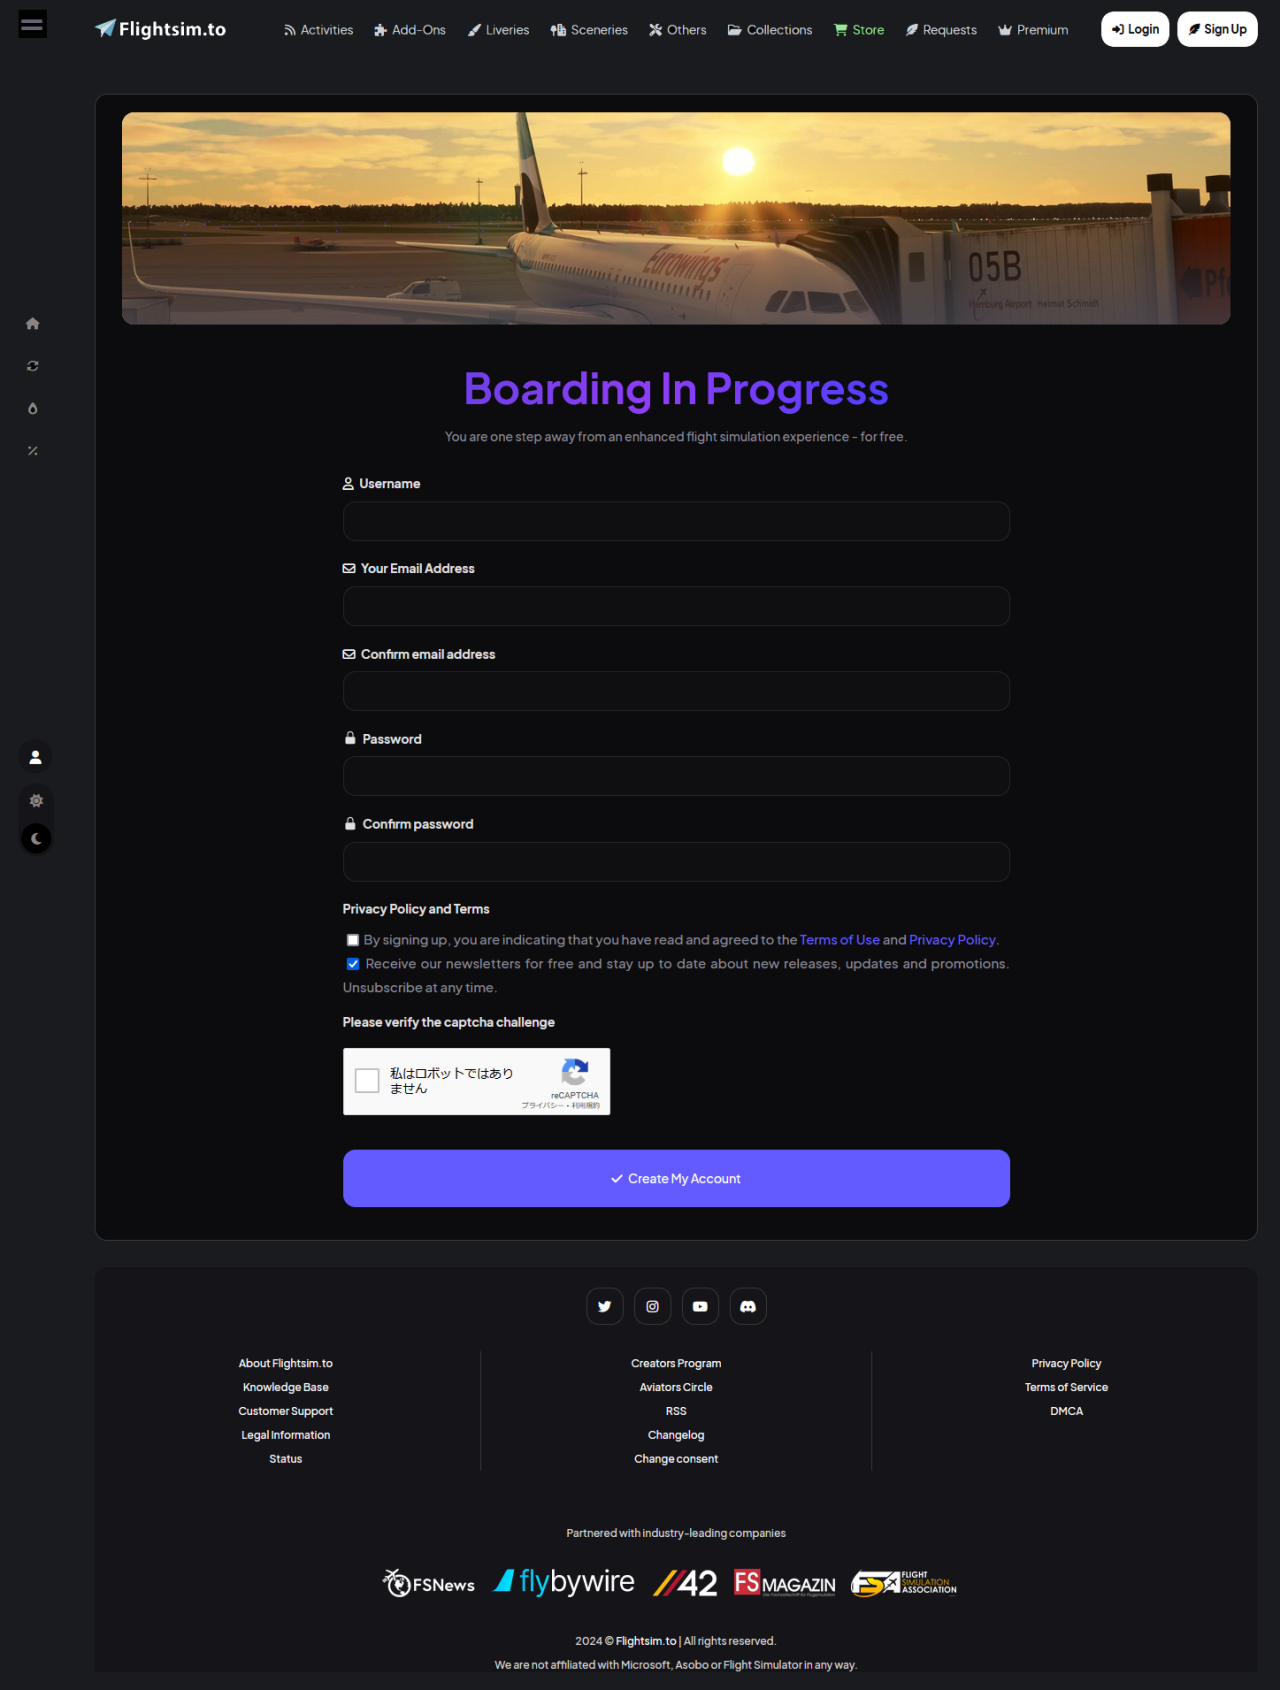 Then you will see a screen like this.
In the "Username" field, think of your pen name and enter it. This will be your logon ID. Your name will also appear on the screen when you post a comment.
In the "Your Email Address" and "Confirm email address" fields, enter your valid email address.
In the "Password" and "Confirm password" fields, think of and enter a password that will only be used for flightsim.to.
In the "Privacy Policy and Term" column, check the contents of the personal information protection policy and check it.
Finally, check "I'm not a robot" and click the "Create My Account" button.
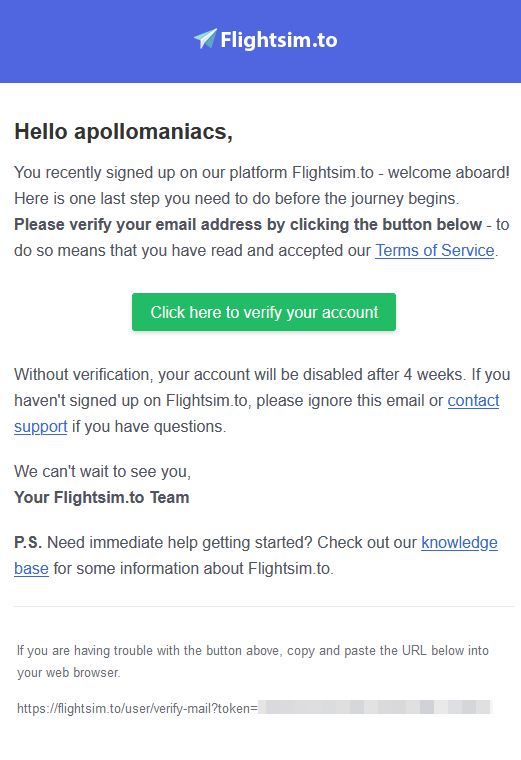 Once you have successfully created an account, you will receive an email like this to the email address you entered.
Click the green "Click here to verify your account" button to confirm your email address.
Once you have successfully created an account, you will receive an email like this to the email address you entered.
Click the green "Click here to verify your account" button to confirm your email address.
 When you open the
flightsim.to
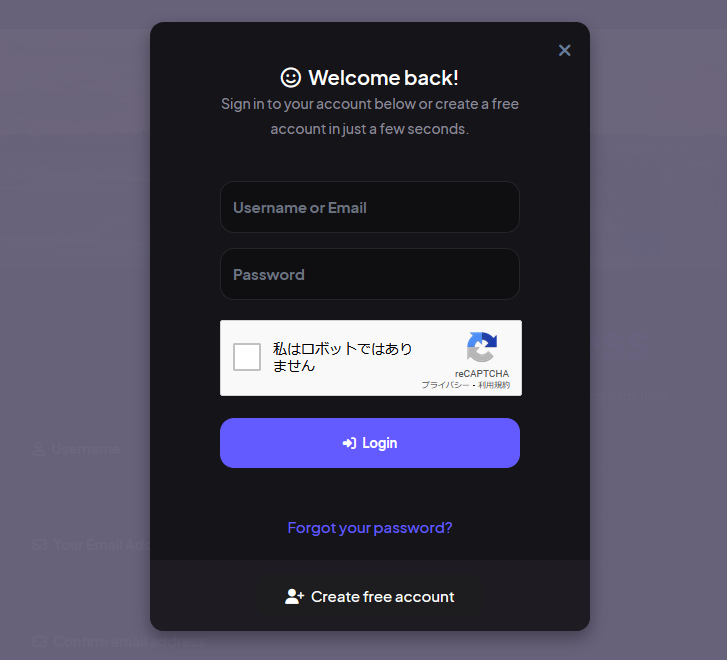
website and click the "Login" button at the top right of the screen, you will see a screen like this.
Enter the pen name or email address and password you entered when creating your account, check "I'm not a robot" and click the "Login" button.
When you open the
flightsim.to
website and click the "Login" button at the top right of the screen, you will see a screen like this.
Enter the pen name or email address and password you entered when creating your account, check "I'm not a robot" and click the "Login" button.
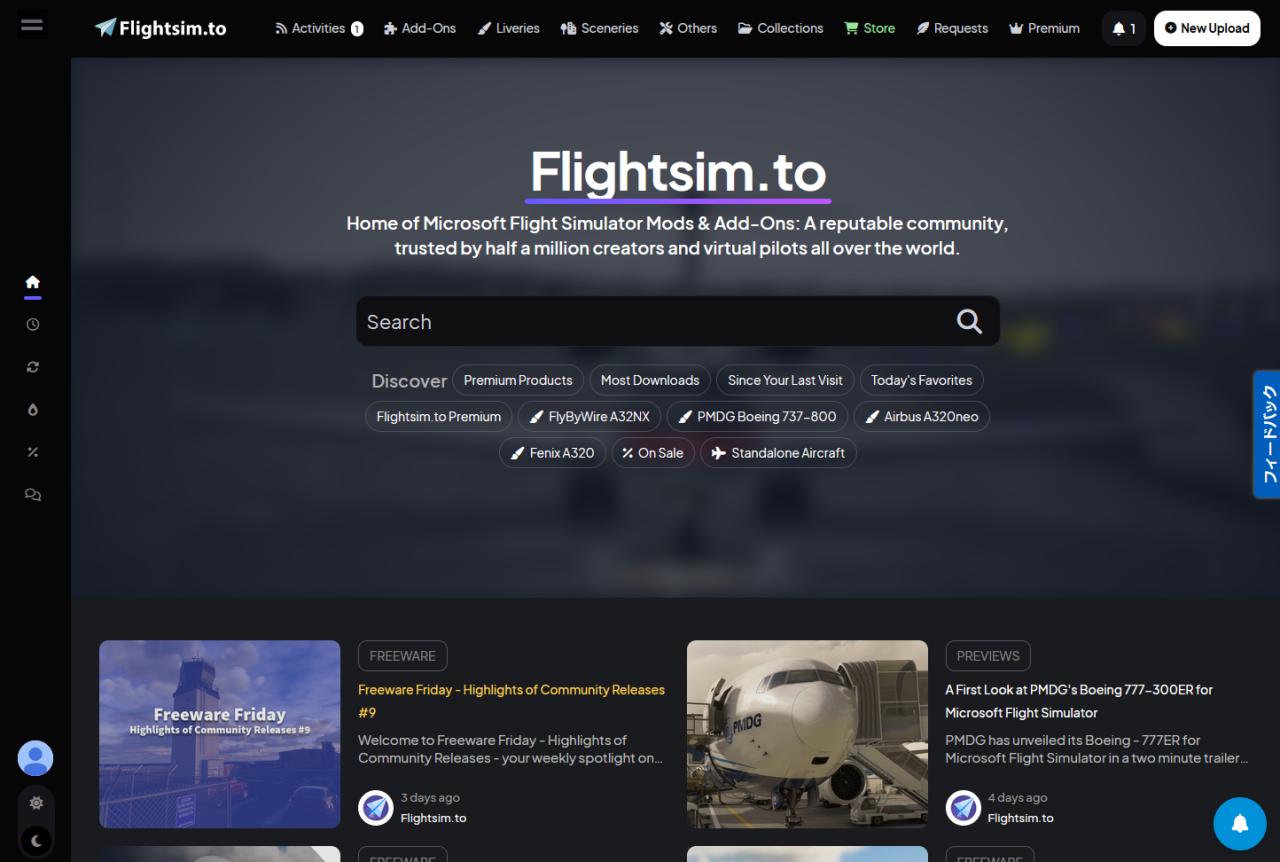 If you successfully log in, you will see a screen like this.
When you scroll the screen, you will see a lot of content lined up.
Clicking on the content you are interested in will take you to the detailed explanation screen for the content.
If you successfully log in, you will see a screen like this.
When you scroll the screen, you will see a lot of content lined up.
Clicking on the content you are interested in will take you to the detailed explanation screen for the content.
Find content
 At the top of the
flightsim.to
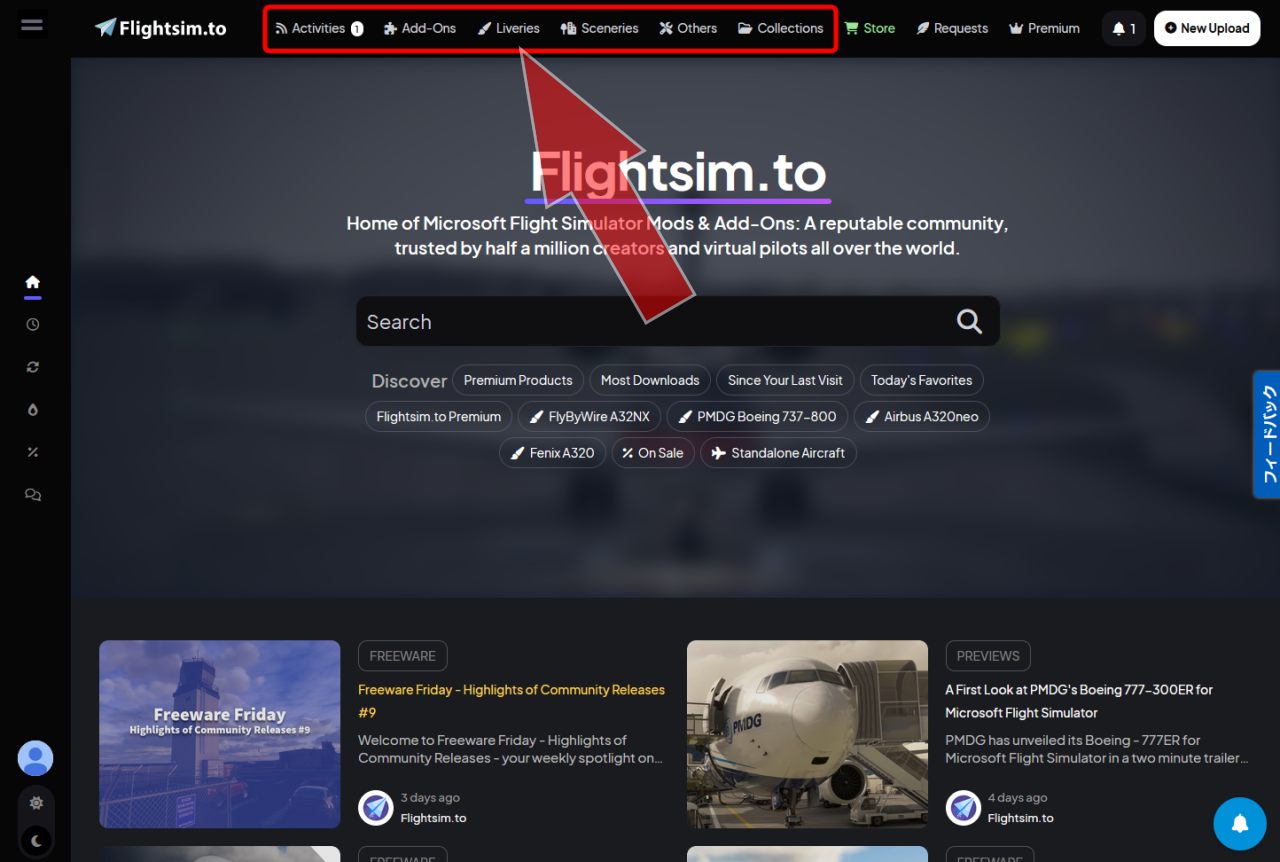
screen, you'll find a menu like this. From here you can search for content by category.
At the top of the
flightsim.to
screen, you'll find a menu like this. From here you can search for content by category.
In "Add-Ons", you can obtain various add-on data regarding the aircraft.
In "Liveries", you can obtain paint and cockpit add-ons for each aircraft.
In "Sceneries", you can obtain data on airports, buildings, and scenery.
Other tools are available under "Others".
 Let's look for airports and scenery here.
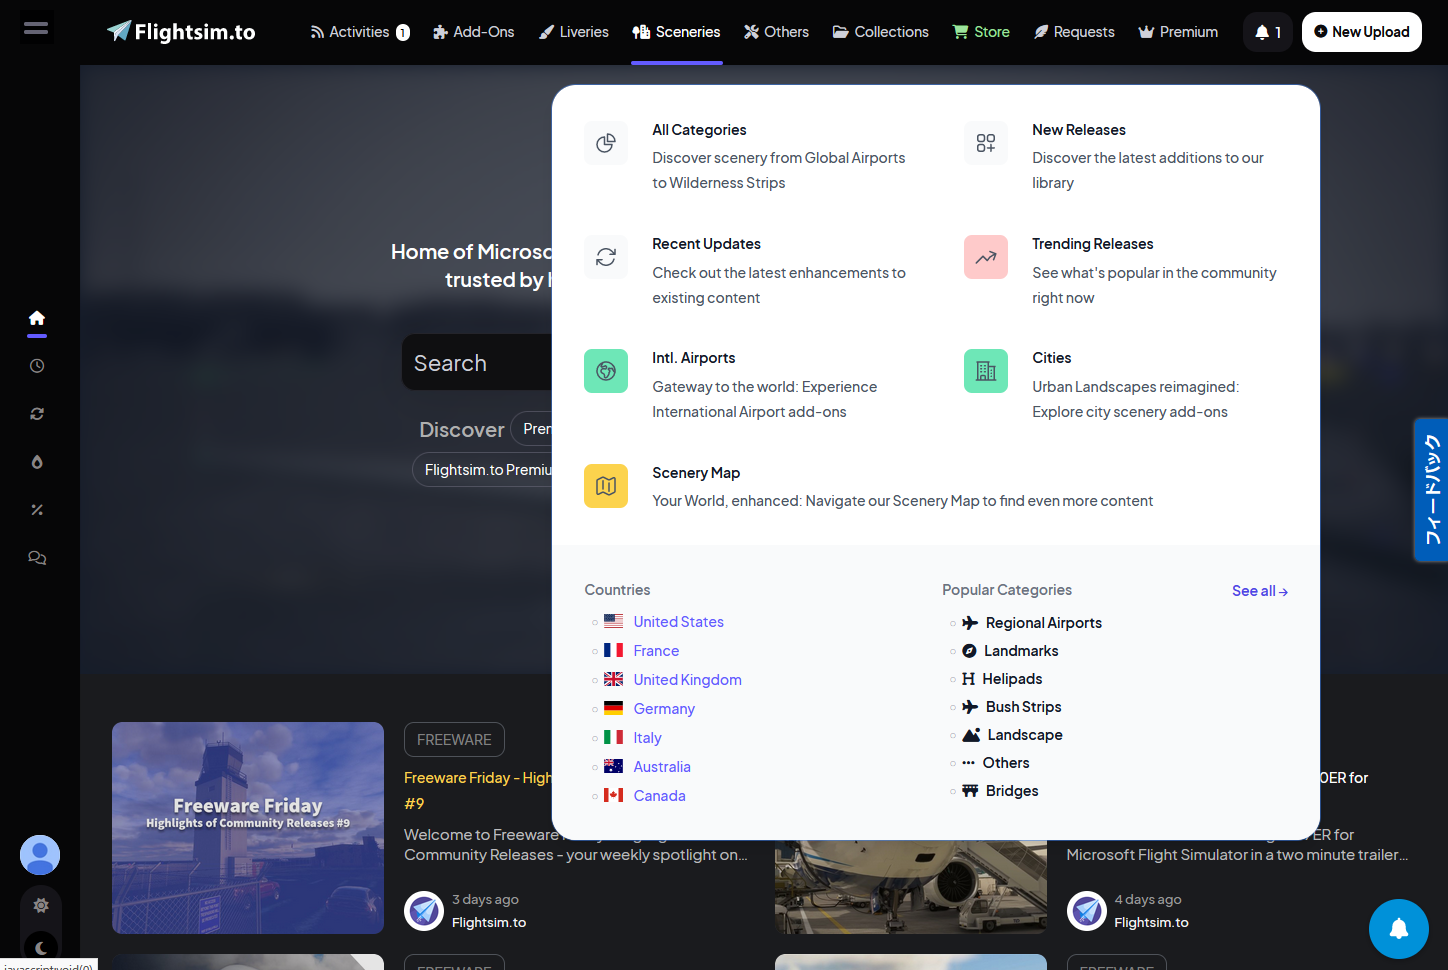
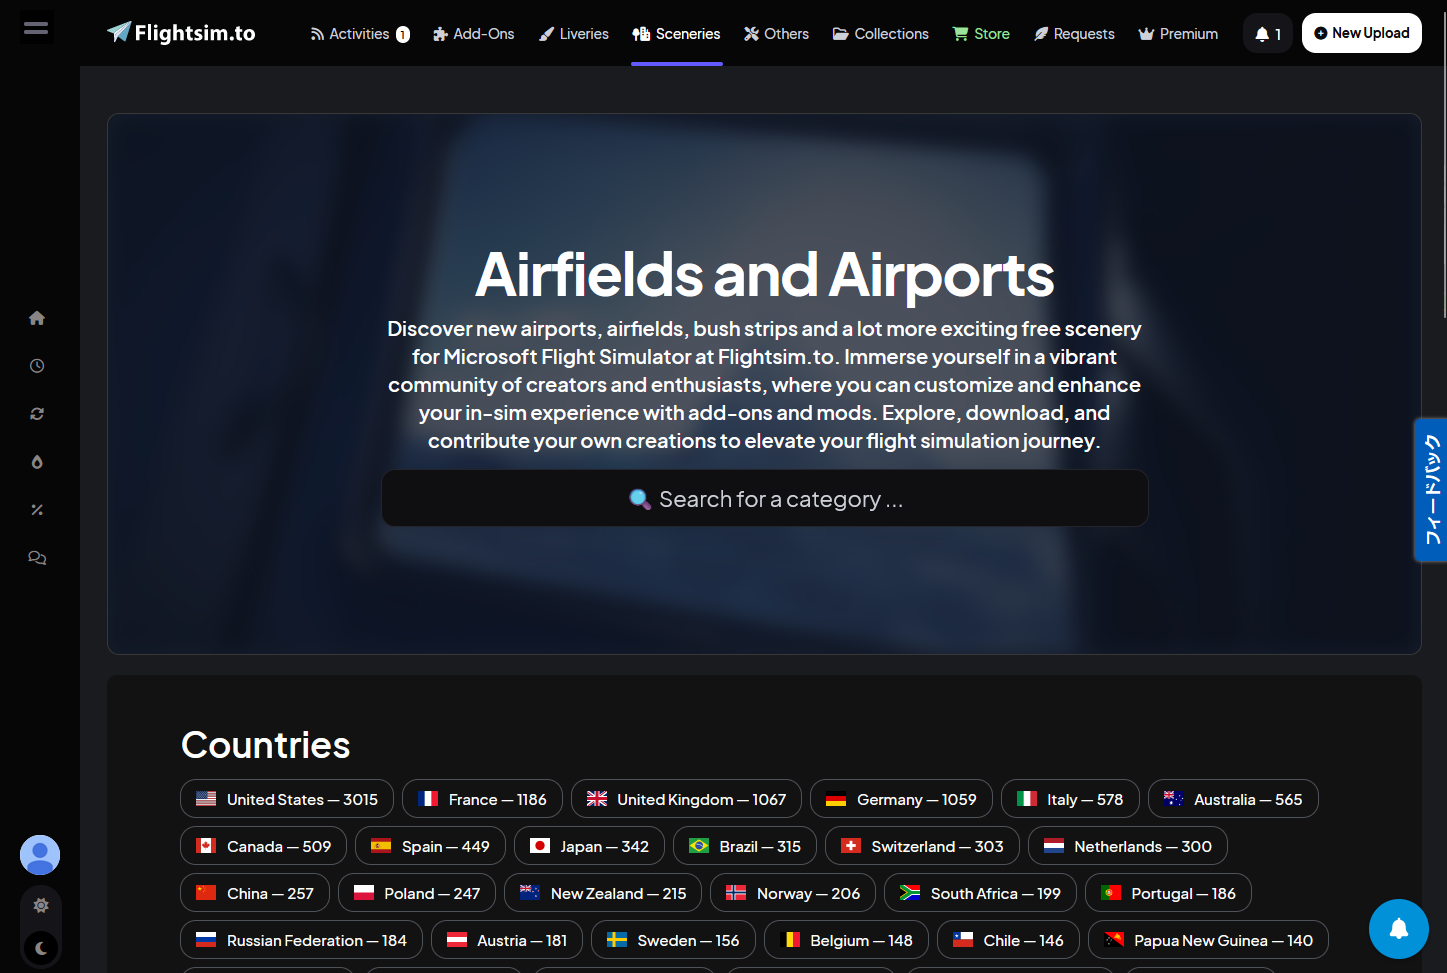
When you click "Sceneries" in the menu, a screen like this will be displayed.
Let's look for airports and scenery here.
When you click "Sceneries" in the menu, a screen like this will be displayed.
Click "All Categories" to see all the contents of "Sceneries".
Click "New Releases" to see recently added content.
Click "Recent Update" to see recently updated content.
In addition, you can display categories such as popular content, international airports, cities, and scenery maps.
At the bottom of this screen, you'll find a list of countries and some of the most popular categories. You can also choose from here.
 When you click "All Categories" on the screen above, a screen like this will appear.
You can enter subcategories in the search box to extract content by category.
When you click "All Categories" on the screen above, a screen like this will appear.
You can enter subcategories in the search box to extract content by category.
As an example, click the "Japan" button at the bottom of this screen to list content related to Japan.
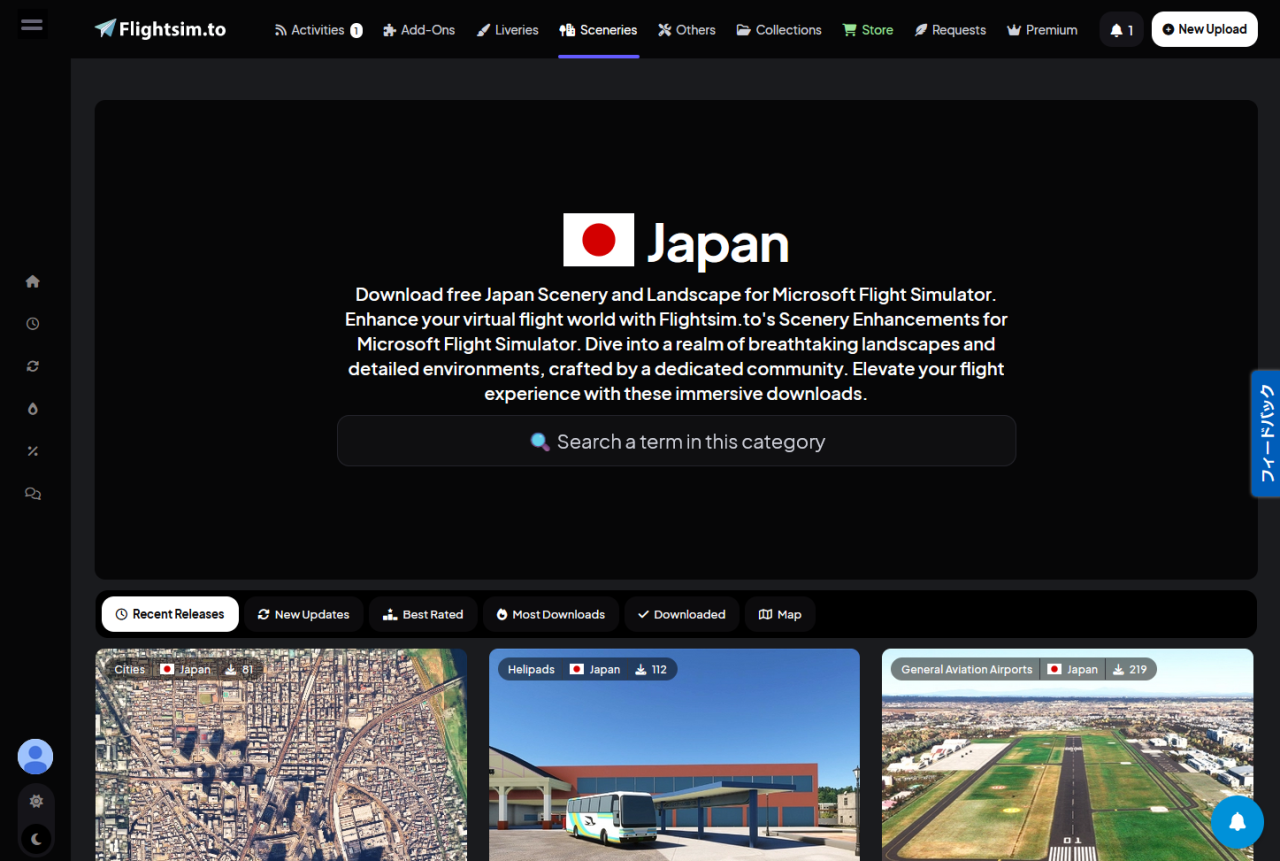 Then it will look like this.
Scroll the screen to find the content you like.
Then it will look like this.
Scroll the screen to find the content you like.
 Each content has various marks.
Free content will display the number of downloads so far, and paid content will display a "$" mark and price.
Content that you have already downloaded will have a green checkmark in front of its title name.
For popular content, the number of stars and reviews given by users will be displayed.
Each content has various marks.
Free content will display the number of downloads so far, and paid content will display a "$" mark and price.
Content that you have already downloaded will have a green checkmark in front of its title name.
For popular content, the number of stars and reviews given by users will be displayed.
Also, sometimes you will find titles with "fictional" in them, which indicates that they are fictional airports or scenery created by users.
Use this information to find high-quality content.
For example, in the case of city scenery, you may find multiple pieces of content that cover similar areas. In such cases, choose the content you want to download based on information such as whether it has a better reputation, is updated frequently, or has a newer release date.
Download & install content
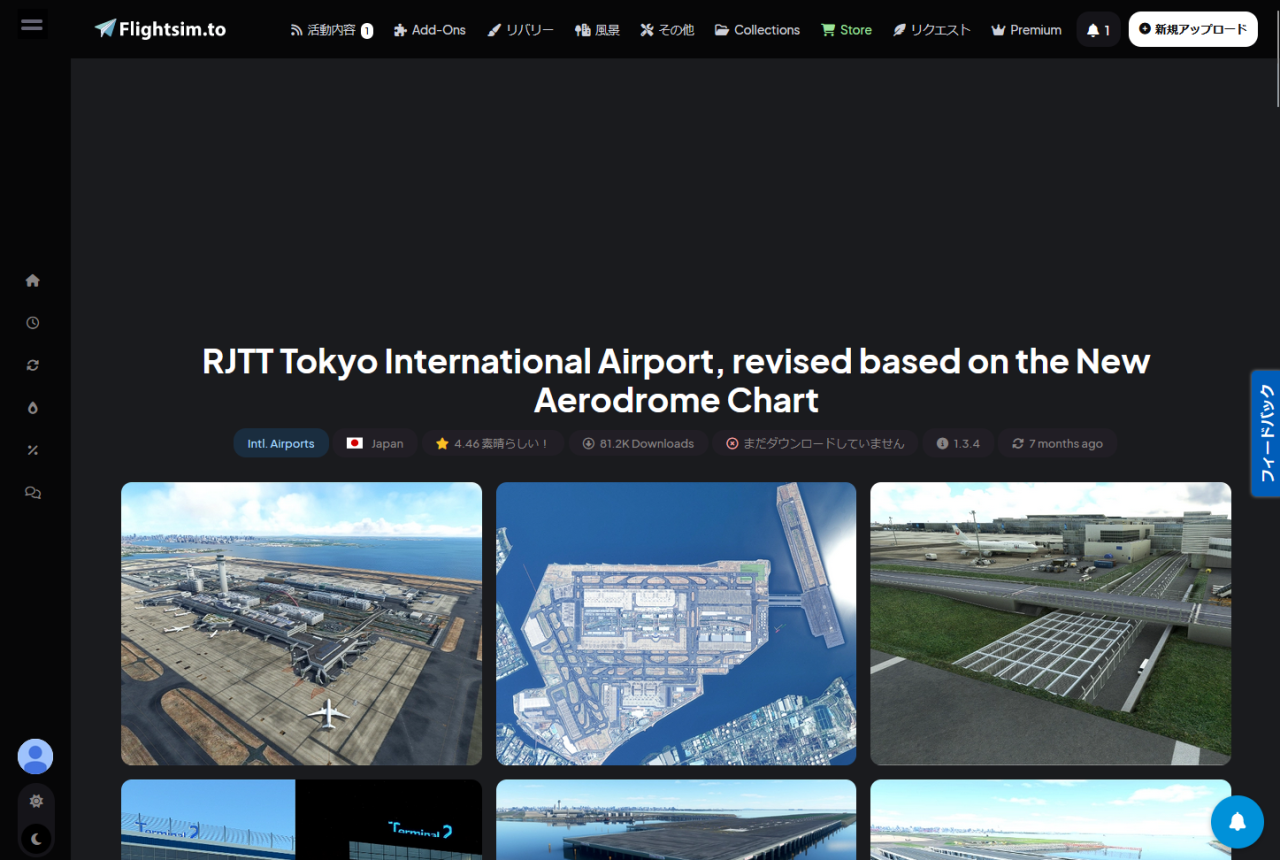 When you find content you like, click on it and a detailed explanation page will open like this.
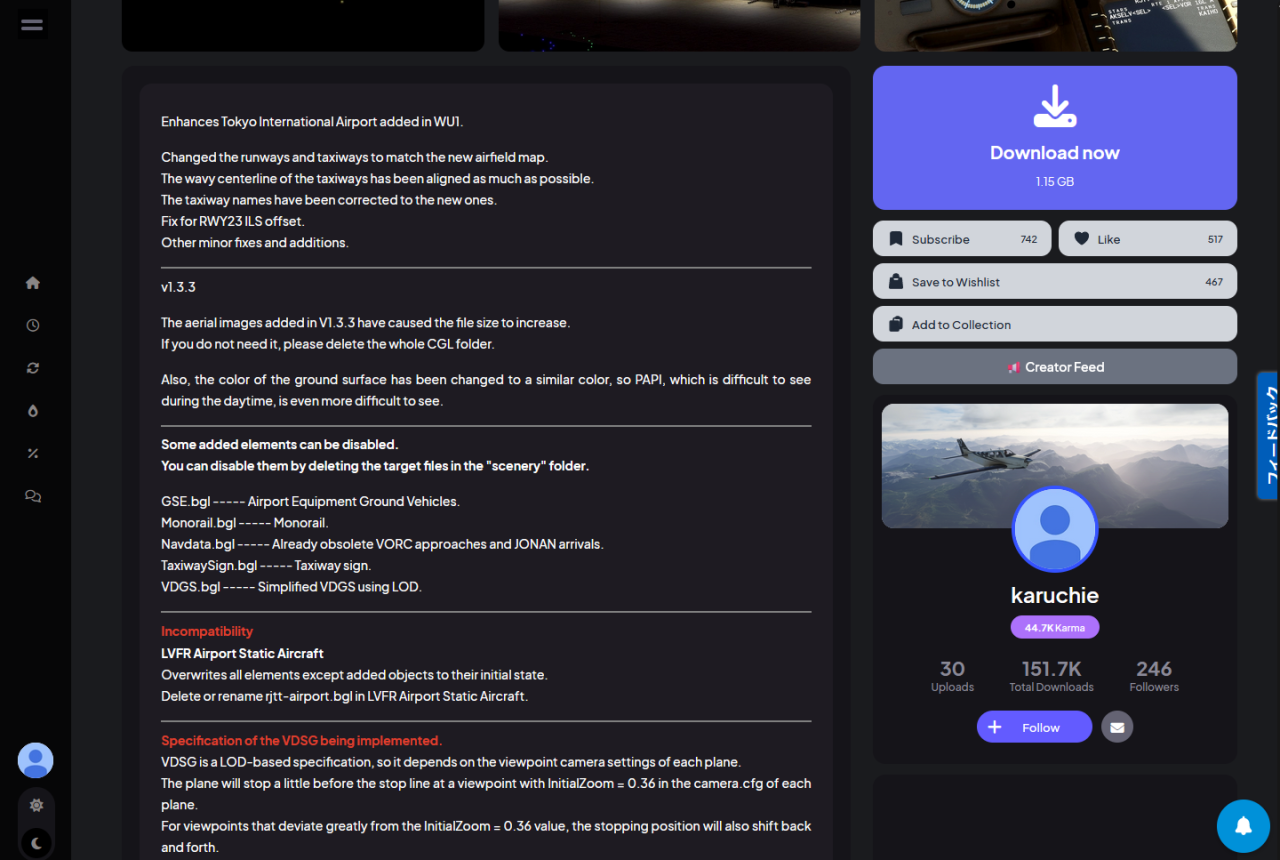 Scroll the screen to read a detailed description of the content.
This may contain important information such as installation instructions, compatibility with other content, and precautions.
Look through it carefully.
Scroll the screen to read a detailed description of the content.
This may contain important information such as installation instructions, compatibility with other content, and precautions.
Look through it carefully.
In particular, be aware that some content named "Enhanced" assumes that other paid/free content has already been installed.
Click the "Download now" button at the top right of the screen to download the content. However, if the browser screen size is small, the "Download now" button will be displayed at the bottom of the screen.
 When you click the "Download now" button, the screen will change and the countdown will begin.
If you are a paid Premium member, this screen will be skipped and you can download it immediately.
When you click the "Download now" button, the screen will change and the countdown will begin.
If you are a paid Premium member, this screen will be skipped and you can download it immediately.
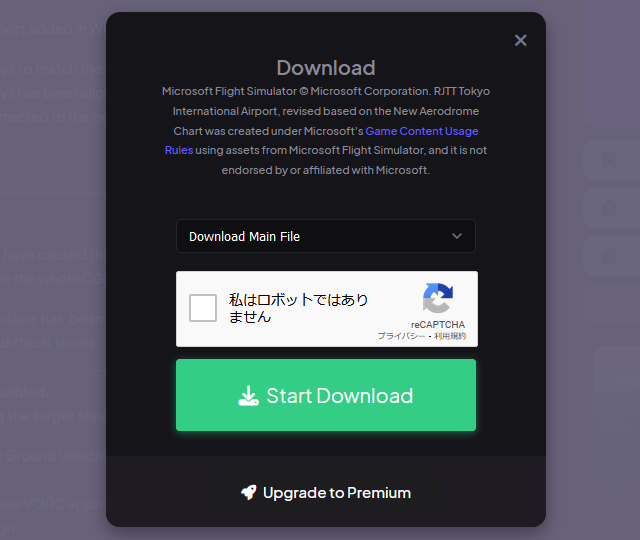 The screen will then change to something like this.
Depending on the content, you may be able to select past versions or related files by clicking where it says "Download Main File."
The screen will then change to something like this.
Depending on the content, you may be able to select past versions or related files by clicking where it says "Download Main File."
Check "I'm not a robot" and click the "Start Download" button to start downloading the content.
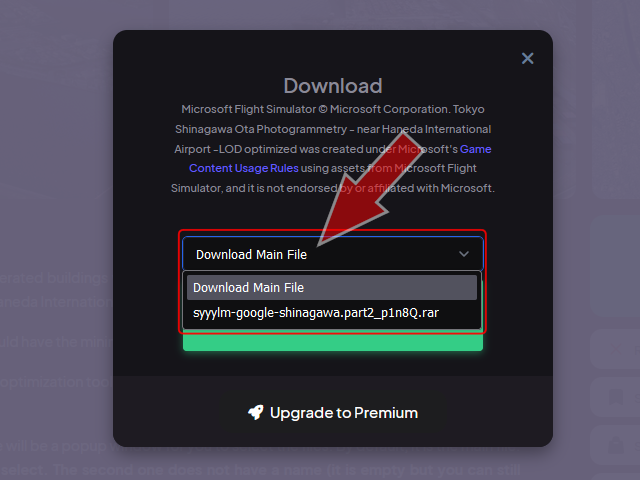 Some content may be distributed in multiple files.
For such content, click where it says "Download Main File" and you can select the file to download like this.
Some content may be distributed in multiple files.
For such content, click where it says "Download Main File" and you can select the file to download like this.
In the example on this screen, the file is divided into two files: "Main File" and "part2". Once you have finished downloading the "Main File", you will need to click the "Download now" button to return to this screen again and download "part2" as well.
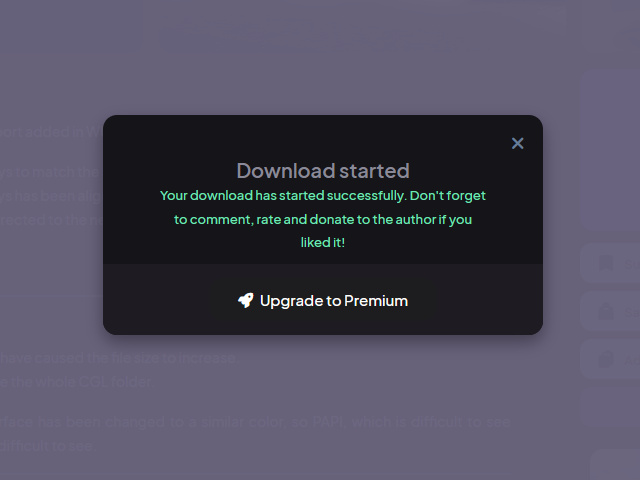 Click the "Start Download" button to switch to a screen like this.
Click the "X" in the upper right corner to return to the detailed explanation screen for this content.
Click the "Start Download" button to switch to a screen like this.
Click the "X" in the upper right corner to return to the detailed explanation screen for this content.
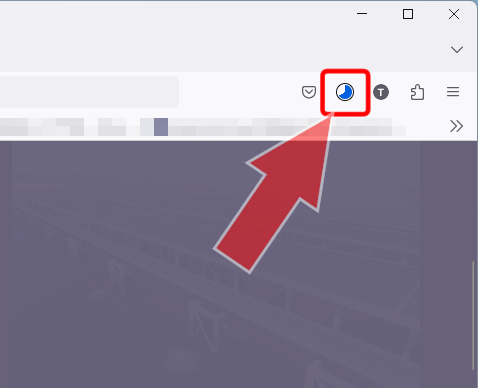 In many browsers, a graph etc. will be displayed in the upper right corner of the screen to indicate that the download is in progress.
Wait for the download to finish.
In many browsers, a graph etc. will be displayed in the upper right corner of the screen to indicate that the download is in progress.
Wait for the download to finish.
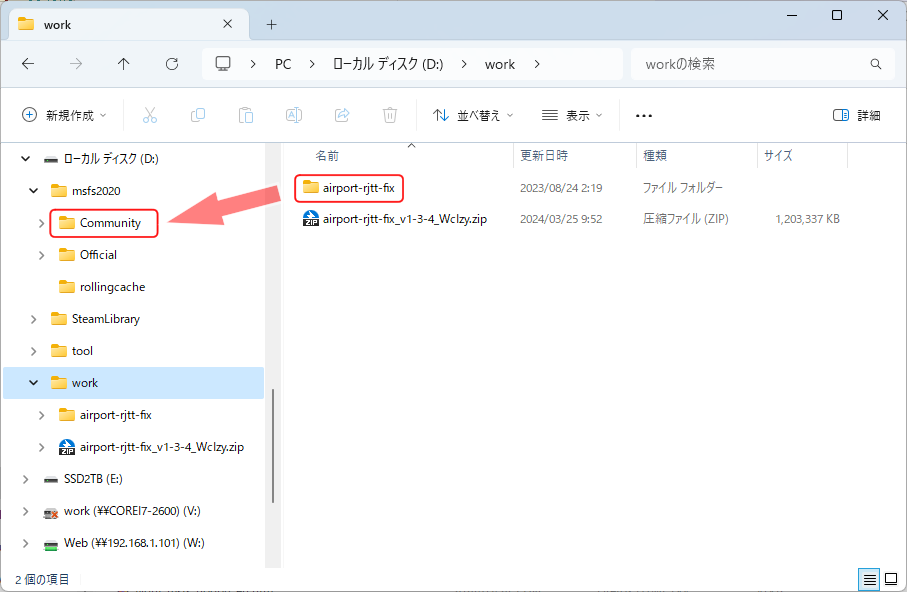 Once the download is complete, you will get a ZIP or RAR file like this, so unzip it.
It will then be extracted to a folder with the same name as the compressed file.
Move this entire folder to the "Community" folder inside the folder containing the MSFS data.
The installation is now complete. ZIP/RAR files can be deleted.
Once the download is complete, you will get a ZIP or RAR file like this, so unzip it.
It will then be extracted to a folder with the same name as the compressed file.
Move this entire folder to the "Community" folder inside the folder containing the MSFS data.
The installation is now complete. ZIP/RAR files can be deleted.
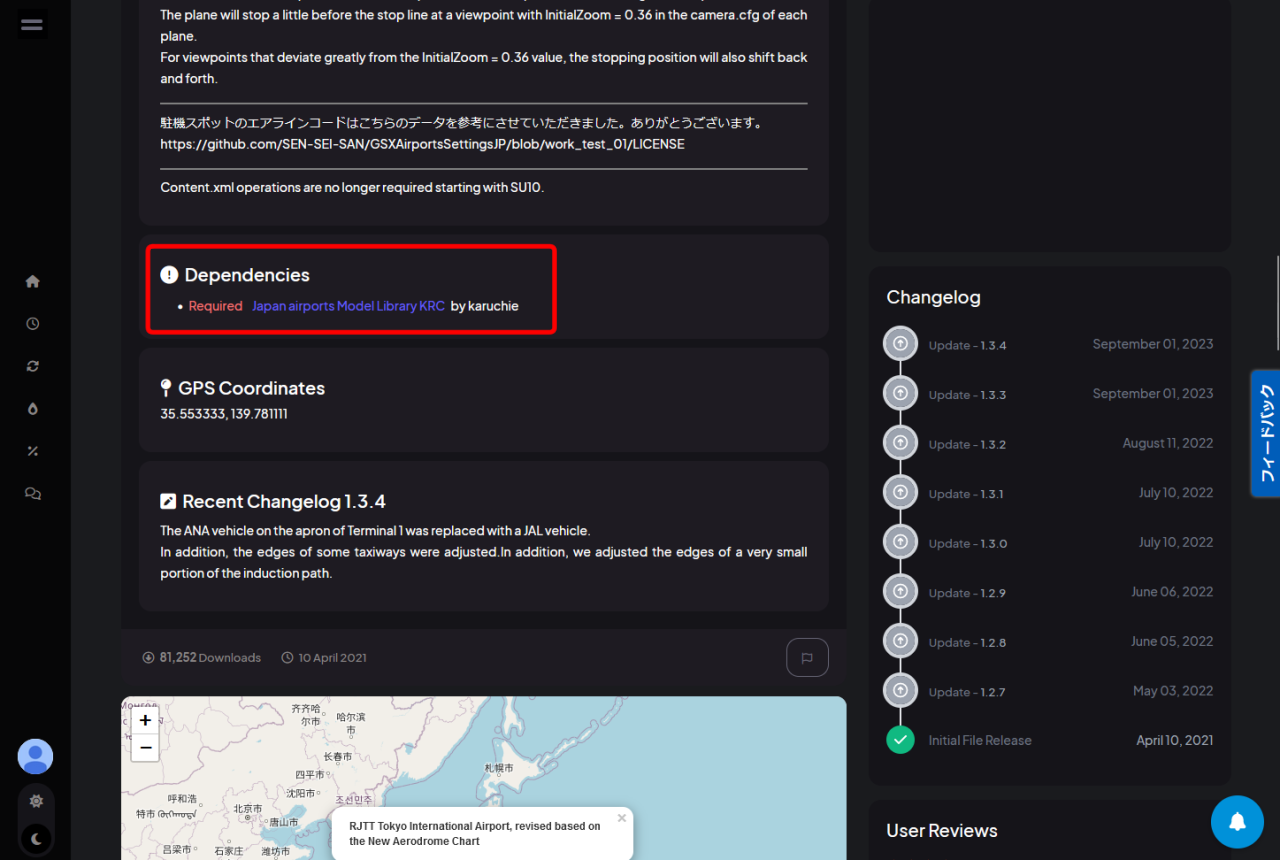 Please note that some content may have dependencies with other content.
Carefully read the detailed explanation screen and download and install any additional content you need.
Please note that some content may have dependencies with other content.
Carefully read the detailed explanation screen and download and install any additional content you need.
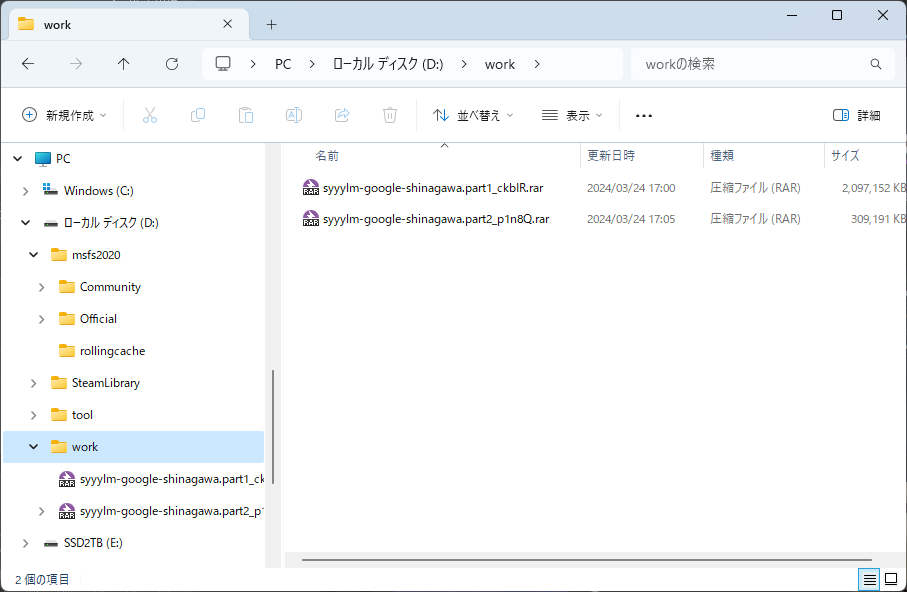 If the content is distributed in multiple files, please download all of them in order.
In the example on this screen, it has been divided into two RAR format files, "part1" and "part2."
If the content is distributed in multiple files, please download all of them in order.
In the example on this screen, it has been divided into two RAR format files, "part1" and "part2."
In such cases, there are two types: cases where you simply unzip multiple files, and cases where the files are in "split RAR" format.
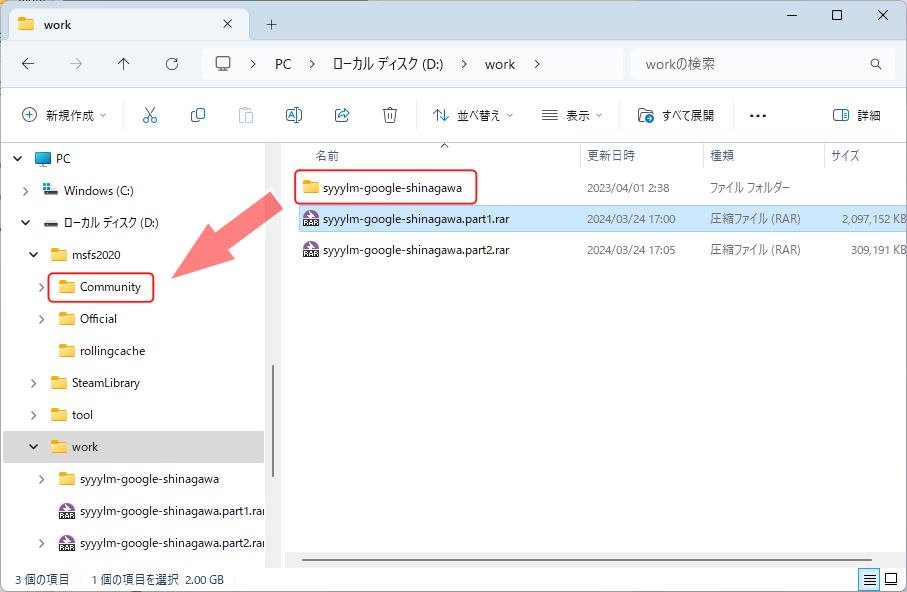 In case of "split RAR" format, change the file name (delete the part after "part1" and "part2") as shown in this figure, then specify the file "part1" and unzip it.
The contents of all compressed files will then be combined and extracted into a single folder with the same name as the compressed file.
Move this entire folder to the "Community" folder inside the folder containing the MSFS data.
The installation is now complete. ZIP/RAR files can be deleted.
In case of "split RAR" format, change the file name (delete the part after "part1" and "part2") as shown in this figure, then specify the file "part1" and unzip it.
The contents of all compressed files will then be combined and extracted into a single folder with the same name as the compressed file.
Move this entire folder to the "Community" folder inside the folder containing the MSFS data.
The installation is now complete. ZIP/RAR files can be deleted.
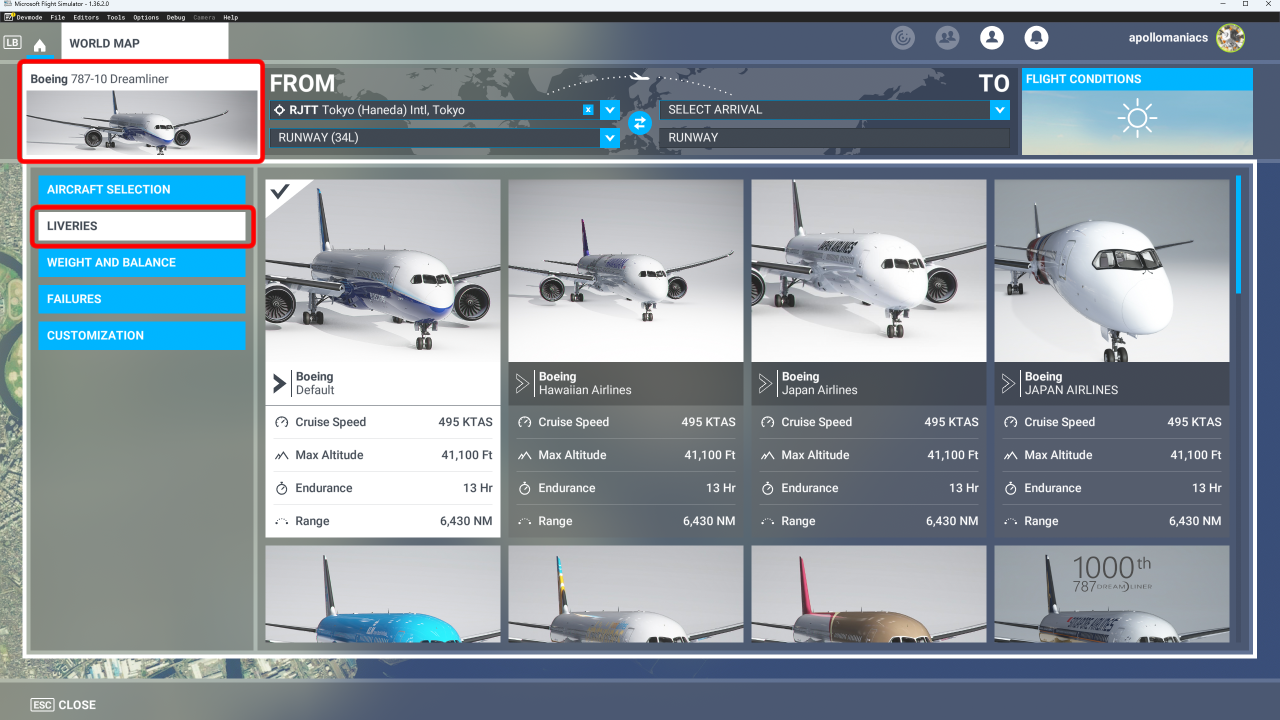 Simply place scenery and buildings in the "Community" folder and they will be placed where they should be in the simulation world.
You can select the aircraft paint by clicking [LIVERIES] on the aircraft selection screen when starting a flight.
Simply place scenery and buildings in the "Community" folder and they will be placed where they should be in the simulation world.
You can select the aircraft paint by clicking [LIVERIES] on the aircraft selection screen when starting a flight.
Create optional content for MSFS yourself
To create content for MSFS yourself, switch MSFS to [DEVELOPER MODE] and use the SDK (Software Development Kit) that can be downloaded from the [HELP] menu. Microsoft has published a site that explains this SDK: Flight Simulator SDK Documentation page.And as for how to use the SDK, YouTube is a waste of time, Mr./Mrs. superspud has published his A Written MSFS SDK Scenery Creation Tutorial on flightsim.to, which is very helpful as it provides detailed explanations for beginners. It includes a wealth of samples and documentation, but start with "MSFS Airport and Scenery Creation.pdf".
Flight Simulator SDK Documentation (Microsoft)
A Written MSFS SDK Scenery Creation Tutorial (Flightsim.to)