
How to add an SSD or hard disk to a Windows 11 computer/How to change the drive name
If you add an SSD or hard disk to your computer, you cannot use it just by connecting the cable. Initialization and partition assignment using Windows management tools is required.
このページを日本語で見る
Adding an SSD or hard disk
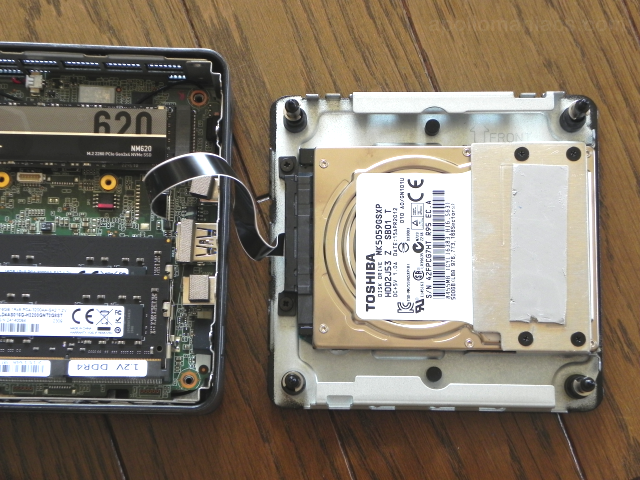 First, install an HDD/SSD on your computer.
The installation method and the storage devices that can be installed differ depending on the computer.
Please check the manufacturer's official website.
First, install an HDD/SSD on your computer.
The installation method and the storage devices that can be installed differ depending on the computer.
Please check the manufacturer's official website.
Buy 2.5 inch HDD (Amazon.com)
Buy 2.5 inch SSD (Amazon.com)
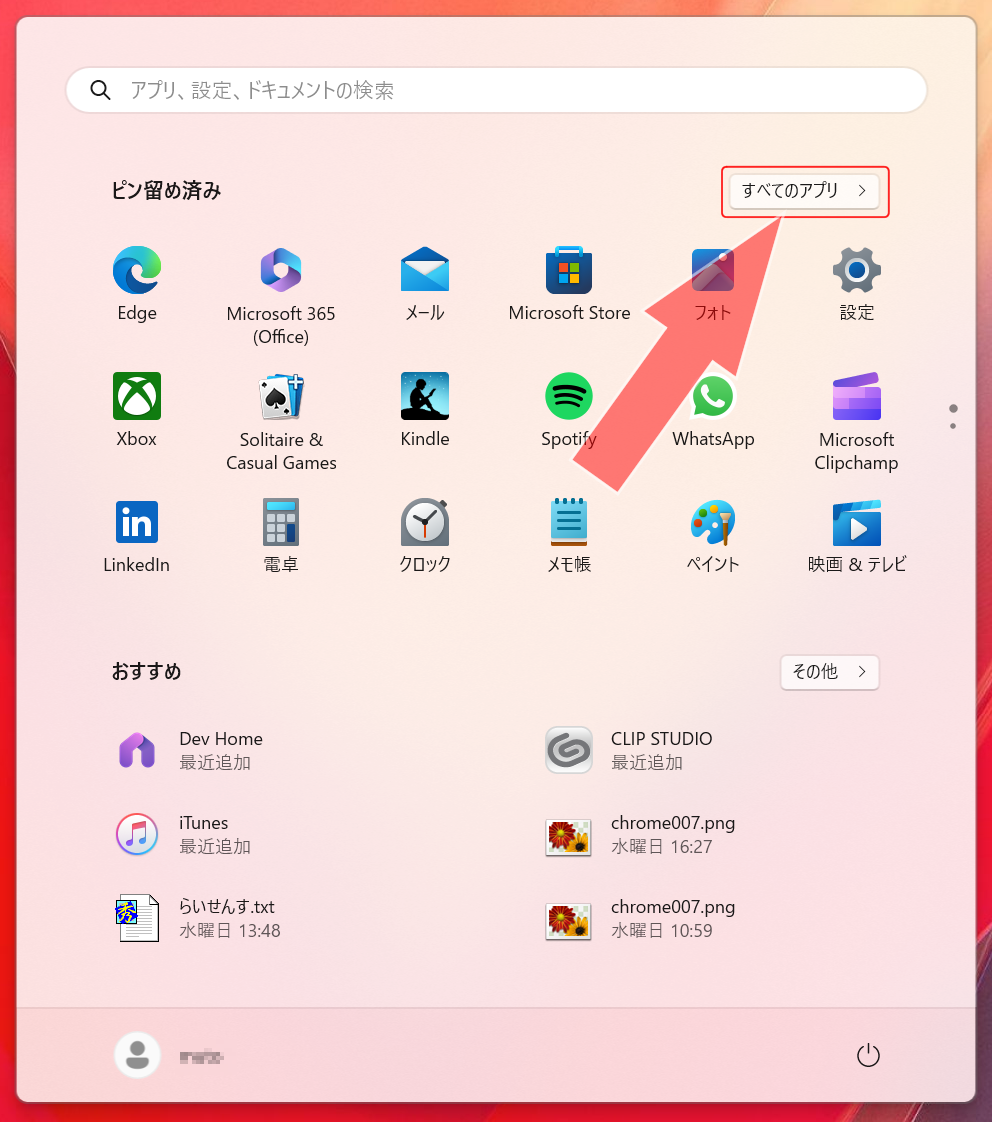 When you press the [Start] key, a screen like this will appear.
Click "All apps" in the top right corner.
When you press the [Start] key, a screen like this will appear.
Click "All apps" in the top right corner.
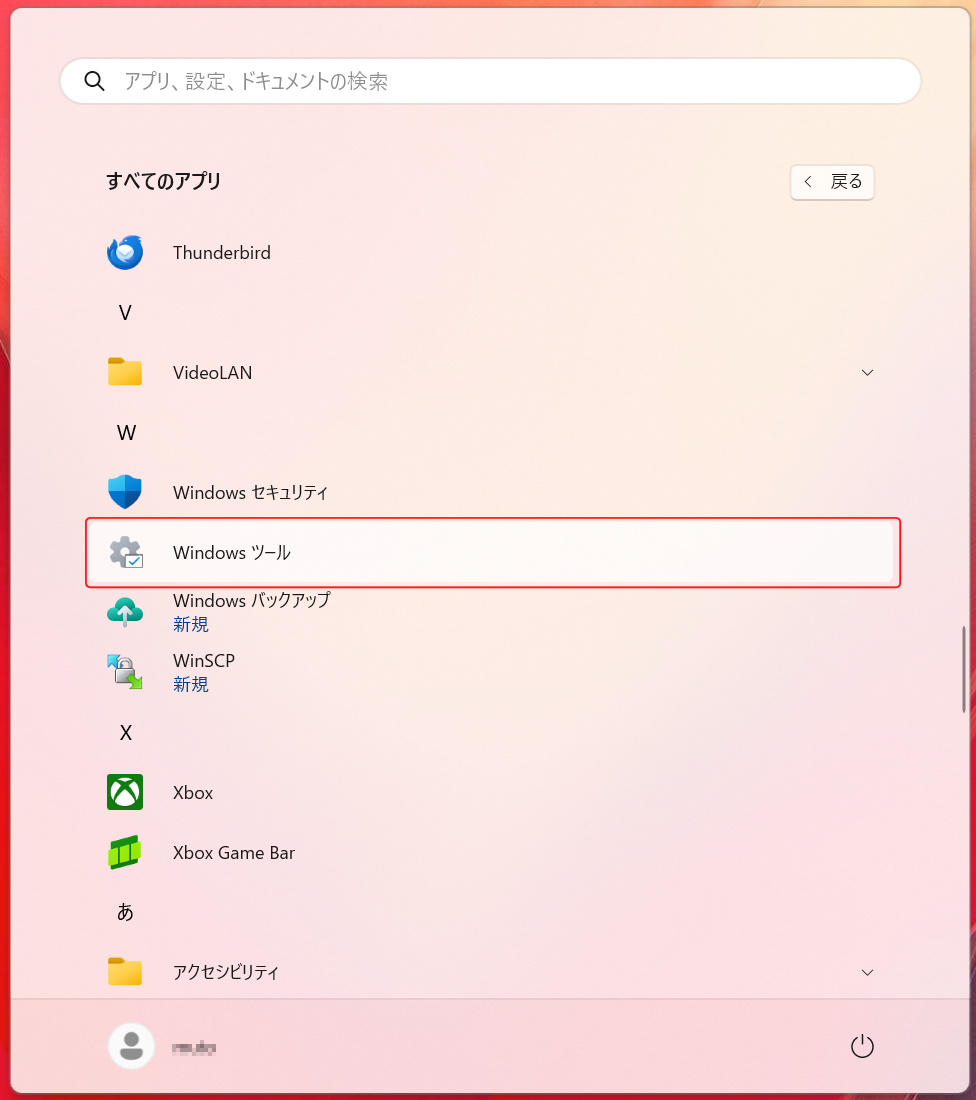 Select "Windows Tools" from the list.
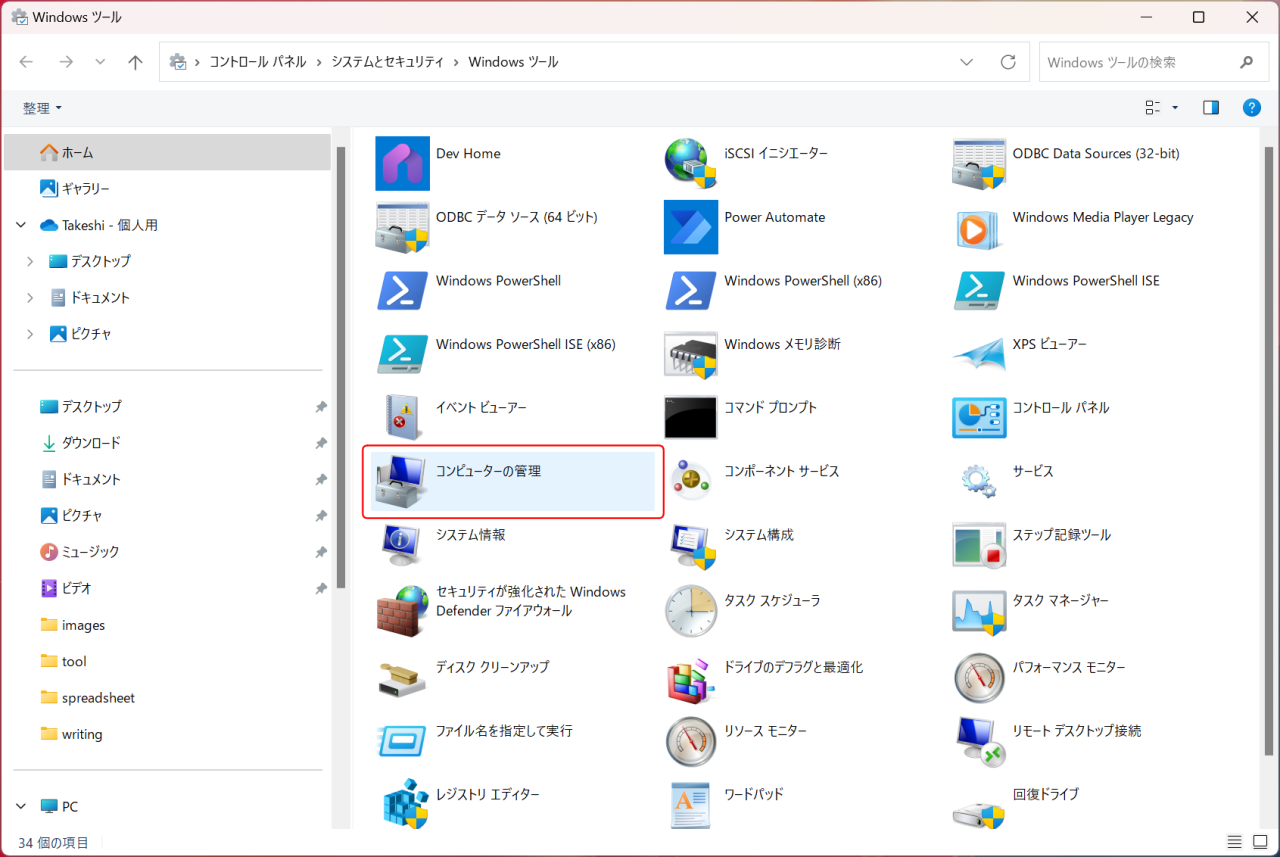 Then you will see a screen like this.
Click "Computer Management".
Then you will see a screen like this.
Click "Computer Management".
 The "Computer Management" app will start.
Click "Disk Management" from the left menu.
The "Computer Management" app will start.
Click "Disk Management" from the left menu.
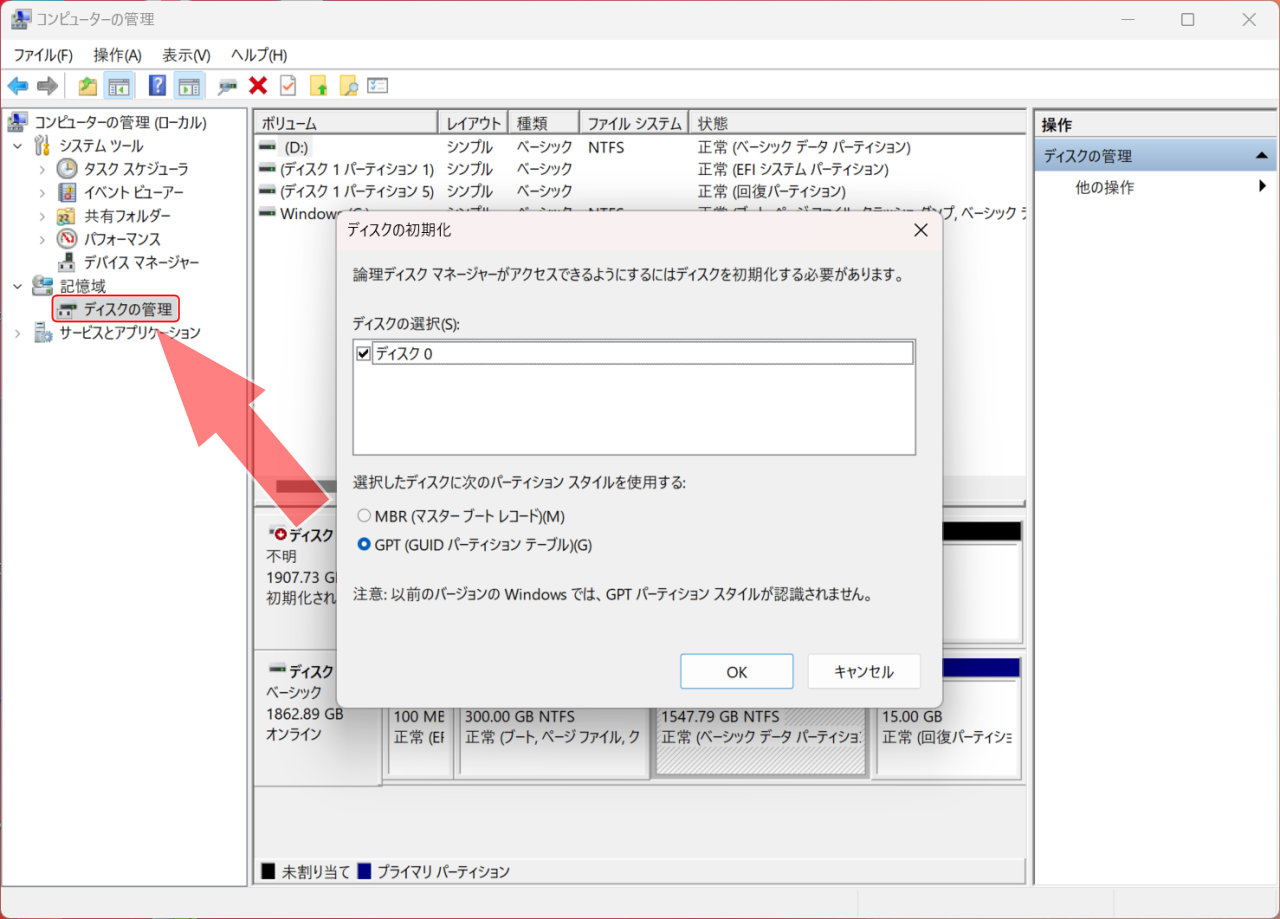
If there is a drive that has been added to your computer but has not been initialized yet, a dialog box like this will appear. Make sure "GPT" is selected and click "OK".
This screen will not appear if you add a drive that has already been initialized. Start with the steps below.
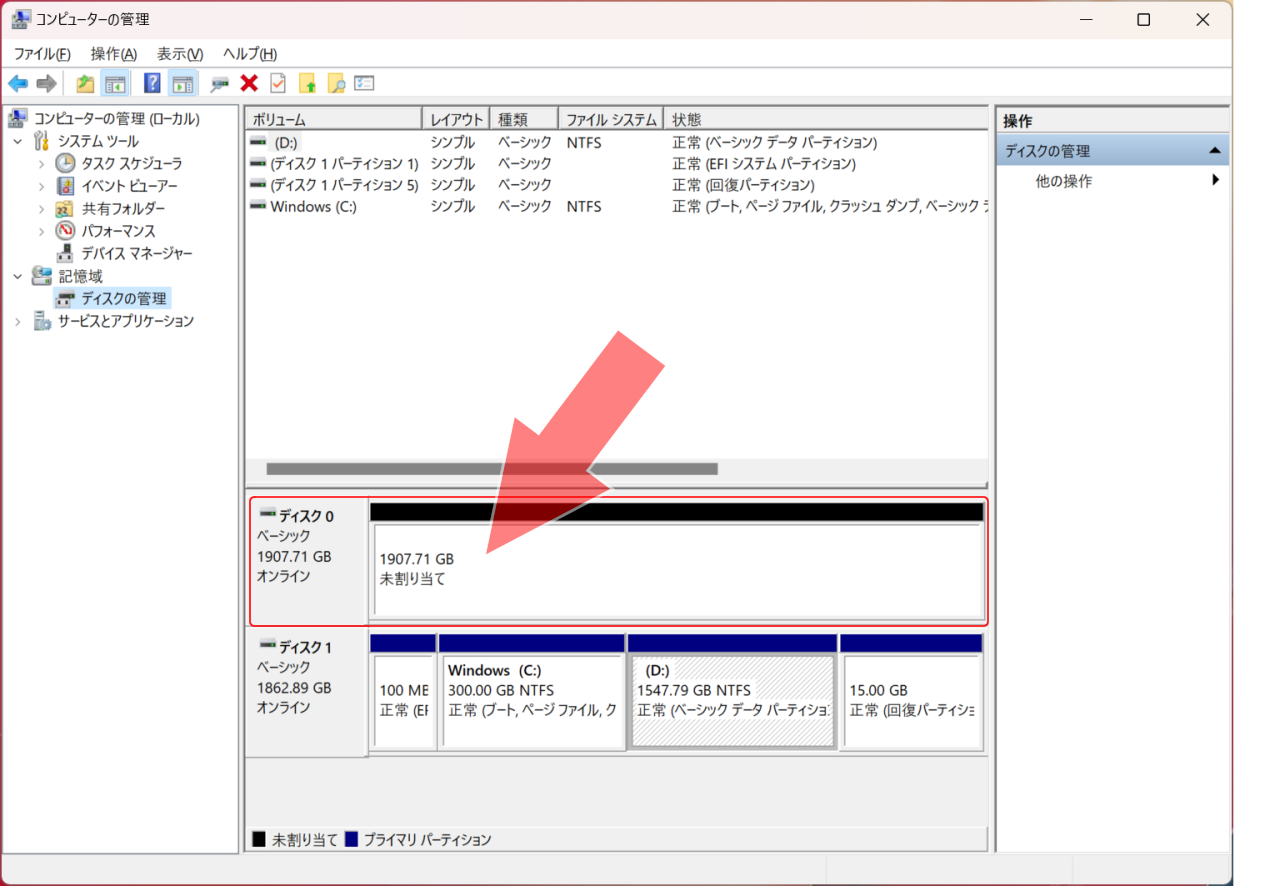 Initialization will be completed in an instant, and the drive will be displayed on the "Disk Management" screen.
However, it is displayed as "Unallocated", so it cannot be used on Windows yet.
Assign a partition (volume) here.
Right click on this area.
Initialization will be completed in an instant, and the drive will be displayed on the "Disk Management" screen.
However, it is displayed as "Unallocated", so it cannot be used on Windows yet.
Assign a partition (volume) here.
Right click on this area.
When adding a drive to which a partition (volume) has already been assigned, "Unallocated" will not be displayed. It can be used on Windows as is. If you want to format or repartition your drive, see Rename/format the drive .
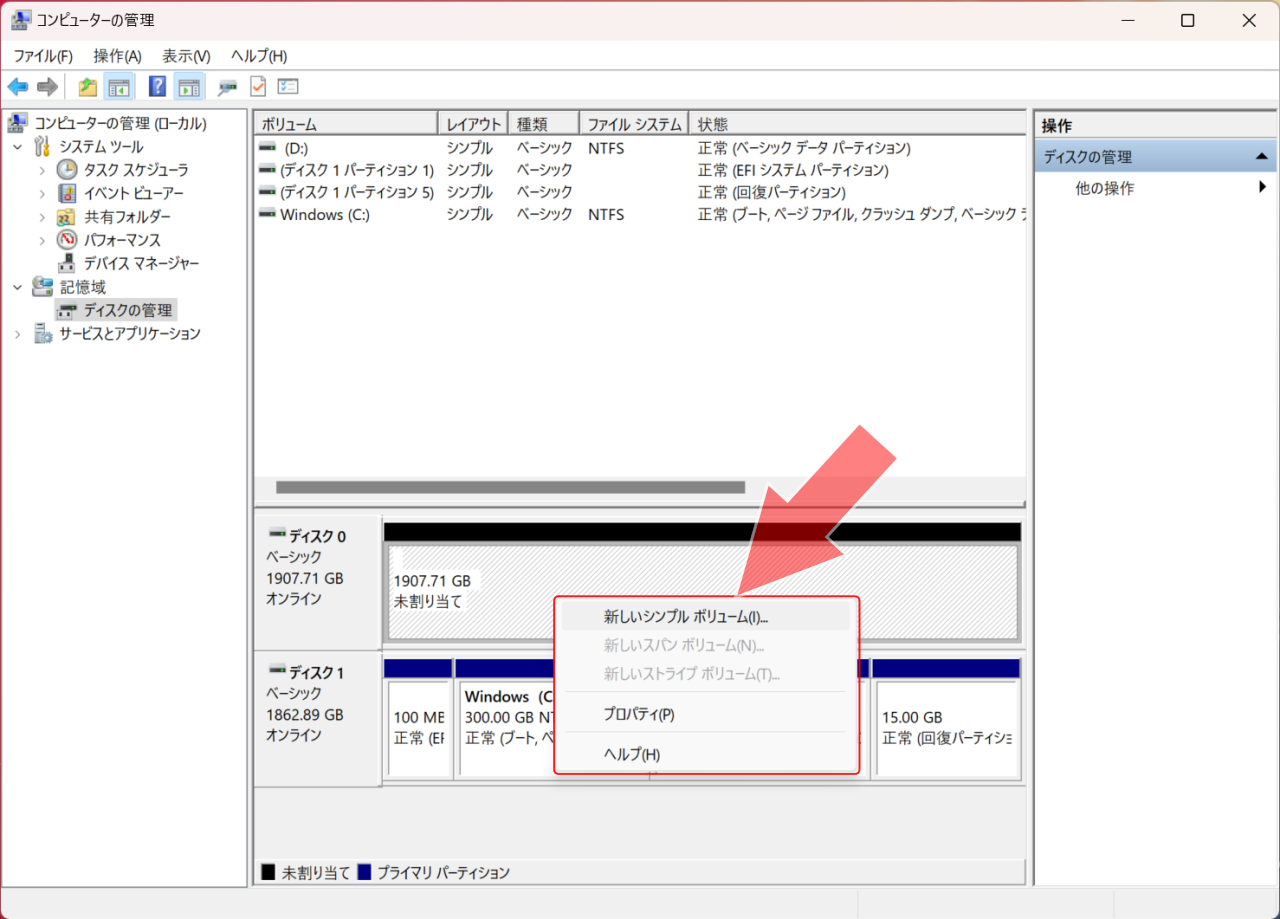 Then a menu like this will be displayed.
Select "New Simple Volume".
Then a menu like this will be displayed.
Select "New Simple Volume".
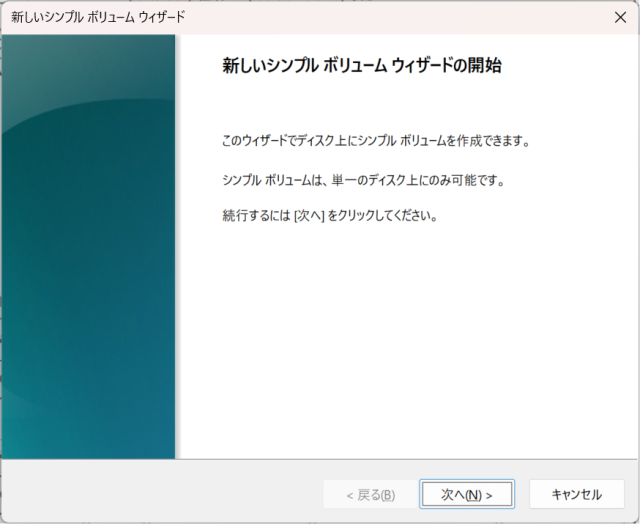 The "New Simple Volume Wizard" will then start.
Click Next.
The "New Simple Volume Wizard" will then start.
Click Next.
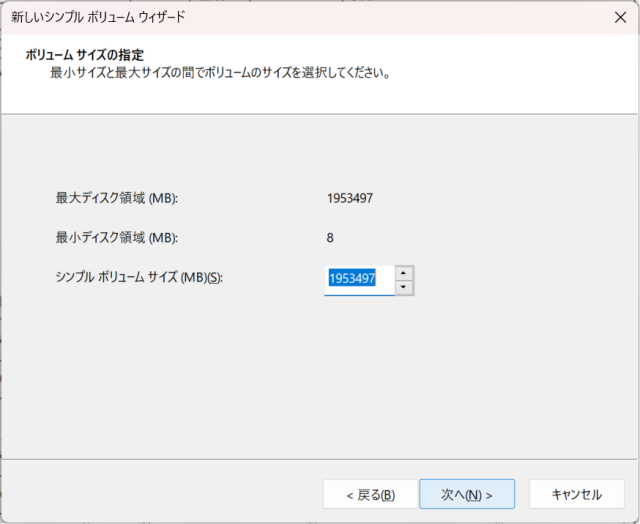 Specify the capacity to allocate to the partition (volume).
The initial value is set to the full capacity of the drive.
If there are no problems, click "Next".
Specify the capacity to allocate to the partition (volume).
The initial value is set to the full capacity of the drive.
If there are no problems, click "Next".
If you want to create multiple partitions (volumes), specify the capacity to allocate to the first partition (volume).
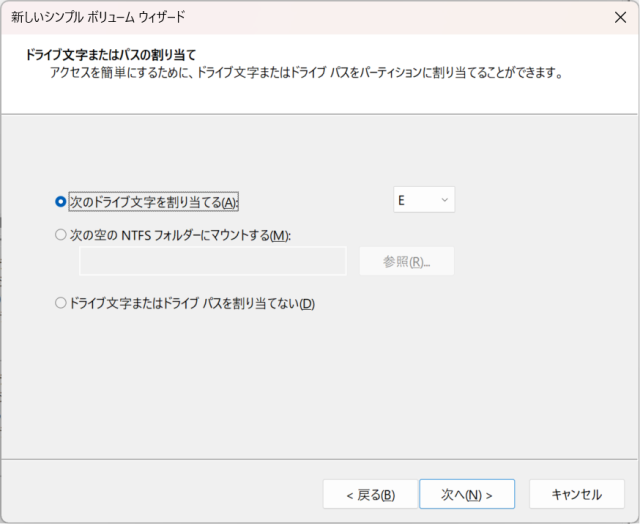 Next, specify the drive letter assigned to the partition (volume).
Then click Next.
Next, specify the drive letter assigned to the partition (volume).
Then click Next.
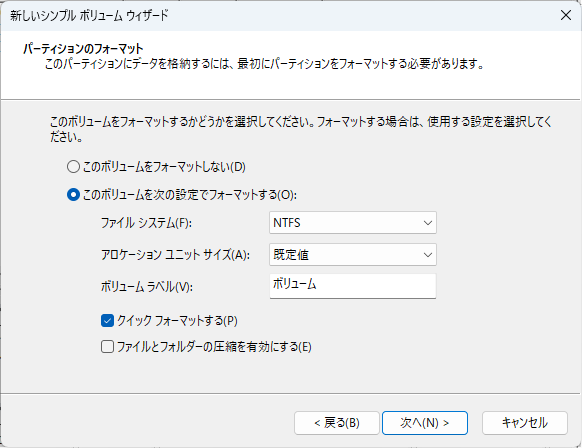 Next, specify the name to assign to the partition (volume) and whether to format it.
Normally, format it with the NTFS file system as shown in the photo on the right.
Give the volume label a name of your choice.
Next, specify the name to assign to the partition (volume) and whether to format it.
Normally, format it with the NTFS file system as shown in the photo on the right.
Give the volume label a name of your choice.
If you want to initialize all sectors of the drive, uncheck "Quick format". However, this takes a very long time. If you want to dispose of your drive, use this option to erase all data.
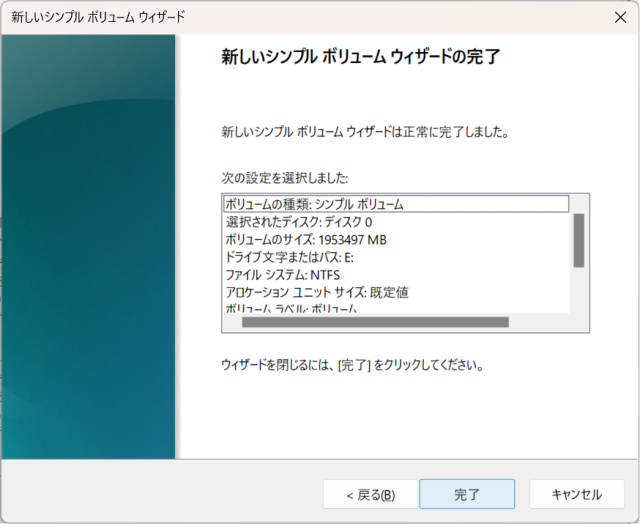 A screen like this will appear, and partition (volume) creation is complete.
You should also be able to see this drive in Explorer.
A screen like this will appear, and partition (volume) creation is complete.
You should also be able to see this drive in Explorer.
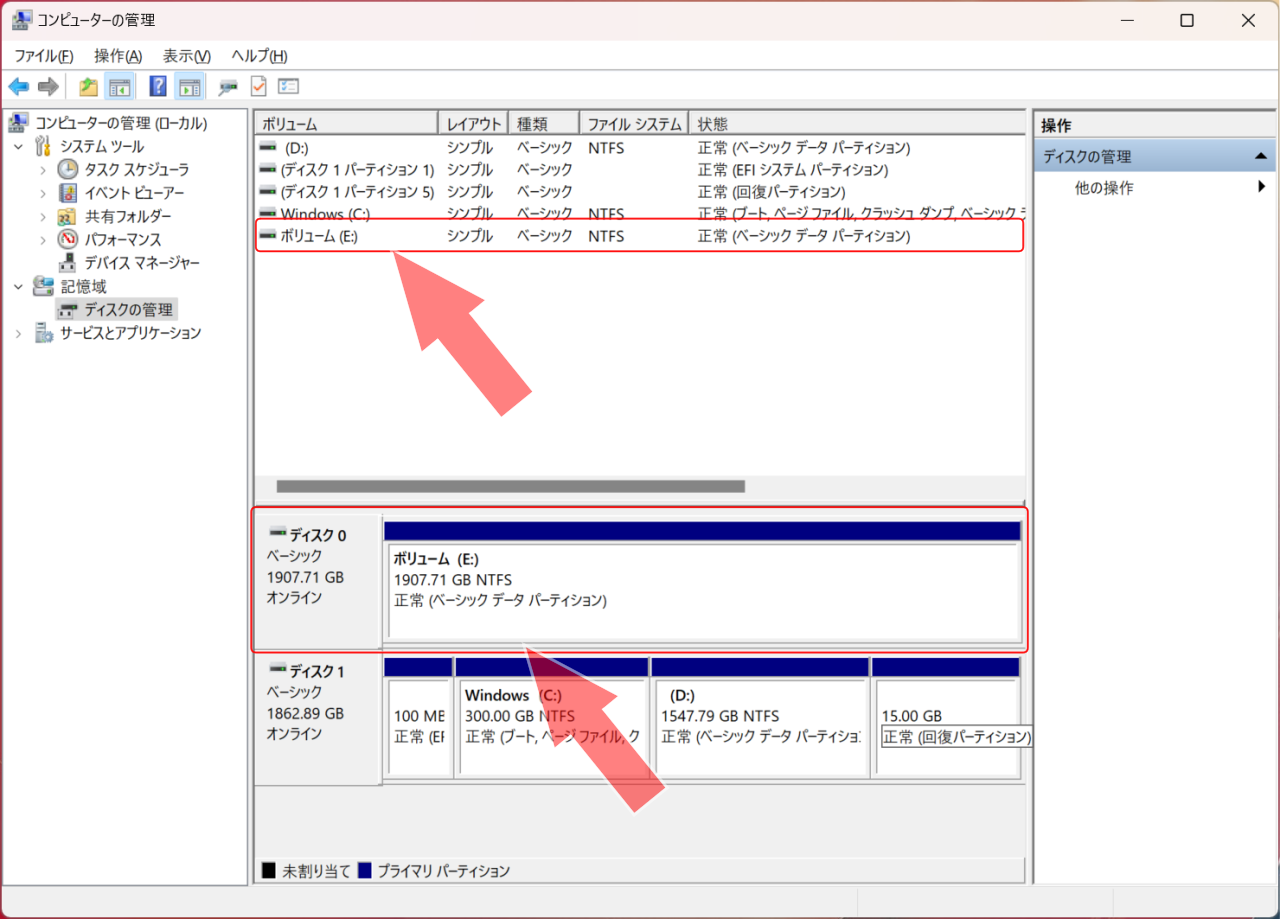 Partitions (volumes) are also displayed on the "Disk Management" screen like this.
If you want to create multiple partitions (volumes), the remaining capacity will be displayed as "Unallocated" on this screen, so right-click it and repeat the partition (volume) allocation.
Rename/format the drive
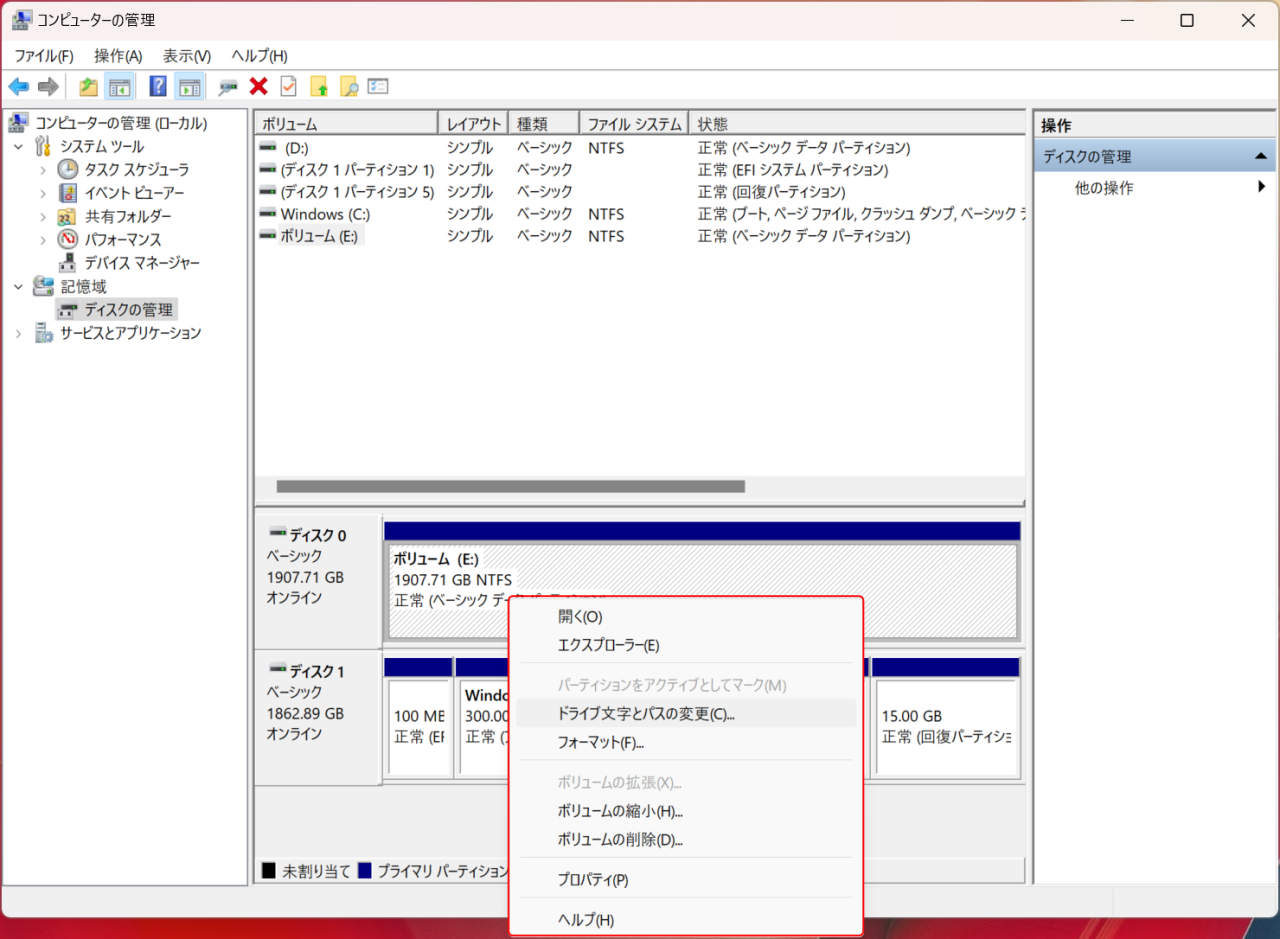 If you want to change the name of the drive assigned to a partition (volume) or format the partition (volume), right-click the target partition (volume) on this screen.
Then a menu like this will be displayed.
If you want to change the name of the drive assigned to a partition (volume) or format the partition (volume), right-click the target partition (volume) on this screen.
Then a menu like this will be displayed.
Selecting "Format", will initialize only that partition (volume).
Selecting "Delete Volume" will release the volume and make it "Unallocated". You can recreate partitions (volumes).
If you select "Change drive letter and paths"...
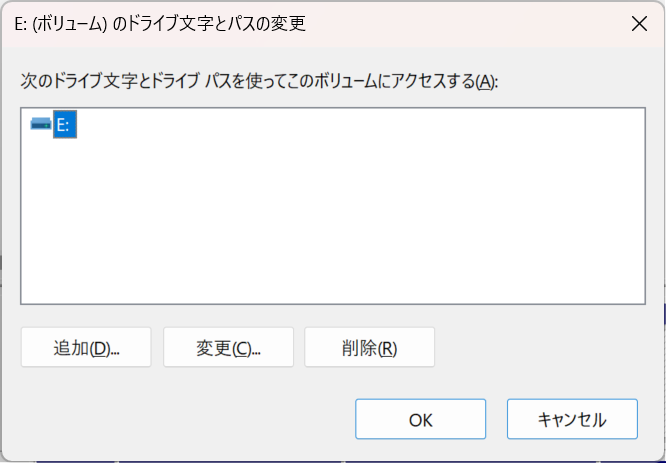 The screen will look like this.
Click Change.
The screen will look like this.
Click Change.
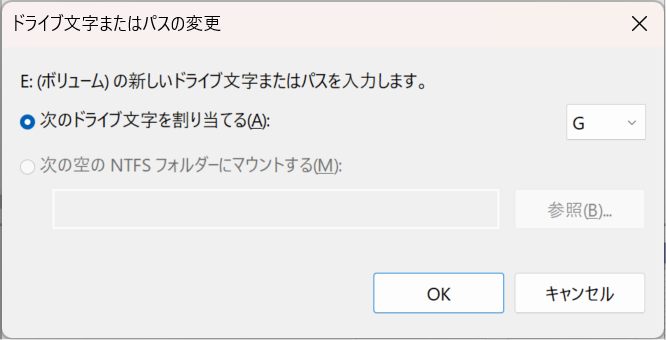 A dialog box like this will then appear.
Change the drive letter and click OK.
The changes are now complete.
A dialog box like this will then appear.
Change the drive letter and click OK.
The changes are now complete.